
Create an interaction HUD using the Unity UI module.
In this tutorial we’ll create an Interaction type HUD to display if an interaction is available.
Your project’s UI system should already be set to use the Unity UI module. If not, check the initial setup tutorial for the Unity UI module.
HUD Prefab Setup #
HUDs use prefabs to create their content when using the Unity UI module. All we need is a text that’s displayed in our HUD.
Use the scene hierarchy context menu to create a HUD and text content in one go: Makinom > HUD > Content > Text Content
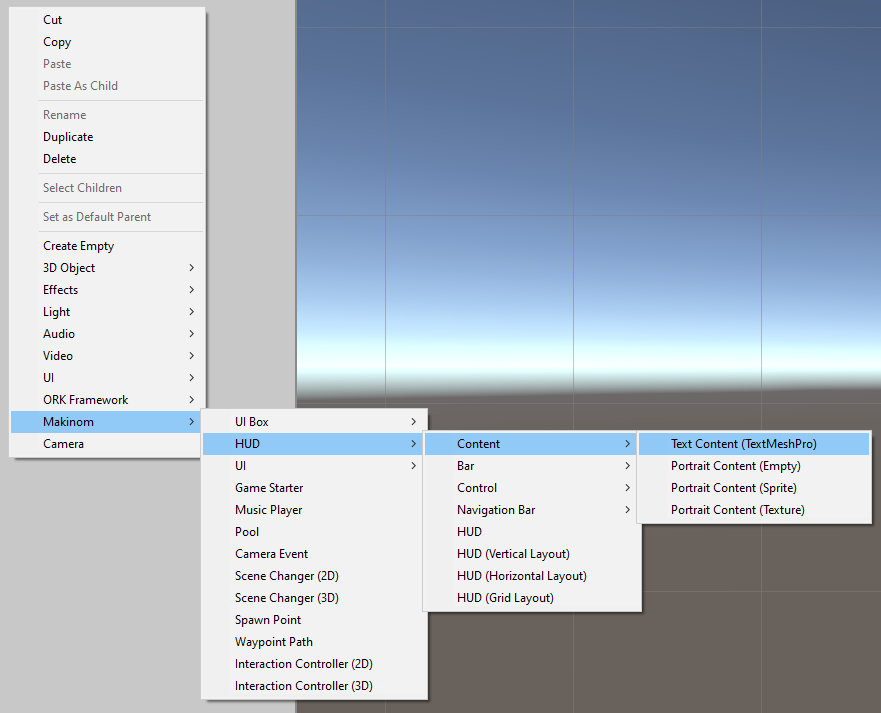
This’ll create a HUD (without layout groups) and add a text content to it – we’ve already the Text Content child object selected, so let’s start with this.

Text Content #
This child object manages the displayed text and it’s style.
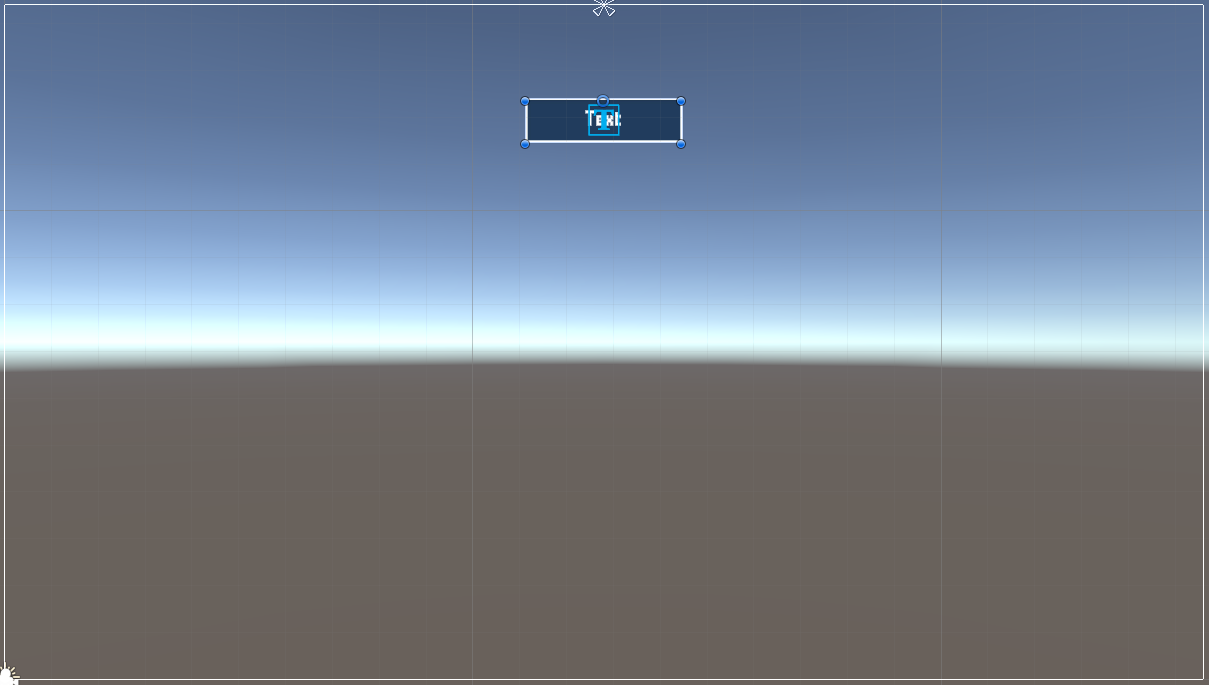
Rect Transform #
Select the stretch anchor presets, i.e. we’ll stretch the transform both horizontally and vertically with it’s parent, so we’ll automatically adjust to the parent’s size.
- Left, Top, Right, Bottom
Set to 5.
This’ll add a bit of padding to the parent’s bounds.
HUD Text Content #
This component defines the text that is displayed.
- Default Content
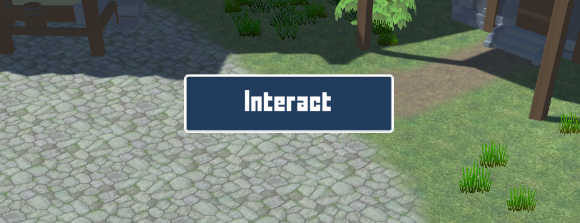
Set to Interact.
TextMeshPro – Text (UI) #
This component manages how the text is displayed.
Style it to your liking, e.g. change the font, font size or alignment. E.g. I’ll use the Middle Center alignment to place the text in the center of the HUD.
HUD #
Select the HUD game object, we’ll now style and place the HUD itself.
Image (Optional) #
To add a background image, add an Image component to the game object.
I’m using the Box Blue sprite from the UI assets (see the UI box tutorial).
Rect Transform #
Place the HUD on the canvas where you want it to show and use appropriate anchor presets. Adjust the size to your liking
E.g. I’m placing it at the center of the top of the screen, using a width of 250 and a height of 70.
Create Prefab #
Create a prefab out of the HUD game object, e.g. naming it Interaction HUD.
If you’ve done the setup in one of your game’s scenes, don’t forget to remove the canvas (with the HUD game object) again.
HUD Setup #
Now we’ll use the HUD prefab in a HUD.
Navigate to UI > HUDs and either change an unused Default HUD or add a new HUD.
HUD Settings #
- Name
Set to Interaction. - HUD Type
Select Interaction. - Auto Display
Enable this setting.
Unity UI #
- UI Layer
Select HUDs or any other UI layer you want the HUD to display on. - HUD Prefab
Select the Interaction HUD prefab you created.
Schematics #
You can optionally use schematics to animate opening and closing the HUD, e.g. fading it in/out. You can also set up default schematics for all HUDs.
See this tutorial for details.
Save Settings #
Don’t forget to save your changes by clicking on Save Settings at the bottom of the editor.
Testing #
Hit play and test your HUD! Naturally, you need an interaction and player with an interaction controller for this to work.
If you’re not satisfied with the look, open up the prefabs of the HUD adjust it to your liking.
Tip: Content Information #
You can add content information to your interaction HUD. E.g. use the <name> text code in the HUD Text Content component’s text.
Where does this content information come from? From the interaction’s game object. You can e.g. use scene objects to add content information, or the interaction can be a combatant or something else with content.


