ORK Framework Logo - RPG Editor for Unity
  • Features
  • Showcase
  • Guide
    • Documentation
    • Tutorials
    • API
  • ORK 2
    • Tutorials
    • Plugins
    • API
  • Support
  • Forum
  • Get ORK

2D RPG Quickstart

  • START 2D RPG Quickstart
  • 01 Initial Setup
  • 02 Player Setup
  • 03 Music & Scenes
  • 04 UI System Setup
  • 05 UI Boxes
  • 06 Flying Texts
  • 07 Status Values
  • 08 Status Effects
  • 09 First Abilities
  • 10 Fighter Setup
  • 11 First Enemies & Battle AI
  • 12 Battle System Setup
  • 13 Animating Battle Start and End
  • 14 Random Battles
  • 15 Animating Actions
  • 16 Player Battle HUD
  • 17 Elemental Attacks
  • 18 Animating More Actions
  • 19 Inventory & Loot
  • 20 Equipment
  • 21 Loot, Start Equipment & Viewers
  • 22 Magic Abilities
  • 23 Caster Setup
  • 24 More Enemies
  • 25 Start Menu & Save Games
  • 26 Menu Screens
  • 27 Interactions
  • 28 Item Collectors
  • END 2D RPG Quickstart

3D RPG Quickstart

  • START 3D RPG Quickstart
  • 01 Initial Setup
  • 02 Player Setup
  • 03 Music & Scenes
  • 04 UI System Setup
  • 05 UI Boxes
  • 06 Flying Texts
  • 07 Status Values
  • 08 Status Effects
  • 09 First Abilities
  • 10 Fighter Setup
  • 11 First Enemies & Battle AI
  • 12 Battle System Setup
  • 13 Animating Battle Start and End
  • 14 Random Battles
  • 15 Animating Actions
  • 16 Player Battle HUD
  • 17 Elemental Attacks
  • 18 Animating More Actions
  • 19 Inventory & Loot
  • 20 Equipment
  • 21 Loot, Start Equipment & Viewers
  • 22 Magic Abilities
  • 23 Caster Setup
  • 24 More Enemies
  • 25 Start Menu & Save Games
  • 26 Menu Screens
  • 27 Interactions
  • 28 Item Collectors
  • END 3D RPG Quickstart

Status System Setup

  • START Status System Setup
  • 01 Status Values
  • 02 Status Development
  • 03 Attack/Defence Modifiers
  • 04 Status Effects
  • 05 Formulas
  • 06 Ability & Item Types
  • 07 Abilities Part 1: Attacks
  • 08 Abilities Part 2: Support & Sabotage
  • 09 Abilities Part 3: Elemental Magic
  • 10 Items
  • 11 Equipment Part 1: Slots & Slot Set Templates
  • 12 Equipment Part 2: Weapons
  • 12.5 (Optional) Equipment Part 2.5: Weapons
  • 13 Equipment Part 3: Shields, Armor & Accessories
  • 13.5 (Optional) Equipment Part 3.5: Shields, Armor & Accessories
  • 14 Equipment Part 4: Available Equipment Templates
  • 15 Loot
  • 16 Battle AIs
  • 17 Combatants Part 1: General Settings
  • 18 Combatants Part 2: Players
  • 19 Combatants Part 3: Enemies
  • 20 Combatant Groups
  • END Status System Setup

3D RPG Playground

  • START 3D RPG Playground
  • 01 Player Setup
  • 02 Start Menu
  • 03 First Interaction
  • 04 Music
  • 05 Areas
  • 06 Collecting Items
  • 07 Displaying Equipment
  • 08 Combatant Prefabs, Icons & Portraits
  • 09 Combatant Animations
  • 10 Camera Positions
  • ANIM 01 Battle Start/End Schematics
  • ANIM 02 Use, Cast & Camera
  • ANIM 03 Abilities & Items
  • ANIM 04 Physical Attacks
  • ANIM 05 Special Actions
  • BATTLE 01 Battle Menu
  • BATTLE 02 Prepare for Battle
  • TURN 01 Turn Based Setup
  • TURN 02 Turn Order HUD
  • ATB 01 Active Time Setup
  • ATB 02 Cast Times
  • ATB 03 Timebar HUD
  • BATTLE 03 The First Battle
  • BATTLE 04 Hunting Move AI
  • BATTLE 05 Spawning Combatants
  • 11 Save Games
  • MENU 01 UI Boxes
  • MENU 02 Template HUDs
  • MENU 03 Overview Menu
  • MENU 04 Menu Screens
  • 12 Shop
  • BATTLE 06 Random Battles
  • DUNGEON 01 Enter the Dungeon
  • DUNGEON 02 The Trapdoor
  • DUNGEON 03 Enemies on Level 1 & 2
  • DUNGEON 04 Traps on Level 3
  • DUNGEON 05 Going Deeper
  • 13 Bestiary (+MENU+ANIM)
  • QUEST 01 Hunting Quests (+MENU)
  • QUEST 02 Guard NPC
  • QUEST 03 Forest Ruin Cheese
  • QUEST 04 Witch NPC with Cheese
  • QUEST 05 Quest Mark HUDs
  • 14 Research Trees (+MENU)
  • CRAFT 01 Crafting Materials
  • CRAFT 02 Crafting Recipes
  • CRAFT 03 Crafting Menu
  • CRAFT 04 Crafting Proficiency & Critical Crafting
  • CRAFT 05 Materials Loot
  • 15 Changing Choice Dialogue
  • 16 Follow Me!
  • BATTLE 07 Sequence Loot Dialogue

3D Action RPG

  • START 3D Action RPG
  • 01 Status System Setup
  • 02 Player Setup
  • 03 Player Weapon
  • 04 Player Attacks
  • 05 Enemy: Chomper
  • 06 Chomper Attack
  • 07 Hit & Death
  • 08 HUDs
  • 09 Rolling on the Floor
  • 10 Enemy: Spitter
  • 11 Spit Attack
  • 12 Potion
  • 13 Grenade
  • 14 Item HUD
  • 15 Enemy: Grenadier
  • 16 Grenadier Melee Attacks
  • 17 Grenadier Flamethrower
  • 18 Item Drops
  • END 3D Action RPG

2D Grid Battle RPG

  • START 2D Grid Battle RPG
  • 01 Player Setup
  • 02 Prefab & Music Setup
  • 03 Randomizing Combatants
  • 04 UI Setup
  • 05 Battle Start, End & Phase Schematics
  • 06 Battle System Setup
  • 07 Battle Grid Setup
  • 08 Grid Move
  • 09 Forest Battle Grid
  • 10 Battle AI
  • 11 Ability Ranges
  • 12 Death & Use Schematics
  • 13 Attack Schematic
  • 14 Shoot Schematics
  • 15 Battle Selection Interaction
  • END 2D Grid Battle RPG

Schematics

  • Simple Start Schematic
  • Battle Start Schematic
  • Battle End Schematic
  • Moving to Target and Back
  • Animating a Base Attack
  • Animating a Magic Ability
  • Grid Movement
  • Open and Close UI Animations
  • Flying Text Mover

UI Setups

  • Unity UI: Initial Setup
  • Unity UI: TextMesh Pro Setup
  • Unity UI: UI Box
  • Unity UI: Flying Text
  • Unity UI: Dragging Notification
  • Unity UI: Canvas with Screen Space Camera
  • Unity UI: Interaction HUD
  • Unity UI: Simple Player HUD
  • Unity UI: Quest HUD
  • Unity UI: Shortcuts HUD
  • Unity UI: Currency HUD
  • Unity UI: Tooltip HUD
  • Unity UI: Control HUD
  • Unity UI: Attack Modifiers
  • Unity UI: Defence Modifiers

Gameplay Bits

  • Combining Input Origins
  • Combining Status Value Flying Texts
  • Fun With Flying Text
  • HUD Effects With Conditional Schematics
  • Inventory Containers
  • Multi Interaction Controllers
  • World Space HUD
  • World Space Dialogue
  • Home
  • Guide
  • Tutorials
  • 3D RPG Quickstart
  • 24 More Enemies

24 More Enemies

Table of Contents
  • Rat
    • Content Information
    • Base Settings > Prefab Settings
    • Status Settings
      • Status Value Settings > Status Values
      • Status Value Settings > Experience Reward
      • Modifier Settings > Attack Modifier Start Values
    • Attacks & Abilities > Ability Development
    • Inventory & Equipment > Loot Settings
  • Spider
    • Content Information
    • Base Settings > Prefab Settings
    • Status Settings
      • Status Value Settings > Status Values
      • Status Value Settings > Experience Reward
      • Modifier Settings > Attack Modifier Start Values
    • Attacks & Abilities > Ability Development
      • Learn Ability 0
      • Learn Ability 1
    • Inventory & Equipment > Loot Settings
    • Battle Settings > Battle AI
    • Animation & Movement > Animations
  • Skeleton
    • Content Information
    • Base Settings > Prefab Settings
    • Status Settings
      • Status Value Settings > Status Values
      • Status Value Settings > Experience Reward
      • Modifier Settings > Attack Modifier Start Values
    • Attacks & Abilities > Ability Development
      • Learn Ability 0
      • Learn Ability 1
    • Inventory & Equipment > Loot Settings
  • Slime
    • Content Information
    • Base Settings > Prefab Settings
    • Status Settings
      • Status Value Settings > Status Values
      • Status Value Settings > Experience Reward
      • Modifier Settings > Attack Modifier Start Values
    • Attacks & Abilities > Ability Development
      • Learn Ability 0
      • Learn Ability 1
      • Learn Ability 2
    • Inventory & Equipment > Loot Settings
    • Battle Settings > Battle AI
  • Combatant Groups
    • Dungeon x3
      • Combatants
    • Dungeon x4
      • Combatants
    • Dungeon x2
      • Combatants
  • Save Changes
  • Battle Scene Variable
    • Variable Changer
      • Variable Change Settings
      • Start Settings
  • Adding Random Battles
    • Transform
    • Random Battle Area
      • Random Battle Settings
      • Combatant Settings
    • Box Collider
  • Testing

In this tutorial we’ll add new enemies and random battles for the dungeon.

We’ll set up:

  • 4 enemies (rat, spider, skeleton and slime)
  • combatant groups
  • random battles in the dungeon

Let’s get to it!

Rat #

The rat is a level 5 enemy and uses the Stun Attack as an ability. It’ll also have a small weakness against all elements.

Navigate to Combatants > Combatants and add a new combatant.

Content Information #

  • Name
    Set to: Rat

Base Settings > Prefab Settings #

  • Prefab
    Select the Rat prefab.
    You can find it in Assets/Tutorial Assets/Prefabs/Combatants/Enemies/.

Status Settings #

  • Start Level
    Set to 5.

Status Value Settings > Status Values #

Click on Set Default to add all Normal type status values with a default start value.

I’ll just list the status values and their start value here – i.e. you need to change the Start Value setting for each of the Initial Status Value settings.

  • Max HP
    Set to 75.
  • Max MP
    Set to 10.
  • ATK
    Set to 25.
  • DEF
    Set to 10.
  • MATK
    Set to 1.
  • MDEF
    Set to 1.

Status Value Settings > Experience Reward #

Click on Add Experience Reward.

  • Status Value
    Select EXP.
  • Reward Value
    Select Value > Value.
    Set the value to 8.

Modifier Settings > Attack Modifier Start Values #

Click on Set All to add all attack modifier attributes with their default start values.

I’ll just list the attributes and their start value here – i.e. you need to change the Start Value setting for each of the Attack Modifier Start Value settings.

  • Fire
    Set to 125.
  • Water
    Set to 125.
  • Earth
    Set to 125.
  • Wind
    Set to 125.

Attacks & Abilities > Ability Development #

Click on Add Ability.

  • Ability
    Select Stun Attack.

Inventory & Equipment > Loot Settings #

We’ll add the Random Weapon loot in addition to the default loot defined in the general settings.

  • Loot Origin
    Select Loot.

Click on Add Loot.

  • Loot
    Select Random Weapon.

Spider #

The spider will use the Boost and Protect abilities.

Copy the Rat combatant and change the following settings.

Content Information #

  • Name
    Set to: Spider

Base Settings > Prefab Settings #

  • Prefab
    Select the Spider prefab.

Status Settings #

  • Start Level
    Set to 6.

Status Value Settings > Status Values #

I’ll just list the status values and their start value here – i.e. you need to change the Start Value setting for each of the Initial Status Value settings.

  • Max HP
    Set to 65.
  • Max MP
    Set to 30.
  • ATK
    Set to 18.
  • DEF
    Set to 15.
  • MATK
    Set to 1.
  • MDEF
    Set to 12.

Status Value Settings > Experience Reward #

  • Reward Value
    Select Value > Value.
    Set the value to 7.

Modifier Settings > Attack Modifier Start Values #

I’ll just list the attributes and their start value here – i.e. you need to change the Start Value setting for each of the Attack Modifier Start Value settings.

  • Fire
    Set to 75.
  • Water
    Set to 150.
  • Earth
    Set to 0.
  • Wind
    Set to 125.

Attacks & Abilities > Ability Development #

The spider will use Boost and Protect.

Learn Ability 0 #

  • Ability
    Select Boost.

Learn Ability 1 #

Click on Add Ability.

  • Ability
    Select Protect.

Inventory & Equipment > Loot Settings #

Instead of a random weapon, we’ll give a Random Armor.

  • Loot
    Select Random Armor.

Battle Settings > Battle AI #

We’ll replace the default battle AI (25% chance to use an ability) with a 50% ability setup.

  • Replace Default
    Enable this setting.

Click on Add Battle AI.

  • Battle AI
    Select Random Ability 50%.

Animation & Movement > Animations #

The spider (and the rest of the new combatants) uses simple movement animations.

Click on Add Animations.

  • Animations
    Select Simple Movement.

Skeleton #

The skeleton will use elemental attacks (fire and water).

Copy the Spider combatant and change the following settings.

Content Information #

  • Name
    Set to: Skeleton

Base Settings > Prefab Settings #

  • Prefab
    Select the Skeleton prefab.

Status Settings #

  • Start Level
    Set to 8.

Status Value Settings > Status Values #

I’ll just list the status values and their start value here – i.e. you need to change the Start Value setting for each of the Initial Status Value settings.

  • Max HP
    Set to 95.
  • Max MP
    Set to 10.
  • ATK
    Set to 28.
  • DEF
    Set to 30.
  • MATK
    Set to 1.
  • MDEF
    Set to 15.

Status Value Settings > Experience Reward #

  • Reward Value
    Select Value > Value.
    Set the value to 12.

Modifier Settings > Attack Modifier Start Values #

I’ll just list the attributes and their start value here – i.e. you need to change the Start Value setting for each of the Attack Modifier Start Value settings.

  • Fire
    Set to 150.
  • Water
    Set to 75.
  • Earth
    Set to -25.
    I.e. earth attacks will heal the combatant.
  • Wind
    Set to 150.

Attacks & Abilities > Ability Development #

The skeleton will use Water Attack and Earth Attack.

Learn Ability 0 #

  • Ability
    Select Water Attack.

Learn Ability 1 #

  • Ability
    Select Earth Attack.

Inventory & Equipment > Loot Settings #

We’ll give a Random Weapon.

  • Loot
    Select Random Weapon.

Slime #

The slime will use elemental magic.

Copy the Skeleton combatant and change the following settings.

Content Information #

  • Name
    Set to: Slime

Base Settings > Prefab Settings #

  • Prefab
    Select the Slime prefab.

Status Settings #

  • Start Level
    Set to 10.

Status Value Settings > Status Values #

I’ll just list the status values and their start value here – i.e. you need to change the Start Value setting for each of the Initial Status Value settings.

  • Max HP
    Set to 80.
  • Max MP
    Set to 100.
  • ATK
    Set to 5.
  • DEF
    Set to 6.
  • MATK
    Set to 20.
  • MDEF
    Set to 25.

Status Value Settings > Experience Reward #

  • Reward Value
    Select Value > Value.
    Set the value to 15.

Modifier Settings > Attack Modifier Start Values #

The slime is weak to fire but strong against the rest.

I’ll just list the attributes and their start value here – i.e. you need to change the Start Value setting for each of the Attack Modifier Start Value settings.

  • Fire
    Set to 200.
  • Water
    Set to 50.
  • Earth
    Set to 50.
  • Wind
    Set to 50.

Attacks & Abilities > Ability Development #

The slime uses Water, Earth and Wind magic.

Learn Ability 0 #

  • Ability
    Select Water.

Learn Ability 1 #

  • Ability
    Select Earth.

Learn Ability 2 #

Click on Add Ability.

  • Ability
    Select Wind.

Inventory & Equipment > Loot Settings #

We’ll give a Random Accessory.

  • Loot
    Select Random Accessory.

Battle Settings > Battle AI #

We increase the ability use to 75%.

  • Battle AI
    Select Random Ability 75%.

Combatant Groups #

We’ll add a few more combatant groups – wasps/snakes with rats and 2 spider/skeletons.

Navigate to Combatants > Combatant Groups and copy the Forest x2 group.

Dungeon x3 #

We already have the group set up with 2 (random) wasps/snakes, so all we need to do is add another combatant.

  • Name
    Set to: Dungeon x3

Combatants #

Click on Add Combatant and change the newly added Combatant 2.

  • Combatant
    Select Rat.

Dungeon x4 #

Copy the Dungeon x3 group, we’ll add another rat.

  • Name
    Set to: Dungeon x4

Combatants #

Copy the Combatant 2 settings.

The newly added Combatant 3 will already have the Rat selected.

Dungeon x2 #

Add a new combatant group.

  • Name
    Set to: Dungeon x2

Combatants #

We’ll change the already added first combatant (Combatant o).

  • Combatant
    Select Spider.

Click on Add Combatant to add another combatant

  • Combatant
    Select Skeleton.

Save Changes #

And that’s it for the editor!

Save the changes using the Save Settings button at the bottom of the editor.

Battle Scene Variable #

Open the Dungeon scene (Asset/Scenes/), we’ll add random battles with our new combatants and groups. First, we’ll set the battle scene that’ll be loaded.

Create a new empty game object using the scene hierarchy’s context menu: Create Empty

Change the newly created game object’s name to Set Battle Scene.

Variable Changer #

Add a Variable Changer component to the game object using the component menu.

Variable Change Settings #

We’ll set the battleScene string variable to the scene name we want our battles to take place in.

Click on Add Variable.

  • Change Type
    Select Variable.
  • Variable Key
    Set to: battleScene
  • String Type
    Select Value > Value.
  • Variable Origin
    Select Global.
  • Type
    Select String.
  • Operator
    Select Set.
  • String Value
    Set to: Dungeon Battle Arena

Start Settings #

Click on Autostart to automatically set the variable when entering the scene.

That’s it for the variable changer – now, each time we enter this scene, the battle scene used by the battle start schematic will automatically be set to the Dungeon Battle Arena scene.

Adding Random Battles #

Next, we’ll set up the Random Battle Area.

Use the scene hierarchy’s context menu: ORK Framework > Battle > Random Battle Area (3D)
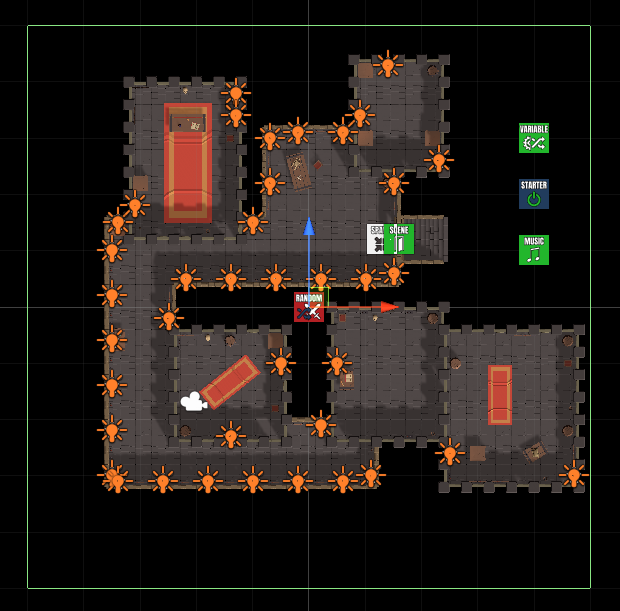
Transform #

We’ll position it at the center of the dungeon.

  • Position
    Set to X=0, Y=5, Z=0.

Random Battle Area #

We’ll add a bunch of individual combatants and groups – the total of their chances should be 100 %.

Random Battle Settings #

We’ll use a higher chance than in the World scene.

  • Battle Chance
    Set to 20.
  • Check Interval
    Set to 0.5.
  • Minimum Move Distance
    Set to 0.1.
  • Minimum Distance
    Set to 5.
  • Maximum Distance
    Set to 15.

Combatant Settings #

We’ll begin with editing the already added Combatant 0.

  • Chance
    Set to 30.
  • Faction
    Select Enemies.
  • Use Group
    Disable this setting.
  • Combatant
    Select Rat.

Copy the Combatant 0 setup and change the following settings.

  • Chance
    Set to 20.
  • Combatant
    Select Spider.

Copy the Combatant 1 setup and change the following settings.

  • Chance
    Set to 15.
  • Combatant
    Select Skeleton.

Copy the Combatant 2 setup and change the following settings.

  • Chance
    Set to 10.
  • Combatant
    Select Slime.

Copy the Combatant 3 setup and change the following settings.

  • Use Group
    Enable this setting.
  • Combatant Group
    Select Dungeon x3.

Copy the Combatant 4 setup and change the following settings.

  • Chance
    Set to 5.
  • Combatant Group
    Select Dungeon x4.

Copy the Combatant 4 setup and change the following settings.

  • Chance
    Set to 10.
  • Combatant Group
    Select Dungeon x2.

That sums up to 100 percent.

Box Collider #

And finally, we’ll adjust the size of the box collider to wrap around the whole scene, basically the same as the camera border.

  • Size
    Set to X=100, Y=20, Y=100.

That’s it for the random battle setup.

Save the changes you’ve made in the scene.

Testing #

Hit play in the Dungeon scene and start a battle.

And it’s working – the enemies are tough for our poor level 1 players, though.

This finishes the battle-related setup of this tutorial series.


Next, we’ll start setting up menus.

Share This Article :
  • Facebook
  • Twitter
  • LinkedIn
  • Pinterest
Updated on March 9, 2023
Table of Contents
  • Rat
    • Content Information
    • Base Settings > Prefab Settings
    • Status Settings
      • Status Value Settings > Status Values
      • Status Value Settings > Experience Reward
      • Modifier Settings > Attack Modifier Start Values
    • Attacks & Abilities > Ability Development
    • Inventory & Equipment > Loot Settings
  • Spider
    • Content Information
    • Base Settings > Prefab Settings
    • Status Settings
      • Status Value Settings > Status Values
      • Status Value Settings > Experience Reward
      • Modifier Settings > Attack Modifier Start Values
    • Attacks & Abilities > Ability Development
      • Learn Ability 0
      • Learn Ability 1
    • Inventory & Equipment > Loot Settings
    • Battle Settings > Battle AI
    • Animation & Movement > Animations
  • Skeleton
    • Content Information
    • Base Settings > Prefab Settings
    • Status Settings
      • Status Value Settings > Status Values
      • Status Value Settings > Experience Reward
      • Modifier Settings > Attack Modifier Start Values
    • Attacks & Abilities > Ability Development
      • Learn Ability 0
      • Learn Ability 1
    • Inventory & Equipment > Loot Settings
  • Slime
    • Content Information
    • Base Settings > Prefab Settings
    • Status Settings
      • Status Value Settings > Status Values
      • Status Value Settings > Experience Reward
      • Modifier Settings > Attack Modifier Start Values
    • Attacks & Abilities > Ability Development
      • Learn Ability 0
      • Learn Ability 1
      • Learn Ability 2
    • Inventory & Equipment > Loot Settings
    • Battle Settings > Battle AI
  • Combatant Groups
    • Dungeon x3
      • Combatants
    • Dungeon x4
      • Combatants
    • Dungeon x2
      • Combatants
  • Save Changes
  • Battle Scene Variable
    • Variable Changer
      • Variable Change Settings
      • Start Settings
  • Adding Random Battles
    • Transform
    • Random Battle Area
      • Random Battle Settings
      • Combatant Settings
    • Box Collider
  • Testing
Sitemap
  • Features
  • Showcase
  • Guide
    • Documentation
    • Tutorials
    • API
  • ORK 2 Hub
    • Tutorials
    • Plugins
    • API
  • Support
  • Forum
  • Get ORK
  • Contact
  • Blog
  • Makinom
  • gamingislove.com
Categories
  • News (60)
  • ORK 2 (137)
    • Tutorial (137)
      • Game tutorial (50)
      • Gameplay (32)
      • How-to (55)
  • Release (130)
Search

© 2015 Gaming is Love e.U.

Disclosure: This site may contain affiliate links, which means I may receive a commission if you click a link and purchase something that I have recommended. While clicking these links won’t cost you any money, they will help me fund my development projects while recommending great assets!