
Create a 3D action RPG’s real time battle system in this ORK 3 tutorial series.
About this Tutorial Series #
This short tutorial series will focus on setting up a Real Time battle system for an action RPG.
It’ll only cover setting up specific features and mechanics for this and doesn’t touch anything else:
- setting up a basic status system, only using status values
- setting up the player combatant with base attacks (cycling through 4 attacks), a roll ability, throwable grenades and a health potion
- stamina system for the player (sprint, attacks and roll costing stamina, stamina recovering over time)
- setting up 3 enemy combatants with attack abilities, battle AI and move AI
- damage is handled using Damage Dealers and Damage Zones
- spawning enemies in the scene
- HUDs
There’ll be no start menu or other menus, leveling system, interactions or other game mechanics. The game starts right in a large scene with spawned enemies to fight.
If you want to learn more about setting up a detailed status system, check out the status system setup tutorial series. If you want to learn more about all kinds of features related to setting up a complete game, check out the 3D RPG Playground tutorial series.
This tutorial series is completed.
Download the Tutorial Assets #
The assets provided for this tutorial series are not for commercial use.
You can download the tutorial assets here (you only need this pack):
Please note!
This package requires using at least Unity 2020.3.
It’s recommended to use LTS (long term support) versions.
Used Assets #
You don’t need to download them separately, all you need is included in the tutorial assets pack download above.
The tutorial uses assets from free Unity Technology asset packs available in the Unity Asset Store.
- 3D Game Kit – Character Pack
- 3D Game Kit – Props Pack
- 3D Game Kit – Environment Pack
- Unity Particle Pack
Additionally, the tutorial uses SoftMaskForUGUI, a free soft mask implementation for the Unity UI, available under the MIT license.
First Steps #
Before getting started with the actual 3D Action RPG tutorials, we’ll have to do some basic setup in the Unity project.
1. Create a new Unity project #
Use the Unity Hub to create a new Unity project, e.g. using Unity 6 (use at least Unity 2020.3 or newer).
Use the 3D (Built-In Render Pipeline) template to create the project. The tutorial assets are set up for the built-in render pipeline – make sure you use that and not URP or HDRP.
2. Unity Project Settings #
First, after creating the new Unity project, we’ll change some settings of the project.
Open the project settings via the Unity menu: Edit > Project Settings…
Input Handling #
ORK relies on the Input Manager input system for certain functionality, so we’ll have to make sure the project is using it.
Go to the Player settings of the project settings and extend the Other Settings foldout.
- Active Input Handling
Select Both or Input Manager (Old).
Layers #
We’ll set up a new layer that’ll be used by the tutorial assets.
Go to the Tags and Layers settings of the project settings and extend the Layers foldout.
If your project already had layer 10 set up, you probably started with a project that has something else set up, e.g. by using a different project template. That shouldn’t have an impact on the tutorials in most cases.
Change the following layer.
- User Layer 10
Set to Combatants.
As the name suggests, this is the layer the prefabs of our combatants, but also their equipment, will be placed on. The tutorial assets are already set up that way.
Why? It’s generally a good idea to have things on different layers, e.g. for this tutorial, the ground (and other scene assets) are on the Default layer and the combatants on layer 10 (Combatants). This makes it easy to use raycasting for positions on the ground without being blocked by combatants.
3. Import ORK Framework #
Import ORK Framework (including Makinom) into your Unity project.
Use either ORK’s free test version or your paid version from the Unity Asset Store (via the Unity Package Manager).
4. Import Tutorial Assets Pack #
Import the tutorial assets pack you downloaded above.
5. Adding Scenes to Build Settings #
For being able to load scenes in a running game, they have to be added to Unity’s build settings. After importing the tutorial assets, we’ll add the scene that is included in the package.
We don’t actually load a scene for this tutorial, but it’s always good to do this (and remember to do this for any new scenes you add).
Open the build settings using the Unity menu: File > Build Settings…
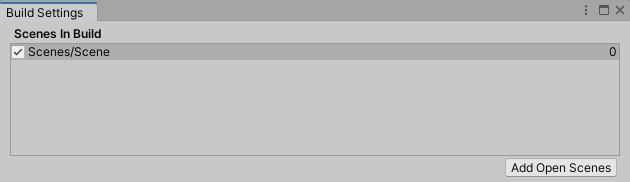
Add the following scene to the Scenes In Build:
- Assets/Scenes/Scene
You can delete the SampleScene that is included in each new Unity project. It’s located in Assets/Scenes/.
6. Initial ORK Project Setup #
Open the Makinom editor for the first time: Window > Gaming Is Love > Makinom
Or the keyboard shortcut: CTRL + Alt + M
Click on the Save Settings button on the bottom right of the editor window to save the intial project setup. This will save your initial project setup.
Close the editor.
7. Initial Unity UI Setup #
Follow the initial setup tutorial for the Unity UI module, this includes:
- changing your project’s UI System Type to the Unity UI module
- setting up TextMesh Pro
- setting up the UI Environment scene (for prefab editing)
- creating a first UI box prefab
- creating default input prefabs
- creating a flying text prefab and setting it up in UI > UI Settings
You can also download the UI asset package provided in the initial setup tutorial and use them in your project setup instead of setting up the prefabs. You still need to set up TextMesh Pro and the UI Environment scene.
Ready! #
You should now have a set up Unity project with ORK/Makinom, the tutorial assets and Unity UI module setup (including TextMesh Pro and flying texts).
And with that, it’s time to start with the setup – we’ll start with setting up a simple status system.
Download the Completed Project #
If you only want to test out the project or compare it with your own setup, you can download the completed tutorial project (up to the last tutorial: 18 Item Drops):
Unity 6 #
This is a Unity 6 project, extract the content of the zip-file and open the project in Unity. The completed project comes with ORK 3’s free test version (you can import the full version from the Asset Store after purchase).
Download Completed Tutorial Project for Unity 6
Unity 2020.3 #
This is a Unity 2020.3 project, extract the content of the zip-file and open the project in Unity. The completed project comes with ORK 3’s free test version (you can import the full version from the Asset Store after purchase).
Download Completed Tutorial Project for Unity 2020.3
Please note that the Unity 2020.3 version of the project will remain on ORK Framework 3.22.0 and will no longer be updated.
Missing Script References #
If you run into missing script reference warnings or don’t see any UI when playing, reimport the following folders (in that order):
- Assets/Gaming Is Love/Makinom 2/
- Assets/Tutorial Assets/_Created/
That should solve missing script references on the UI prefabs.
Detailed Setup Guide #
Here’s a detailed guide to setting up the completed project in Unity and reimporting the folders to avoid missing UI scripts:
- Download the completed Unity project (zip-file)
- Unzip the file
- Add the project to your Unity HUB
- Open the project with at least Unity 2020.3
- (Optional, only needed with missing script references)
Right-click on the folder Assets/Gaming Is Love/Makinom 2/ in the project view tab and select Reimport - (Optional, only needed with missing script references)
Right-click on the folder Assets/Tutorial Assets/_Created/ in the project view tab and select Reimport - Open the Scene scene (Assets/Scenes/)
- Hit play
The completed project comes with ORK 3’s free test version – just import your full version into the project in case you want to use it.
Controls #
The finished project uses the following controls:
- WASD
Player movement - Left Shift
Hold to sprint - Right Mouse Button
Hold+drag to change camera - Left Mouse Button
Attack - Space
Roll - E
Throw grenade - Q
Use potion


