ORK Framework Logo - RPG Editor for Unity
  • Features
  • Showcase
  • Guide
    • Documentation
    • Tutorials
    • API
  • ORK 2
    • Tutorials
    • Plugins
    • API
  • Support
  • Forum
  • Get ORK

Status System Setup

  • START Status System Setup
  • 01 Status Values
  • 02 Status Development
  • 03 Attack/Defence Modifiers
  • 04 Status Effects
  • 05 Formulas
  • 06 Ability & Item Types
  • 07 Abilities Part 1: Attacks
  • 08 Abilities Part 2: Support & Sabotage
  • 09 Abilities Part 3: Elemental Magic
  • 10 Items
  • 11 Equipment Part 1: Slots & Slot Set Templates
  • 12 Equipment Part 2: Weapons
  • 12.5 (Optional) Equipment Part 2.5: Weapons
  • 13 Equipment Part 3: Shields, Armor & Accessories
  • 13.5 (Optional) Equipment Part 3.5: Shields, Armor & Accessories
  • 14 Equipment Part 4: Available Equipment Templates
  • 15 Loot
  • 16 Battle AIs
  • 17 Combatants Part 1: General Settings
  • 18 Combatants Part 2: Players
  • 19 Combatants Part 3: Enemies
  • 20 Combatant Groups
  • END Status System Setup

3D RPG Playground

  • START 3D RPG Playground
  • 01 Player Setup
  • 02 Start Menu
  • 03 First Interaction
  • 04 Music
  • 05 Areas
  • 06 Collecting Items
  • 07 Displaying Equipment
  • 08 Combatant Prefabs, Icons & Portraits
  • 09 Combatant Animations
  • 10 Camera Positions
  • ANIM 01 Battle Start/End Schematics
  • ANIM 02 Use, Cast & Camera
  • ANIM 03 Abilities & Items
  • ANIM 04 Physical Attacks
  • ANIM 05 Special Actions
  • BATTLE 01 Battle Menu
  • BATTLE 02 Prepare for Battle
  • TURN 01 Turn Based Setup
  • TURN 02 Turn Order HUD
  • ATB 01 Active Time Setup
  • ATB 02 Cast Times
  • ATB 03 Timebar HUD
  • BATTLE 03 The First Battle
  • BATTLE 04 Hunting Move AI
  • BATTLE 05 Spawning Combatants
  • 11 Save Games
  • MENU 01 UI Boxes
  • MENU 02 Template HUDs
  • MENU 03 Overview Menu
  • MENU 04 Menu Screens
  • 12 Shop
  • BATTLE 06 Random Battles
  • DUNGEON 01 Enter the Dungeon
  • DUNGEON 02 The Trapdoor
  • DUNGEON 03 Enemies on Level 1 & 2
  • DUNGEON 04 Traps on Level 3
  • DUNGEON 05 Going Deeper
  • 13 Bestiary (+MENU+ANIM)
  • QUEST 01 Hunting Quests (+MENU)
  • QUEST 02 Guard NPC
  • QUEST 03 Forest Ruin Cheese
  • QUEST 04 Witch NPC with Cheese
  • QUEST 05 Quest Mark HUDs
  • 14 Research Trees (+MENU)
  • CRAFT 01 Crafting Materials
  • CRAFT 02 Crafting Recipes
  • CRAFT 03 Crafting Menu
  • CRAFT 04 Crafting Proficiency & Critical Crafting
  • CRAFT 05 Materials Loot
  • 15 Changing Choice Dialogue
  • 16 Follow Me!
  • BATTLE 07 Sequence Loot Dialogue

3D Action RPG

  • START 3D Action RPG
  • 01 Status System Setup
  • 02 Player Setup
  • 03 Player Weapon
  • 04 Player Attacks
  • 05 Enemy: Chomper
  • 06 Chomper Attack
  • 07 Hit & Death
  • 08 HUDs
  • 09 Rolling on the Floor
  • 10 Enemy: Spitter
  • 11 Spit Attack
  • 12 Potion
  • 13 Grenade
  • 14 Item HUD
  • 15 Enemy: Grenadier
  • 16 Grenadier Melee Attacks
  • 17 Grenadier Flamethrower
  • 18 Item Drops
  • END 3D Action RPG

2D Grid Battle RPG

  • START 2D Grid Battle RPG
  • 01 Player Setup
  • 02 Prefab & Music Setup
  • 03 Randomizing Combatants
  • 04 UI Setup
  • 05 Battle Start, End & Phase Schematics
  • 06 Battle System Setup
  • 07 Battle Grid Setup
  • 08 Grid Move
  • 09 Forest Battle Grid
  • 10 Battle AI
  • 11 Ability Ranges
  • 12 Death & Use Schematics
  • 13 Attack Schematic
  • 14 Shoot Schematics
  • 15 Battle Selection Interaction
  • END 2D Grid Battle RPG

Schematics

  • Simple Start Schematic
  • Battle Start Schematic
  • Battle End Schematic
  • Moving to Target and Back
  • Animating a Base Attack
  • Animating a Magic Ability
  • Grid Movement
  • Open and Close UI Animations
  • Flying Text Mover

UI Setups

  • Unity UI: Initial Setup
  • Unity UI: TextMesh Pro Setup
  • Unity UI: UI Box
  • Unity UI: Flying Text
  • Unity UI: Dragging Notification
  • Unity UI: Interaction HUD
  • Unity UI: Simple Player HUD
  • Unity UI: Quest HUD
  • Unity UI: Shortcuts HUD
  • Unity UI: Currency HUD
  • Unity UI: Tooltip HUD
  • Unity UI: Control HUD
  • Unity UI: Attack Modifiers
  • Unity UI: Defence Modifiers

Gameplay Bits

  • Combining Input Origins
  • Combining Status Value Flying Texts
  • Fun With Flying Text
  • HUD Effects With Conditional Schematics
  • Inventory Containers
  • Multi Interaction Controllers
  • World Space HUD
  • World Space Dialogue
  • Home
  • Guide
  • Tutorials
  • UI Setups
  • Unity UI: Flying Text

Unity UI: Flying Text

Table of Contents
  • Flying Text Prefab Setup
    • Styling
    • Content Size Fitters
    • Create Prefab
  • Default Setup
    • Flying Text Settings
      • Default Flying Text Positions
  • Animating Flying Texts
  • Tip: When Using Multiple Cameras

Create a simple flying text.

Flying texts are used to display things like damage numbers or other status changes on screen, at the position of the combatant they affect.

In this tutorial we’ll create a prefab that’ll be used to create flying texts in the UI.

Your project’s UI system should already be set to use the Unity UI module. If not, check the initial setup tutorial for the Unity UI module.

You can download finished prefab here:

Download Prefab

This contains a flying text prefab as set up below and the used font.

Flying Text Prefab Setup #

Creating our flying text prefab is pretty straight forward. We create a ready to use setup using the scene hierarchy’s context menu: Makinum > UI > Flying Text (Sprite + TextMeshPro)

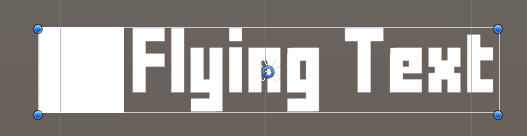
This creates a simple flying text game object with an icon and text, horizontally arranged.

Styling #

The icon (sprite) is displayed by the Flying Text > Image child object – depending on your icons, font and font size you might want to adjust it’s size.

Displaying the text is handled by the TextMeshPro – Text (UI) component on the Flying Text > Text child object. This is where you can change the font, font size, font color, etc.

Don’t worry too much about the font color, though – this is usually changed by the individual flying texts that’ll use the prefab.

I’d recommend to change the font and disable wrapping.

  • Wrapping
    Disable this setting.

When using the tutorial assets provided by other tutorials (FFF Forward font, icons), I’d recommend a 50×50 sprite size and a font size of 30. See the TextMesh Pro setup tutorial for details on the font/sprite setup.

However, the position seems to be a bit off – let’s fix that.

Content Size Fitters #

We’ll use Content Size Fitter components to adjust the horizontal size of the flying text to the displayed content (icon and text).

Select the Flying Text > Text child object and add a Content Size Fitter component to it.

  • Horizontal Fit
    Select Preferred Size.

Select the Flying Text game object and add a Content Size Fitter component to it.

  • Horizontal Fit
    Select Preferred Size.

Now this looks better.

Create Prefab #

That’s already everything we need to do. Create a prefab out of the flying text, e.g. save it as Flying Text.

You can now remove the canvas (and flying text) from the scene.

Default Setup #

Next, we’ll use our prefab as the default flying text. Open the Makinom editor and navigate to UI > UI Settings.

Change the following settings.

Flying Text Settings #

  • UI Prefab
    Select the prefab you created.

Default Flying Text Positions #

Since we’re already here, let’s randomize the flying text’s position a bit.

Flying texts are displayed at the position of game objects on screen, you can add a random offset and use child objects for placement (if available). We’ll use both.

  • Use Child
    Set to Center.
    In case the game object has a child object named Center, the flying text will be placed using it.
    Otherwise, it’ll use the game object’s own position.

You can add multiple positions for flying texts, e.g. using them in order and automatically resetting the order after a time. This can be useful when multiple flying texts are displayed at the same time to bring order into the chaos.

We’ll just use a randomized position, though. Change the Position 0 settings.

  • Random Offset From
    Set to X=-0.5, Y=-0.5, Z=-0.5.
  • Random Offset To
    Set to X=0.5, Y=0.5, Z=0.5.

That’s it – don’t forget to save the changes you did in the Makinom editor via the Save Settings button at the bottom.

Animating Flying Texts #

You want to animate the flying text, e.g. fade in/out and move it upwards?

This can be done by using a schematic – see this schematic tutorial for an example.

You can do even more by using prefabs to place flying texts, learn more in this gameplay bits tutorial.

Tip: When Using Multiple Cameras #

Flying texts are displayed on-screen based on where the camera sees the game object or world position they are placed at.

If you switch between different cameras, e.g. between in- and out-of-battle, the main camera that was used when the level was loaded is still being used for positioning flying texts.

To switch the used camera, add an Is Makinom Camera component to each of the cameras. This component will set the game object’s camera as the main camera used by ORK/Makinom when the game object is enabled. Please note that this will only work if you enable/disable the cameras as needed.

UI
Share This Article :
  • Facebook
  • Twitter
  • LinkedIn
  • Pinterest
Updated on December 17, 2022
Table of Contents
  • Flying Text Prefab Setup
    • Styling
    • Content Size Fitters
    • Create Prefab
  • Default Setup
    • Flying Text Settings
      • Default Flying Text Positions
  • Animating Flying Texts
  • Tip: When Using Multiple Cameras
Sitemap
  • Features
  • Showcase
  • Guide
    • Documentation
    • Tutorials
    • API
  • ORK 2 Hub
    • Tutorials
    • Plugins
    • API
  • Support
  • Forum
  • Get ORK
  • Contact
  • Blog
  • Makinom
  • gamingislove.com
Categories
  • News (59)
  • ORK 2 (137)
    • Tutorial (137)
      • Game tutorial (50)
      • Gameplay (32)
      • How-to (55)
  • Release (129)
Search

© 2015 Gaming is Love e.U.

Disclosure: This site may contain affiliate links, which means I may receive a commission if you click a link and purchase something that I have recommended. While clicking these links won’t cost you any money, they will help me fund my development projects while recommending great assets!