
In this tutorial we’ll set up the spitter’s spit attack.
The spit attack will fire a projectile that damages whoever it hits. Yes, it’s damaging friend and foe alike.
We’ll set up:
- the spit prefab (damage dealer)
- the spit schematic
- the spit ability
- the spit battle AI
- update the spitter
Let’s get to it!
Spit Prefab Setup #
Open the Spit prefab for editing, you can find it in Assets/Tutorial Assets/Prefabs/Weapons/.
The prefab is already set up for us, all we need to do is add a Damage Dealer component.
Add Damage Dealer #
Add a Damage Dealer component to the prefab’s root game object using the component menu.
- Start Type
Select Trigger Enter. - Destroy On Damage
Enable this setting.
In case the spit hits (and damages) something, it’ll be destroyed. - Damage Zone From Children
Enable this setting. - Damage Zone From Parent
Enable this setting. - One Time Damage
Enable this setting.
Activation Settings #
We’re using the activation tag attack in the spit attack ability (same as the chomper’s attack), so we need to use that here as well.
- Field
Enable this setting. - All Battle Systems
Enable this setting.
Click on Add Activation Tag.
- Activation Tag
Set to attack.
And that’s it for the prefab – save the changes.
Spit Attack Schematic #
Next, we’ll set up the schematic for spitting.
Open the editor, navigate to Schematics and start working on a new schematic.

Settings #
We need to add the Spit prefab.
Prefabs #
Click on Add Prefab Resource.
- Auto Destroy After Time
Enable this setting. - Time
Set to 5.
The spit will be removed after 5 seconds (in case it didn’t hit a target). - Prefab
Select the Spit prefab.
Rotate To #
Add Node > Movement > Rotation > Rotate To
We’ll directly set the rotation to face the target, not fade it over time (as we did in the chomper’s attack schematic). The user (Machine Object) will face the target (Starting Object).
- Object (Rotating Object)
Select Machine Object. - Rotate Component
Select Transform. - Lock Rotation
Enable X and Z. - Rotation Target
Select Game Object. - Object
Select Starting Object.
Combatant Animation #
Add Node > Animation > Combatant > Combatant Animation
We’ll play the combatant’s attack 2 animation (which is the spitting animation for the combatant).
- Object
Select Machine Object. - Animation Type
Select Attack 2. - Wait
Enable this setting. - Normalized Time (Wait)
Set to 0.5. - Store Duration
Enable this setting. - Normalized Time (Store Duration)
Set to 0.6. - Variable Key
Set to wait. - Variable Origin
Select Local.
Play Sound #
Add Node > Audio > Audio > Play Sound
We’ll play the Attack sound type on the user (Machine Object).
- Object (Play On)
Select Machine Object. - Use Sound Type
Enable this setting. - Sound Type
Select Attack. - Play One Shot
Enable this setting. - Set Pitch
Enable this setting. - Random Pitch
Enable this setting. - Pitch
Set to 0.8. - Pitch 2
Set to 1.2.
Spawn Prefab #
Add Node > Game Object > Prefab > Spawn Prefab
We’ll now spawn the spit prefab we’ve set up in the Settings node.
- Prefab
Select Prefab 0. - Target Type
Select Object. - Object (Target Object)
Select Machine Object. - Local Space
Enable this setting. - Offset
Set to X=0, Y=1, Z=0. - Use Rotation
Enable this setting.
I.e. the prefab is spawned using the user’s rotation (we want to fire it in the user’s forward direction).
Wait #
Add Node > Base > Wait
We’ll wait for a frame (0 seconds) to give the prefab time to spawn.
- Time
Select Value > Value.
Set the value to 0.
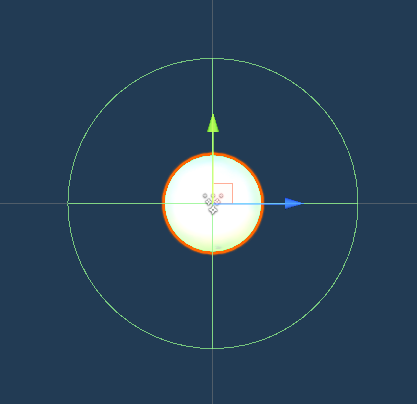
Rigidbody Add Force #
Add Node > Game Object > Rigidbody > Rigidbody Add Force
This node is used to add a force vector to a Rigidbody or Rigidbody 2D component.
Our spit prefab will be moved via physics, we’ll simply fire it forward and up with enough force to reach the target (the ability’s use range will be 5). And we’ll add a bit randomization to it.
- Object (Rigidbody Object)
Select Prefab 0.
The value beside the prefab allows you to use individual instances you created (we only created one).
Using -1 (the default value) will use all instances of the prefab that where created by the schematic. - Relative Force
Enable this setting.
The force will be applied relative to the game object’s position/rotation, i.e. this’ll make sure we fire forward in local space instead of world space. - Vector3 Type (Force)
Select Value > Set Axis.
This lets us set each axis indivdidually with a float value selection.
We use this to set each axis to random values. - X-Axis
Select Value > Random.
Set the first value to -0.2.
Set the second value to 0.2.
This randomizes the left/right angle of the shot. - Y-Axis
Select Value > Random.
Set the first value to 0.8.
Set the second value to 1.2.
This randomizes the shot’s height angle. - Z-Axis
Select Value > Random.
Set the first value to 0.8.
Set the second value to 1.2.
This randomizes the shot’s forward angle. - Force Multiply
Select Value > Random.
Set the first value to 4.5.
Set the second value to 5.5.
This randomizes the shot’s reach (via the applied force). - Force Mode
Select Impulse.
We only give the rigidbody an initial push and let physics handle the rest.
Activate Damage Dealer #
Add Node > Battle > Action Outcome > Activate Damage Dealer
We’ll now activate the damage dealer on the spawned prefab (via the ability’s activation tags, which we’ll set up after this).
- Object (Activate On)
Select Prefab 0. - Activate
Enable this setting. - Use Action Tags
Enable this setting. - Set Action
Enable this setting. - Add Prefab
Enable this setting. - Use Action Prefabs
Enable this setting.
The ability will set up a prefab that’ll be spawned when the damage dealer deals damage.
Wait #
Add Node > Base > Wait
We’ll now wait for the stored duration.
- Time
Select Variable > Float Variable. - Variable Key
Set to wait. - Variable Origin
Select Local.
And that’s it for the schematic. Click on Save Schematic to save it, e.g. as SpitAttack.
Spit Ability #
Next, we’ll set up the ability for the spit attack – once again, we can make use of our previous work and copy the Chomper Attack ability.
Navigate to Status > Abilities and copy the Chomper Attack ability.
- Name
Set to Spit Attack.
Target Selection Settings #
We’ll use a Custom target selection setup, allowing to target/damage all combatants – enemies and allies.
- Target Selection Type
Select Custom.
Target Settings #
- Target Type
Select All.
This lets the ability damage ally and enemy alike.
We’ll make sure it’s only used on enemies in the battle AI. - Target Range
Select Single. - Not On Self
Enable this setting.
This prevents the user from damaging itself, e.g. by the spit prefab spawning in it.
Use Range Settings #
- Template
Select Range 5.
Target Settings > Target Changes > Target Change 0 > Status Change 0 #
We’ll change the status value that’s used as the damage to RATK instead of ATK.
- Status Value (Change Value)
Select RATK.
Battle Animation > Battle Animation 0 #
- Schematic Asset
Select SpitAttack.
Battle Animation > Damage Dealer Settings #
We need to add the particle effect that’ll be used when hitting a target.
- Add Prefab
Enable this setting. - Prefab
Select the AcidSplash prefab.
You can find it in Assets/Tutorial Assets/3D Game Kit/Prefabs/VFX/Characters/Enemies/Spitter/. - Destroy After
Set to 3.
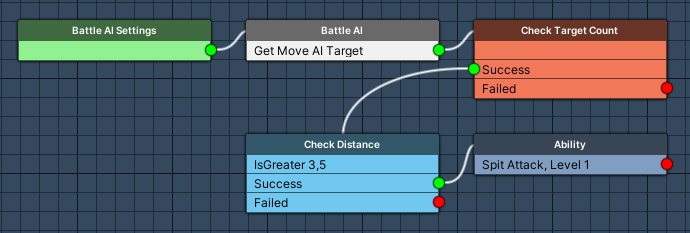
Spit Battle AI #
Again, we can copy the chomper’s battle AI and adjust it to our needs.
Navigate to Battles > Battle AI and copy the Attack battle AI.
Battle AI Settings #
- Name
Set to Spit.
Check Distance #
We’ll change the check to greater than 3.5.
- Check Type
Select Is Greater. - Check Value
Select Value > Value.
Set the value to 3.5.
Attack #
Remove this node.
Ability #
Add Node > Action > Ability
Instead of using the base attack, we’ll use the spit ability.
- Ability
Select Spit Attack. - Force Found Targets
Enable this setting.
This makes sure the found target (i.e. an enemy) is used.
Updating the Spitter #
Finally, we’ll update the Spitter combatant, we’ll add the spit ability and battle AI.
Navigate to Combatants > Combatants and select the Spitter.
Attacks & Abilities > Ability Development #
We need to add the Spit Attack ability, or the combatant can’t use it.
Click on Add Ability.
- Learn at Level
Set to 1. - Ability
Select Spit Attack.
Battle Settings > Battle AI #
We also need to add the Spit battle AI, we also want to use it with a higher priority than the base attack, so we need to add it before the already added Attack battle AI.
Copy the Battle AI 0 and keep editing Battle AI 0 instead of the new copy.
- Battle AI
Select Spit.
Save Changes #
And that’s it!
Don’t forget to save your changes by clicking on Save Settings at the bottom of the editor.
Testing #
Hit play and engage a spitter.
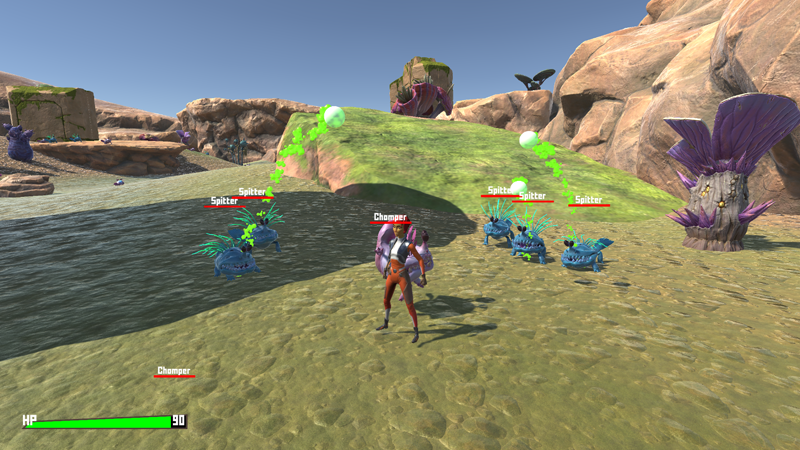
They’re spitting at us!
And they also hit other enemies – great!
Next, we’ll add a healing potion.


