ORK Framework Logo - RPG Editor for Unity
  • Features
  • Showcase
  • Guide
    • Documentation
    • Tutorials
    • API
  • ORK 2
    • Tutorials
    • Plugins
    • API
  • Support
  • Forum
  • Get ORK

Status System Setup

  • START Status System Setup
  • 01 Status Values
  • 02 Status Development
  • 03 Attack/Defence Modifiers
  • 04 Status Effects
  • 05 Formulas
  • 06 Ability & Item Types
  • 07 Abilities Part 1: Attacks
  • 08 Abilities Part 2: Support & Sabotage
  • 09 Abilities Part 3: Elemental Magic
  • 10 Items
  • 11 Equipment Part 1: Slots & Slot Set Templates
  • 12 Equipment Part 2: Weapons
  • 12.5 (Optional) Equipment Part 2.5: Weapons
  • 13 Equipment Part 3: Shields, Armor & Accessories
  • 13.5 (Optional) Equipment Part 3.5: Shields, Armor & Accessories
  • 14 Equipment Part 4: Available Equipment Templates
  • 15 Loot
  • 16 Battle AIs
  • 17 Combatants Part 1: General Settings
  • 18 Combatants Part 2: Players
  • 19 Combatants Part 3: Enemies
  • 20 Combatant Groups
  • END Status System Setup

3D RPG Playground

  • START 3D RPG Playground
  • 01 Player Setup
  • 02 Start Menu
  • 03 First Interaction
  • 04 Music
  • 05 Areas
  • 06 Collecting Items
  • 07 Displaying Equipment
  • 08 Combatant Prefabs, Icons & Portraits
  • 09 Combatant Animations
  • 10 Camera Positions
  • ANIM 01 Battle Start/End Schematics
  • ANIM 02 Use, Cast & Camera
  • ANIM 03 Abilities & Items
  • ANIM 04 Physical Attacks
  • ANIM 05 Special Actions
  • BATTLE 01 Battle Menu
  • BATTLE 02 Prepare for Battle
  • TURN 01 Turn Based Setup
  • TURN 02 Turn Order HUD
  • ATB 01 Active Time Setup
  • ATB 02 Cast Times
  • ATB 03 Timebar HUD
  • BATTLE 03 The First Battle
  • BATTLE 04 Hunting Move AI
  • BATTLE 05 Spawning Combatants
  • 11 Save Games
  • MENU 01 UI Boxes
  • MENU 02 Template HUDs
  • MENU 03 Overview Menu
  • MENU 04 Menu Screens
  • 12 Shop
  • BATTLE 06 Random Battles
  • DUNGEON 01 Enter the Dungeon
  • DUNGEON 02 The Trapdoor
  • DUNGEON 03 Enemies on Level 1 & 2
  • DUNGEON 04 Traps on Level 3
  • DUNGEON 05 Going Deeper
  • 13 Bestiary (+MENU+ANIM)
  • QUEST 01 Hunting Quests (+MENU)
  • QUEST 02 Guard NPC
  • QUEST 03 Forest Ruin Cheese
  • QUEST 04 Witch NPC with Cheese
  • QUEST 05 Quest Mark HUDs
  • 14 Research Trees (+MENU)
  • CRAFT 01 Crafting Materials
  • CRAFT 02 Crafting Recipes
  • CRAFT 03 Crafting Menu
  • CRAFT 04 Crafting Proficiency & Critical Crafting
  • CRAFT 05 Materials Loot
  • 15 Changing Choice Dialogue
  • 16 Follow Me!
  • BATTLE 07 Sequence Loot Dialogue

3D Action RPG

  • START 3D Action RPG
  • 01 Status System Setup
  • 02 Player Setup
  • 03 Player Weapon
  • 04 Player Attacks
  • 05 Enemy: Chomper
  • 06 Chomper Attack
  • 07 Hit & Death
  • 08 HUDs
  • 09 Rolling on the Floor
  • 10 Enemy: Spitter
  • 11 Spit Attack
  • 12 Potion
  • 13 Grenade
  • 14 Item HUD
  • 15 Enemy: Grenadier
  • 16 Grenadier Melee Attacks
  • 17 Grenadier Flamethrower
  • 18 Item Drops
  • END 3D Action RPG

2D Grid Battle RPG

  • START 2D Grid Battle RPG
  • 01 Player Setup
  • 02 Prefab & Music Setup
  • 03 Randomizing Combatants
  • 04 UI Setup
  • 05 Battle Start, End & Phase Schematics
  • 06 Battle System Setup
  • 07 Battle Grid Setup
  • 08 Grid Move
  • 09 Forest Battle Grid
  • 10 Battle AI
  • 11 Ability Ranges
  • 12 Death & Use Schematics
  • 13 Attack Schematic
  • 14 Shoot Schematics
  • 15 Battle Selection Interaction
  • END 2D Grid Battle RPG

Schematics

  • Simple Start Schematic
  • Battle Start Schematic
  • Battle End Schematic
  • Moving to Target and Back
  • Animating a Base Attack
  • Animating a Magic Ability
  • Grid Movement
  • Open and Close UI Animations
  • Flying Text Mover

UI Setups

  • Unity UI: Initial Setup
  • Unity UI: TextMesh Pro Setup
  • Unity UI: UI Box
  • Unity UI: Flying Text
  • Unity UI: Dragging Notification
  • Unity UI: Interaction HUD
  • Unity UI: Simple Player HUD
  • Unity UI: Quest HUD
  • Unity UI: Shortcuts HUD
  • Unity UI: Currency HUD
  • Unity UI: Tooltip HUD
  • Unity UI: Control HUD
  • Unity UI: Attack Modifiers
  • Unity UI: Defence Modifiers

Gameplay Bits

  • Combining Input Origins
  • Combining Status Value Flying Texts
  • Fun With Flying Text
  • HUD Effects With Conditional Schematics
  • Inventory Containers
  • Multi Interaction Controllers
  • World Space HUD
  • World Space Dialogue
  • Home
  • Guide
  • Tutorials
  • 3D Action RPG
  • 03 Player Weapon

03 Player Weapon

Table of Contents
  • Game State
  • Item Types
    • 0: Useables
      • Item Type Settings
    • 1: Weapons
  • Equipment Slots
  • Equipment
    • Item Settings
      • Prefab Settings
    • Equipment Settings > Equipment Slot Set 0
  • Equipment Slot Set Template
    • Equipable On
  • Player Start Equipment
    • Inventory & Equipment > Start Equipment
  • Save Changes
  • Updating the Player Prefab
    • Add Damage Zone
    • Add Radius
    • Add Equipment Viewer
      • Display Conditions
  • Updating the Staff Prefab
    • Add Damage Dealer
      • Activation Settings

In this tutorial we’ll set up the player’s weapon.

We need to set up a weapon for our player attacks – Ellen attacks with a staff, which we’ll spawn during attacks using an equipment viewer on Ellen’s prefab.

You can learn more about equipment in this documentation.

We’ll set up:

  • a game state to handle showing or hiding the staff
  • equipment (also item types and equipment slots)
  • the player’s start equipment
  • components on the player and equipment prefabs

Let’s get to it.

Game State #

First, we’ll set up a game state that manages showing or hiding the weapon. Schematics animating the attacks will activate or deactivate the state, the equipment viewer uses the state as condition for showing the equipment.

Navigate to Game > Game States, we’ll add a new game state.

  • Name
    Set to Show Staff.
  • Initial State
    Disable this setting.

That’s it for the new game state.

Item Types #

Navigate to Inventory > Item Types, we’ll change the Default type and add an additional type.

0: Useables #

We’ll use this item type for the grenade and potion items.

  • Name
    Set to Useables.

Item Type Settings #

We need to set the damage type – this handles amations for damage or evade when items of this type are used.

The Default damage type is already set up to use the (also default) Damage animation type.

  • Damage Type
    Select Default.

1: Weapons #

Copy the Useables type.

  • Name
    Set to Weapons.

Equipment Slots #

Equipment slots are used to equip equipment on a combatant.

Navigate to Inventory > Equipment Slots. The default setup of a new project already has multiple equipment slots set up – we’ll only use the Weapon equipment slot.

Feel free to remove the other equipment slots, or keep them – we don’t need to make any other changes here.

Equipment #

Navigate to Inventory > Equipment, we’ll change the Default equipment and make Ellen’s staff out of it.

  • Name
    Set to Staff.

Item Settings #

  • Item Type
    Select Weapons.

Prefab Settings #

We only need to set up the viewer prefab, i.e. the prefab that’ll be used by Equipment Viewer components to show the weapon on the combatant.

  • Viewer Prefab
    Select Staff Variant.
    The prefab can be found in Assets/Tutorial Assets/Prefabs/Weapons/.

Equipment Settings > Equipment Slot Set 0 #

We’ll use the Deault slot set template, which we’ll set up right after this.

  • Slot Set Type
    Select Template.
  • Template
    Select Default.

Equipment Slot Set Template #

Either click on the Edit button beside the Template selection or navigate to Templates > Equipment Slot Set Templates and select the Default template.

  • Name
    Set to Weapon.

Equipable On #

Click on Add Equipment Slot.

  • Equipable On
    Select Weapon.

Player Start Equipment #

Navigate to Combatants > Combatants and select Ellen.

We’ll now add the start equipment (i.e. the staff).

Inventory & Equipment > Start Equipment #

We only need to set the start equipment and don’t have to take care about which equipment slots or equipment are available for the combatant.

The default setup in a new project adds all equipment lots to combatants and allows all equipment.

Click on Add Start Equipment.

Click on Add Equipment Slot.

  • Equipment Slot
    Select Weapon.
  • Equipment
    Select Staff.

Save Changes #

That’s it for the setup in the editor.

Don’t forget to save your changes by clicking on Save Settings at the bottom of the editor.

Updating the Player Prefab #

Open the Ellen Variant prefab for editing – you can find it in Assets/Tutorial Assets/Prefabs/Combatants/.

We’ll add a Damage Zone component (to allow the player to take damage from enemy Damage Dealer components), a Radius component (used for distance calculations) and an Equipment Viewer to show the staff.

Add Damage Zone #

Add a Damage Zone component to the prefab’s root using the component menu.

The default setup is already correct for us.

Add Radius #

Add a Radius component to the prefab’s root using the component menu.

It should automatically set the radius according to the added colliders.

  • Radius
    Select Value > Value.
  • Value
    Set to 0.4.

Add Equipment Viewer #

We need to add the Equipment Viewer component to the Ellen_Left_Hand_Attach child object:

Select the child object and use the component menu to add an Equipment Viewer component.

  • Equipment Slot
    Select Weapon.

Display Conditions #

Click on Add Condition.

  • Condition Type
    Select Game State.

Click on Add Game State.

  • Condition Type
    Select Game State.
  • Game State
    Select Show Staff.
  • Check State
    Select Active.

That’s it for Ellen’s prefab – save the changes.

Updating the Staff Prefab #

Open the Staff Variant prefab for editing – you can find it in Assets/Tutorial Assets/Prefabs/Weapons/.

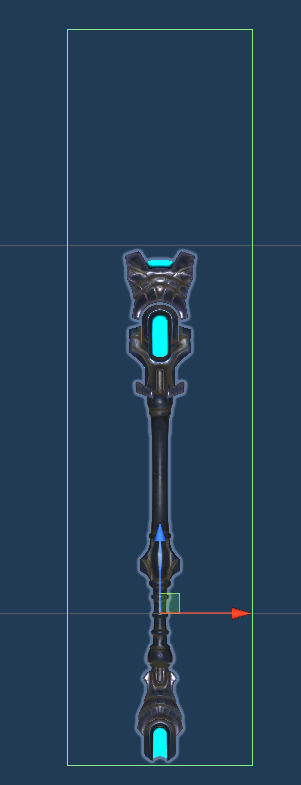
As you can see, it has a larger Box Collider (used as trigger) added to it. This is what’ll be used to hit enemies (i.e. their Damage Zone components).

We only need to add a Damage Dealer component to it and set it up.

Add Damage Dealer #

Add a Damage Dealer component to the prefab’s root using the component menu.

  • Start Type
    Select Trigger Enter.
    Damage zones on game objects entering the trigger will cause damage to them.
  • Damage Zone From Children
    Enable this setting.
    Child objects of the game object entering the trigger will be searched for damage zones.
  • Damage Zone From Parent
    Enable this setting.
    Parent objects of the game object entering the trigger will be searched for damage zones.
  • One Time Damage
    Enable this setting.
    A combatant will only be damaged once by this damage dealer.
    This is only while the damage dealer is active – when it’s deactivated it’ll reset all targets and can damage the same target again.

Activation Settings #

Damage dealers can only deal damage when they’re activated (learn more about this in this documentation).

We’ll make use Activation Tags on the damage dealer and abilities to do this – if an ability uses a matching tag, the damage dealer can be activated by it.

  • Field
    Enable this setting.
    The damage dealer can be activated outside of battles.
  • All Battle Systems
    Enable this setting.
    The damage dealer can be activated in all battle systems.

Click on Add Activation Tag.

  • Activation Tag
    Set to weapon.

And that’s it for the staff prefab – save the changes.


Next, we’ll set up the player attacks.

Share This Article :
  • Facebook
  • Twitter
  • LinkedIn
  • Pinterest
Updated on January 25, 2022
Table of Contents
  • Game State
  • Item Types
    • 0: Useables
      • Item Type Settings
    • 1: Weapons
  • Equipment Slots
  • Equipment
    • Item Settings
      • Prefab Settings
    • Equipment Settings > Equipment Slot Set 0
  • Equipment Slot Set Template
    • Equipable On
  • Player Start Equipment
    • Inventory & Equipment > Start Equipment
  • Save Changes
  • Updating the Player Prefab
    • Add Damage Zone
    • Add Radius
    • Add Equipment Viewer
      • Display Conditions
  • Updating the Staff Prefab
    • Add Damage Dealer
      • Activation Settings
Sitemap
  • Features
  • Showcase
  • Guide
    • Documentation
    • Tutorials
    • API
  • ORK 2 Hub
    • Tutorials
    • Plugins
    • API
  • Support
  • Forum
  • Get ORK
  • Contact
  • Blog
  • Makinom
  • gamingislove.com
Categories
  • News (59)
  • ORK 2 (137)
    • Tutorial (137)
      • Game tutorial (50)
      • Gameplay (32)
      • How-to (55)
  • Release (129)
Search

© 2015 Gaming is Love e.U.

Disclosure: This site may contain affiliate links, which means I may receive a commission if you click a link and purchase something that I have recommended. While clicking these links won’t cost you any money, they will help me fund my development projects while recommending great assets!