

Learn more about using components on cursor prefabs.
Combatants and target selections can be highlighted using cursor prefabs – i.e. a prefab that’s placed on a highlighted combatant or at the position of a raycast (for raycast targeting).
These prefabs can use components (implementing different cursor prefab interfaces) to use the highlighted combatant or information about the selected action for different things, e.g. scaling the cursor prefab based on the combatant’s radius or the use range of an action.
The following interfaces are available:
- ICombatantHighlightCursorPrefab
Used for highlighting a combatant.
Receives information about the highlighted combatant. - ITargetSelectionCursorPrefab
Used for highlighting a selected target during the regular target selection.
Receives information about the action, the action’s user and the selected target (the cursor is placed on). - ITargetRaycastCursorPrefab
Used for highlighting the raycast targeting position.
Receives information about the action and it’s user.
ORK comes with some default implementations for these interfaces, see below for the available variants.
Cursor prefabs can use multiple highlight components at the same time. The target selection can also mix combatant highlight and target selection components. When using multiple components, it’s best to use those components on child objects of the cursor prefab to prevent them from interfering with each other, e.g.:
- Root
The prefab’s root, no cursor component attached.- Combatant Highlight
E.g. using the Radius Scale highlight to scale this child object based on the highlighted combatant’s radius. - Combatant Highlight
E.g. using the Use Range Scale highlight to scale this child object based on the highlighted combatant’s current action use range.
- Combatant Highlight
You can find more detailed information about the interfaces – where they’re used, the available components (default implementations) and how to write your own implementations below.
Combatant Highlights #
The ICombatantHighlightCursorPrefab interface is used to highlight combatants and provides information of the highlighted combatant.
Used In #
It’s used by Prefab highlight types in:
- Target Selection
Highlights the selected target.
This uses the Target Highlight settings in Battle > Target Settings.
The target selection also uses ITargetSelectionCursorPrefab interface components. - Battle Menu: User Highlight
Highlights the battle menu’s user. - Raycast Targeting: User Highlight
Highlights the raycast target selection’s user. - Phase Battle System: Player Combatant Selection
Highlighting the selected combatant when the player selects the next phase battle user.
This uses the Target Highlight settings in Battle > Target Settings.
Available Components #
ORK comes with a few implementations for the combatant highlight components.
Radius Scale #
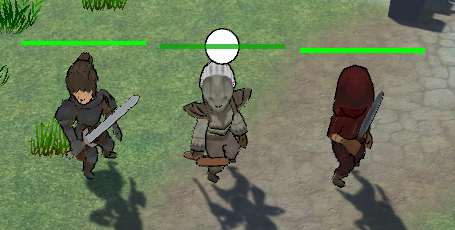
The Combatant Highlight: Radius Scale component scales the game object it’s attached to based on the radius of the highlighted combatant.
The radius of a combatant is defined by it’s Radius component.
E.g. here’s a sphere that’s scaled by the combatant’s radius:
Schematic #
The Combatant Highlight: Schematic component plays schematics when starting and stopping the highlight.
Use Range Scale #
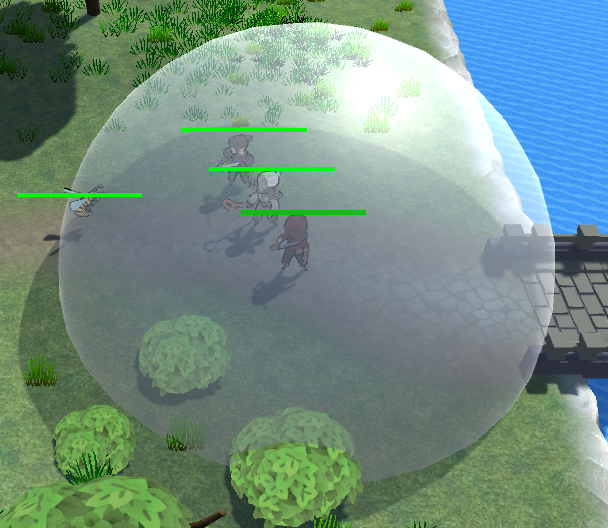
The Combatant Highlight: Use Range Scale component scales the game object it’s attached to based on the use range of the currently selected action of the highlighted combatant.
The currently selected action means what’s currently highlighted/selected in the combatant’s battle menu, i.e. this is only used for player combatants selecting actions via battle menus.
The component automatically updates the scale when the selection changes – no selected action (or not using a use range) will use a scale of 0.
This component is best used by the battle menu’s or raycast targeting’s user highlight.
E.g. here’s a sphere that’s scaled by the use range:
Scripting #
Create a custom combatant highlight component by implementing the ICombatantHighlightCursorPrefab interface in a component (MonoBehaviours).
The interface features two functions that need to be implemented.
StartSelection Function #
The StartSelection function is called when the cursor is spawned/enabled and starts highlighting a combatant.
public void StartSelection(Combatant combatant)
The combatant is the highlighted combatant.
StopSelection Function #
The StopSelection function is called when the highlight is stopped.
public void StopSelection()
Use this function for any cleanup you need to do.
Example: Radius Scale #
This is the code for the radius scale component:
using UnityEngine;
using GamingIsLove.Makinom;
using System.Collections.Generic;

namespace GamingIsLove.ORKFramework.Components
{
    [AddComponentMenu("ORK Framework/Battle/Combatant Highlight: Radius Scale")]
    public class RadiusCombatantHighlightCursorPrefab : MonoBehaviour, ICombatantHighlightCursorPrefab
    {
        public virtual void StartSelection(Combatant combatant)
        {
            float radius = combatant.Object.Radius;
            if(radius > 0)
            {
                this.transform.localScale = new Vector3(radius, radius, radius);
            }
            else
            {
                this.transform.localScale = Vector3.zero;
            }
        }

        public virtual void StopSelection()
        {
            this.transform.localScale = Vector3.one;
        }
    }
}
For a more complex implementation, check out the use range scale component – it keeps track of the highlighted combatant and checks each frame if a change occured (updating the highlight in that case).
Target Selection Highlight #
The ITargetSelectionCursorPrefab interface is used to highlight a selected target and provides information of the highlighted combatant (i.e. the target), the target selection’s user and action.
Used In #
It’s used by Prefab highlight types in:
- Target Selection
Highlights the selected target.
This uses the Target Highlight settings in Battle > Target Settings.
The target selection also uses ICombatantHighlightCursorPrefab interface components.
Available Components #
ORK comes with a few implementations for the target selection highlight components.
Affect Range Scale #
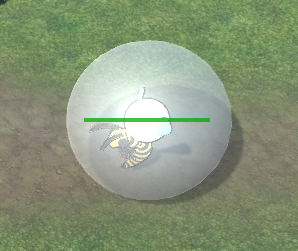
The Target Selection Cursor: Affect Range Scale component scales the game object it’s attached to based on the affect range of the target selection’s action.
If the action doesn’t use an affect range, it’ll use a scale of 0.
E.g. here’s a sphere that’s scaled by the affect range (also uses the Radius combatant highlight from above):
Line #
The Target Selection Cursor: Line component uses a Line Renderer to show a line between user and target.
Schematic #
The Target Selection Cursor: Schematic component plays schematics when starting and stopping the highlight.
Scripting #
Create a custom target selection highlight component by implementing the ITargetSelectionCursorPrefab interface in a component (MonoBehaviours).
The interface features two functions that need to be implemented.
StartSelection Function #
The StartSelection function is called when the cursor is spawned/enabled and starts highlighting a combatant.
public void StartSelection(Combatant user, Combatant target, IShortcut shortcut)
The user is the target selection’s user.
The target is the highlighted combatant (i.e. the target of the target selection).
The shortcut is the action for which a target is selected – e.g. an AbilityShortcut for an ability or an ItemShortcut for an item.
StopSelection Function #
The StopSelection function is called when the highlight is stopped.
public void StopSelection()
Use this function for any cleanup you need to do.
Example: Affect Range Scale #
This is the code for the affect range scale component:
using UnityEngine;
using GamingIsLove.Makinom;
using System.Collections.Generic;

namespace GamingIsLove.ORKFramework.Components
{
    [AddComponentMenu("ORK Framework/Battle/Target Selection Cursor: Affect Range Scale")]
    public class AffectRangeScaleTargetSelectionCursorPrefab : MonoBehaviour, ITargetSelectionCursorPrefab
    {
        public virtual void StartSelection(Combatant user, Combatant target, IShortcut shortcut)
        {
            bool used = false;
            TargetSettings targetSettings = TargetSettings.Get(shortcut);
            if(targetSettings != null)
            {
                UseRange affectRange = targetSettings.affectRange.GetConditionalRange(
                    user, target, shortcut as IVariableSource);
                if(affectRange != null)
                {
                    float range = affectRange.GetRangeValue(user);
                    if(range > 0)
                    {
                        used = true;
                        this.transform.localScale = new Vector3(range, range, range);
                    }
                }
            }
            if(!used)
            {
                this.transform.localScale = Vector3.zero;
            }
        }

        public virtual void StopSelection()
        {
            this.transform.localScale = Vector3.one;
        }
    }
}
It’s a bit more complex than the combatant highlight example, as it needs to get it’s information from the provided action. However, the overall use is the same.
Target Raycast Highlight #
The ITargetRaycastCursorPrefab interface is used to highlight the current position of raycast targeting and provides information of the selection’s user and action.
Used In #
It’s only used by the Cursor Object of Target Raycast Settings, i.e. abilities or items using raycast targeting.
The default settings for all actions can be found in Battles > Target Settings, each ability/item can optionally use a custom setup.
Available Components #
ORK comes with a few implementations for the target raycast highlight components.
Affect Range Scale #
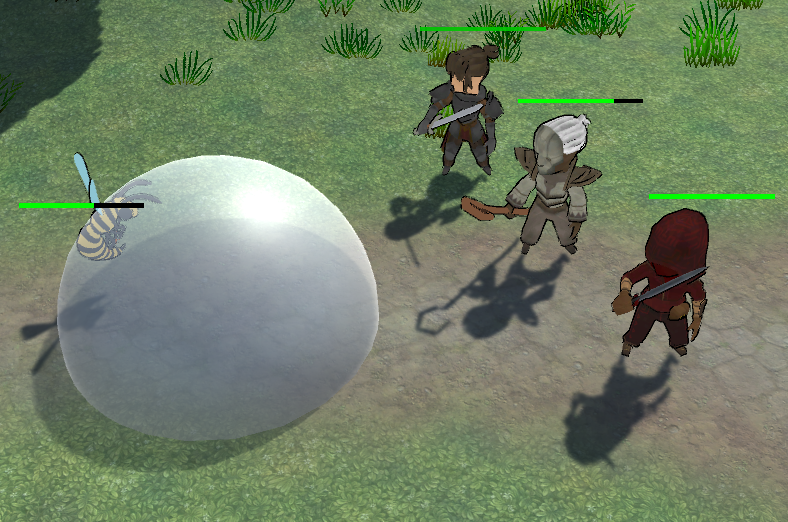
The Target Raycast Cursor: Affect Range Scale component scales the game object it’s attached to based on the affect range of the raycast target selection’s action.
If the action doesn’t use an affect range, it’ll use a scale of 0.
E.g. here’s a sphere that’s scaled by the affect range (and placed at the raycast’s position):
Line #
The Target Raycast Cursor: Line component uses a Line Renderer to create a line between the user and the raycasted position.
Schematic #
The Target Raycast Cursor: Schematic component plays schematics when starting and stopping the highlight.
Scripting #
Create a custom target raycast highlight component by implementing the ITargetRaycastCursorPrefab interface in a component (MonoBehaviours).
The interface features two functions that need to be implemented.
StartSelection Function #
The StartSelection function is called when the cursor is spawned/enabled and starts highlighting a combatant.
public virtual void StartSelection(Combatant user, BaseAction action)
The user is the target selection’s user.
The action is the action for which a target is selected – e.g. an AbilityAction for an ability or an ItemAction for an item.
StopSelection Function #
The StopSelection function is called when the highlight is stopped.
public void StopSelection()
Use this function for any cleanup you need to do.
Example: Affect Range Scale #
This is the code for the affect range scale component:
using UnityEngine;
using GamingIsLove.Makinom;
using System.Collections.Generic;

namespace GamingIsLove.ORKFramework.Components
{
    [AddComponentMenu("ORK Framework/Battle/Target Raycast Cursor: Affect Range Scale")]
    public class AffectRangeScaleTargetRaycastCursorPrefab : MonoBehaviour, ITargetRaycastCursorPrefab
    {
        public virtual void StartSelection(Combatant user, BaseAction action)
        {
            bool used = false;
            TargetSettings targetSettings = TargetSettings.Get(action);
            if(targetSettings != null)
            {
                UseRange affectRange = targetSettings.affectRange.GetConditionalRange(
                    user, user, action.Shortcut as IVariableSource);
                if(affectRange != null)
                {
                    float range = affectRange.GetRangeValue(user);
                    if(range > 0)
                    {
                        used = true;
                        this.transform.localScale = new Vector3(range, range, range);
                    }
                }
            }
            if(!used)
            {
                this.transform.localScale = Vector3.zero;
            }
        }

        public virtual void StopSelection()
        {
            this.transform.localScale = Vector3.one;
        }
    }
}
It works similar to the target highlight‘s affect range, but it get’s the affect range information from the provided action instead of the target selection’s shortcut.