
In this tutorial we’ll set up schematics to animate battle actions.
We’ll start with the schematics for animating a combatant’s death and using something. Since we only have a single use animation for our combatants, we’ll use the same schematic for using items and (most) abilities.
We’ll set up:
- death schematic
- use schematic
- death battle animation
- item/ability battle animations
Let’s get to it.
Death Schematic #
This one will be pretty simple, we play the Death animation and wait for a second.
Navigate to Schematics and start workgin on a new schematic.

Combatant Animation #
Add Node > Animation > Combatant > Combatant Animation
We’ll play the Death animation.
If you remember, this’ll set a bool parameter in the animator controller and keep playing this animation until we stop it (or use the revive animation). So, we don’t need to wait or store any duration here.
- Object
Select Machine Object. - Animation Type
Select Death.
Wait #
Add Node > Base > Wait
We just wait for a second to let the death of the combatant be visible before the battle continues.
- Time
Select Value > Value.
Set the value to 1.
Calculate Action #
Add Node > Battle > Action Outcome > Calculate Action
Each action needs to be calculated, even death.
No further settings needed.
And that’s it for the schematic. Click on Save Schematic to save it, e.g. as Death.
Use Schematic #
We’ll play the Use animation, play an audio clip and spawn a prefab.
Similar to the Death animation, the Use animation will play until we stop it, i.e. we need to stop it at the end of the schematic.
Create a new schematic.

Settings #
We’ll add a prefab and audio clip to the schematic – we’ll define default prefab and audio clip, but some items/abilities will replace them with their own using the asset override settings.
Prefabs #
Click on Add Prefab Resource.
- Auto Destroy After Time
Enable this setting. - Time
Set to 0.55. - Prefab
Select Smoke.
Audio Clips #
Click on Add Audio Clip Resource.
- Audio Clip
Select Magic2.
Combatant Animation #
Add Node > Animation > Combatant > Combatant Animation
We’ll play the Use animation. Again, no waiting.
- Object
Select Machine Object. - Animation Type
Select Use.
Wait #
Add Node > Base > Wait
- Time
Select Value > Value.
Set the value to 0.5.
Play Sound #
Add Node > Audio > Audio > Play Sound
Play the audio clip on the target (the Starting Object of the schematic).
- Object (Play On)
Select Starting Object. - Audio Clip
Select 0: Magic2. - Play One Shot
Enable this setting.
Spawn Prefab #
Add Node > Game Object > Prefab > Spawn Prefab
We’ll spawn the prefab on the target (Starting Object).
- Prefab
Select Prefab 0. - Target Type
Select Object. - Object (Target Object)
Select Starting Object.
Wait #
Copy the previous Wait node.
Calculate Action #
Add Node > Battle > Action Outcome > Calculate Action
We now calculate the outcome of the action.
No further settings needed.
Wait #
Copy the previous Wait node.
Combatant Animation #
Copy the previous Combatant Animation node.
We’ll now stop playing the Use animation.
- Stop
Enable this setting.
And that’s it for the schematic. Click on Save Schematic to save it, e.g. as Use.
Death Battle Animation #
We’ll now use the schematics to set up the battle animations of our actions. Special actions like death are set up in the general settings of combatants.
Navigate to Combatants > Combatants > General Settings.
Battle Settings > Default Battle Animations > Death Animation #
Click on Add Battle Animation.
- Schematic Asset
Select the Death schematic.
Items #
We’ll continue with the items.
Navigate to Inventory > Items, we’ll set up the battle animations for all useable items.
Many of them share the same setup, so I’ll just list them here with their setup. The setup is in the Battle Animation settings of the items.
Potion, High Potion, Super Potion #
These items use a green smoke prefab.
Click on Add Battle Animation.
- Schematic Asset
Select the Use schematic.
We’ll replace the prefab in the Resource Overrides settings.
Click on Add Prefab Override.
- Auto Destroy After Time
Enable this setting. - Time
Set to 0.55. - Prefab
Select SmokeGreen.
Magic Potion #
This item uses a blue smoke prefab.
Click on Add Battle Animation.
- Schematic Asset
Select the Use schematic.
We’ll replace the prefab in the Resource Overrides settings.
Click on Add Prefab Override.
- Auto Destroy After Time
Enable this setting. - Time
Set to 0.55. - Prefab
Select SmokeBlue.
Revive Potion, Cure Potion, Antidote, Eye Drops, Cough Drops #
These items use the default prefab.
Click on Add Battle Animation.
- Schematic Asset
Select the Use schematic.
Abilities #
Navigate to Status > Abilities, we’ll now do the same for the abilities.
Again, many of them share the same setup, so I’ll just list them here with their setup. The setup is in the Battle Animation settings of the abilities.
The elemental magic abilities (starting with Fire) will all have their unique prefabs and also replace the audio clip. Also, keep in mind that Heal and the elemental magic abilities have level 1-3.
Drain #
Click on Add Battle Animation.
- Schematic Asset
Select the Use schematic.
We’ll replace the prefab in the Resource Overrides settings.
Click on Add Prefab Override.
- Auto Destroy After Time
Enable this setting. - Time
Set to 1.1. - Prefab
Select Drain.
We’ll also replace the audio clip. Click on Add Audio Clip Override.
- Audio Clip
Select Hit2.
Heal (Level 1-3), Regeneration #
Click on Add Battle Animation.
- Schematic Asset
Select the Use schematic.
We’ll replace the prefab in the Resource Overrides settings.
Click on Add Prefab Override.
- Auto Destroy After Time
Enable this setting. - Time
Set to 0.55. - Prefab
Select SmokeGreen.
Steal, Cure, Shut Up!, Look At Me! #
Click on Add Battle Animation.
- Schematic Asset
Select the Use schematic.
Faster, Keen Eye, Meditate, Defensive Mode, Fortify #
Click on Add Battle Animation.
- Schematic Asset
Select the Use schematic.
We’ll replace the prefab in the Resource Overrides settings.
Click on Add Prefab Override.
- Auto Destroy After Time
Enable this setting. - Time
Set to 1.1. - Prefab
Select ShieldYellow.
Slower #
Click on Add Battle Animation.
- Schematic Asset
Select the Use schematic.
We’ll replace the prefab in the Resource Overrides settings.
Click on Add Prefab Override.
- Auto Destroy After Time
Enable this setting. - Time
Set to 1.1. - Prefab
Select ShieldBlue.
Fire (Level 1-3) #
Click on Add Battle Animation.
- Schematic Asset
Select the Use schematic.
We’ll replace the prefab in the Resource Overrides settings.
Click on Add Prefab Override.
- Auto Destroy After Time
Enable this setting. - Time
Set to 1.1. - Prefab
Select Flame.
We’ll also replace the audio clip. Click on Add Audio Clip Override.
- Audio Clip
Select Fire3.
Water (Level 1-3) #
Click on Add Battle Animation.
- Schematic Asset
Select the Use schematic.
We’ll replace the prefab in the Resource Overrides settings.
Click on Add Prefab Override.
- Auto Destroy After Time
Enable this setting. - Time
Set to 1.1. - Prefab
Select Water.
Make sure to use the prefab from Assets/Tutorial Assets/Prefabs/Effects/.
We’ll also replace the audio clip. Click on Add Audio Clip Override.
- Audio Clip
Select Explosion3.
Quake (Level 1-3) #
Click on Add Battle Animation.
- Schematic Asset
Select the Use schematic.
We’ll replace the prefab in the Resource Overrides settings.
Click on Add Prefab Override.
- Auto Destroy After Time
Enable this setting. - Time
Set to 1.1. - Prefab
Select Earth.
We’ll also replace the audio clip. Click on Add Audio Clip Override.
- Audio Clip
Select Explosion2.
Wind (Level 1-3) #
Click on Add Battle Animation.
- Schematic Asset
Select the Use schematic.
We’ll replace the prefab in the Resource Overrides settings.
Click on Add Prefab Override.
- Auto Destroy After Time
Enable this setting. - Time
Set to 1.1. - Prefab
Select Wind.
We’ll also replace the audio clip. Click on Add Audio Clip Override.
- Audio Clip
Select Hit7.
Light (Level 1-3) #
Click on Add Battle Animation.
- Schematic Asset
Select the Use schematic.
We’ll replace the prefab in the Resource Overrides settings.
Click on Add Prefab Override.
- Auto Destroy After Time
Enable this setting. - Time
Set to 1.1. - Prefab
Select Light.
We’ll also replace the audio clip. Click on Add Audio Clip Override.
- Audio Clip
Select Spirit.
Dark (Level 1-3) #
Click on Add Battle Animation.
- Schematic Asset
Select the Use schematic.
We’ll replace the prefab in the Resource Overrides settings.
Click on Add Prefab Override.
- Auto Destroy After Time
Enable this setting. - Time
Set to 1.1. - Prefab
Select Dark.
We’ll also replace the audio clip. Click on Add Audio Clip Override.
- Audio Clip
Select Explosion4.
Electro (Level 1-3) #
Click on Add Battle Animation.
- Schematic Asset
Select the Use schematic.
We’ll replace the prefab in the Resource Overrides settings.
Click on Add Prefab Override.
- Auto Destroy After Time
Enable this setting. - Time
Set to 1.1. - Prefab
Select Electro.
We’ll also replace the audio clip. Click on Add Audio Clip Override.
- Audio Clip
Select Strange.
Save Changes #
And that’s it for the ability and item animations!
Don’t forget to save your changes by clicking on Save Settings at the bottom of the editor.
Testing #
Hit play in the Forest Battle 1 scene and use some items or abilities that we’ve just animated.
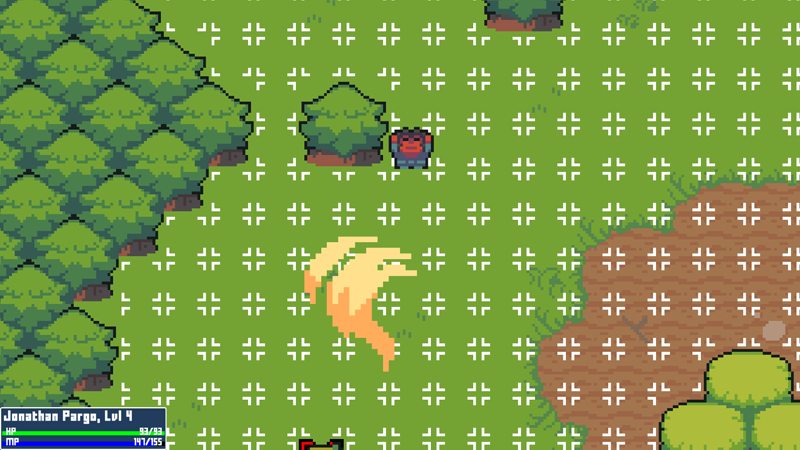
Great – seems to be working.
Next, we’ll continue with the attack animations.


