ORK Framework Logo - RPG Editor for Unity
  • Features
  • Showcase
  • Guide
    • Documentation
    • Tutorials
    • API
  • ORK 2
    • Tutorials
    • Plugins
    • API
  • Support
  • Forum
  • Get ORK

2D RPG Quickstart

  • START 2D RPG Quickstart
  • 01 Initial Setup
  • 02 Player Setup
  • 03 Music & Scenes
  • 04 UI System Setup
  • 05 UI Boxes
  • 06 Flying Texts
  • 07 Status Values
  • 08 Status Effects
  • 09 First Abilities
  • 10 Fighter Setup
  • 11 First Enemies & Battle AI
  • 12 Battle System Setup
  • 13 Animating Battle Start and End
  • 14 Random Battles
  • 15 Animating Actions
  • 16 Player Battle HUD
  • 17 Elemental Attacks
  • 18 Animating More Actions
  • 19 Inventory & Loot
  • 20 Equipment
  • 21 Loot, Start Equipment & Viewers
  • 22 Magic Abilities
  • 23 Caster Setup
  • 24 More Enemies
  • 25 Start Menu & Save Games
  • 26 Menu Screens
  • 27 Interactions
  • 28 Item Collectors
  • END 2D RPG Quickstart

3D RPG Quickstart

  • START 3D RPG Quickstart
  • 01 Initial Setup
  • 02 Player Setup
  • 03 Music & Scenes
  • 04 UI System Setup
  • 05 UI Boxes
  • 06 Flying Texts
  • 07 Status Values
  • 08 Status Effects
  • 09 First Abilities
  • 10 Fighter Setup
  • 11 First Enemies & Battle AI
  • 12 Battle System Setup
  • 13 Animating Battle Start and End
  • 14 Random Battles
  • 15 Animating Actions
  • 16 Player Battle HUD
  • 17 Elemental Attacks
  • 18 Animating More Actions
  • 19 Inventory & Loot
  • 20 Equipment
  • 21 Loot, Start Equipment & Viewers
  • 22 Magic Abilities
  • 23 Caster Setup
  • 24 More Enemies
  • 25 Start Menu & Save Games
  • 26 Menu Screens
  • 27 Interactions
  • 28 Item Collectors
  • END 3D RPG Quickstart

Status System Setup

  • START Status System Setup
  • 01 Status Values
  • 02 Status Development
  • 03 Attack/Defence Modifiers
  • 04 Status Effects
  • 05 Formulas
  • 06 Ability & Item Types
  • 07 Abilities Part 1: Attacks
  • 08 Abilities Part 2: Support & Sabotage
  • 09 Abilities Part 3: Elemental Magic
  • 10 Items
  • 11 Equipment Part 1: Slots & Slot Set Templates
  • 12 Equipment Part 2: Weapons
  • 12.5 (Optional) Equipment Part 2.5: Weapons
  • 13 Equipment Part 3: Shields, Armor & Accessories
  • 13.5 (Optional) Equipment Part 3.5: Shields, Armor & Accessories
  • 14 Equipment Part 4: Available Equipment Templates
  • 15 Loot
  • 16 Battle AIs
  • 17 Combatants Part 1: General Settings
  • 18 Combatants Part 2: Players
  • 19 Combatants Part 3: Enemies
  • 20 Combatant Groups
  • END Status System Setup

3D RPG Playground

  • START 3D RPG Playground
  • 01 Player Setup
  • 02 Start Menu
  • 03 First Interaction
  • 04 Music
  • 05 Areas
  • 06 Collecting Items
  • 07 Displaying Equipment
  • 08 Combatant Prefabs, Icons & Portraits
  • 09 Combatant Animations
  • 10 Camera Positions
  • ANIM 01 Battle Start/End Schematics
  • ANIM 02 Use, Cast & Camera
  • ANIM 03 Abilities & Items
  • ANIM 04 Physical Attacks
  • ANIM 05 Special Actions
  • BATTLE 01 Battle Menu
  • BATTLE 02 Prepare for Battle
  • TURN 01 Turn Based Setup
  • TURN 02 Turn Order HUD
  • ATB 01 Active Time Setup
  • ATB 02 Cast Times
  • ATB 03 Timebar HUD
  • BATTLE 03 The First Battle
  • BATTLE 04 Hunting Move AI
  • BATTLE 05 Spawning Combatants
  • 11 Save Games
  • MENU 01 UI Boxes
  • MENU 02 Template HUDs
  • MENU 03 Overview Menu
  • MENU 04 Menu Screens
  • 12 Shop
  • BATTLE 06 Random Battles
  • DUNGEON 01 Enter the Dungeon
  • DUNGEON 02 The Trapdoor
  • DUNGEON 03 Enemies on Level 1 & 2
  • DUNGEON 04 Traps on Level 3
  • DUNGEON 05 Going Deeper
  • 13 Bestiary (+MENU+ANIM)
  • QUEST 01 Hunting Quests (+MENU)
  • QUEST 02 Guard NPC
  • QUEST 03 Forest Ruin Cheese
  • QUEST 04 Witch NPC with Cheese
  • QUEST 05 Quest Mark HUDs
  • 14 Research Trees (+MENU)
  • CRAFT 01 Crafting Materials
  • CRAFT 02 Crafting Recipes
  • CRAFT 03 Crafting Menu
  • CRAFT 04 Crafting Proficiency & Critical Crafting
  • CRAFT 05 Materials Loot
  • 15 Changing Choice Dialogue
  • 16 Follow Me!
  • BATTLE 07 Sequence Loot Dialogue

3D Action RPG

  • START 3D Action RPG
  • 01 Status System Setup
  • 02 Player Setup
  • 03 Player Weapon
  • 04 Player Attacks
  • 05 Enemy: Chomper
  • 06 Chomper Attack
  • 07 Hit & Death
  • 08 HUDs
  • 09 Rolling on the Floor
  • 10 Enemy: Spitter
  • 11 Spit Attack
  • 12 Potion
  • 13 Grenade
  • 14 Item HUD
  • 15 Enemy: Grenadier
  • 16 Grenadier Melee Attacks
  • 17 Grenadier Flamethrower
  • 18 Item Drops
  • END 3D Action RPG

2D Grid Battle RPG

  • START 2D Grid Battle RPG
  • 01 Player Setup
  • 02 Prefab & Music Setup
  • 03 Randomizing Combatants
  • 04 UI Setup
  • 05 Battle Start, End & Phase Schematics
  • 06 Battle System Setup
  • 07 Battle Grid Setup
  • 08 Grid Move
  • 09 Forest Battle Grid
  • 10 Battle AI
  • 11 Ability Ranges
  • 12 Death & Use Schematics
  • 13 Attack Schematic
  • 14 Shoot Schematics
  • 15 Battle Selection Interaction
  • END 2D Grid Battle RPG

Schematics

  • Simple Start Schematic
  • Battle Start Schematic
  • Battle End Schematic
  • Moving to Target and Back
  • Animating a Base Attack
  • Animating a Magic Ability
  • Grid Movement
  • Open and Close UI Animations
  • Flying Text Mover

UI Setups

  • Unity UI: Initial Setup
  • Unity UI: TextMesh Pro Setup
  • Unity UI: UI Box
  • Unity UI: Flying Text
  • Unity UI: Dragging Notification
  • Unity UI: Canvas with Screen Space Camera
  • Unity UI: Interaction HUD
  • Unity UI: Simple Player HUD
  • Unity UI: Quest HUD
  • Unity UI: Shortcuts HUD
  • Unity UI: Currency HUD
  • Unity UI: Tooltip HUD
  • Unity UI: Control HUD
  • Unity UI: Attack Modifiers
  • Unity UI: Defence Modifiers

Gameplay Bits

  • Combining Input Origins
  • Combining Status Value Flying Texts
  • Fun With Flying Text
  • HUD Effects With Conditional Schematics
  • Inventory Containers
  • Multi Interaction Controllers
  • World Space HUD
  • World Space Dialogue
  • Home
  • Guide
  • Tutorials
  • 3D RPG Quickstart
  • 23 Caster Setup

23 Caster Setup

Table of Contents
  • Status Development
    • Development Settings
      • Level Range
    • Value Development
      • Status Value 0: Max HP
      • Status Value 1: Max MP
      • Status Value 2: EXP
      • Status Value 3: ATK
      • Status Value 4: DEF
      • Status Value 5: MATK
      • Status Value 6: MDEF
  • Caster Combatant
    • Content Information
    • Base Settings > Prefab Settings
    • Status Settings > Status Value Settings
    • Attacks & Abilities > Ability Development
    • Inventory & Equipment > Available Equipment
      • Available Equipment Slots
      • Available Equipment
    • Inventory & Equipment > Start Equipment
    • Animations & Movement > Animations
  • Save Changes
  • Start Game Schematic
    • Join Group
  • Testing

In this tutorial we’ll set up the 2nd player combatant.

The caster will use a different status development than the fighter, focusing on magic.

We’ll set up:

  • caster’s status development
  • caster combatant
  • update start game schematic (joining the caster to the player group)

Let’s get to it.

Status Development #

Open the Makinom editor, navigate to Status > Status Developments, and add a new status development.

Development Settings #

  • Name
    Set to: Caster

Level Range #

Like the fighter, the caster’s level range is 1-10.

Click on the Edit Level Range button to change them.

  • Minimum Value
    Set to 1.
  • Maximum Value
    Set to 10.

Click on Ok to accept the changes.

Value Development #

Click on Set Default to add all Normal and Experience type status values with a base setup.

Status Value 0: Max HP #

  • Development Type
    Select Curve.

Click on Edit Curve to open the curve dialogue.

  • Start Value (Min. Level)
    Set to 50.
  • End Value (Max. Level)
    Set to 250.
  • Interpolation
    Select Linear.

Click on Generate Curve to create the curve. Due to the high maximum value of the status value (9999), you’ll only see a small curve at the bottom of the window – enable Bar Highest Value Display to use the curve’s highest value as maximum for the display instead.

Click on Confirm to accept the curve.

Status Value 1: Max MP #

  • Development Type
    Select Curve.

Click on Edit Curve to open the curve dialogue.

  • Start Value (Min. Level)
    Set to 70.
  • End Value (Max. Level)
    Set to 300.
  • Interpolation
    Select Linear.

Click on Generate Curve to create the curve.

Click on Confirm to accept the curve.

Status Value 2: EXP #

  • Development Type
    Select Curve.

Click on Edit Curve to open the curve dialogue.

  • Start Value (Min. Level)
    Set to 0.
  • End Value (Max. Level)
    Set to 100.
  • Interpolation
    Select Linear.

Click on Generate Curve to create the curve.

Click on Confirm to accept the curve.

Status Value 3: ATK #

  • Development Type
    Select None.
    We don’t change the caster’s ATK on level ups.
  • Start Value
    Set to 5.

Status Value 4: DEF #

  • Development Type
    Select None.
  • Start Value
    Set to 8.

Status Value 5: MATK #

  • Development Type
    Select Curve.

Click on Edit Curve to open the curve dialogue.

  • Start Value (Min. Level)
    Set to 15.
  • End Value (Max. Level)
    Set to 100.
  • Interpolation
    Select Quadratic > Quadratic In.
    This gives us a slower increase at the early levels.

Click on Generate Curve to create the curve.

Click on Confirm to accept the curve.

Status Value 6: MDEF #

  • Development Type
    Select Curve.

Click on Edit Curve to open the curve dialogue.

  • Start Value (Min. Level)
    Set to 15.
  • End Value (Max. Level)
    Set to 50.
  • Interpolation
    Select Linear.

Click on Generate Curve to create the curve.

Click on Confirm to accept the curve.

Caster Combatant #

Navigate to Combatants > Combatants and add a new combatant.

Content Information #

  • Name
    Set to: Caster

Base Settings > Prefab Settings #

  • Prefab
    Select the Wizard prefab.

Status Settings > Status Value Settings #

We’ll use the status development we just set up.

  • Has Status Development
    Enable this setting.
  • Status Development
    Select Caster.

Attacks & Abilities > Ability Development #

We’ll add all 4 elemental spells and support magic.

I’ll set them up to be learned at different levels (with a few abilities being available at level 1), but feel free to learn them all at level 1 to test them out.

Click on Add Ability.

  • Learn At Level
    Set to 1.
  • Ability
    Select Fire.

Click on Add Ability again.

  • Learn At Level
    Set to 1.
  • Ability
    Select Water.

Click on Add Ability again.

  • Learn At Level
    Set to 1.
  • Ability
    Select Heal.

Click on Add Ability again.

  • Learn At Level
    Set to 2.
  • Ability
    Select Earth.

Click on Add Ability again.

  • Learn At Level
    Set to 3.
  • Ability
    Select Boost.

Click on Add Ability again.

  • Learn At Level
    Set to 4.
  • Ability
    Select Wind.

Click on Add Ability again.

  • Learn At Level
    Set to 5.
  • Ability
    Select Protect.

Inventory & Equipment > Available Equipment #

The caster can’t equip the Sword or Axe.

  • Available Equipment
    Select Custom.

Available Equipment Slots #

  • All Equipment Slots
    Enable this setting.

Available Equipment #

The caster can’t equip the sword or axe.

  • Exclude Equipment
    Enable this setting.

Click on Add Equipment.

  • Equipment
    Select Sword.

Click on Add Equipment.

  • Equipment
    Select Axe.

Inventory & Equipment > Start Equipment #

The caster will have a Staff equipped at the start.

Click on Add Start Equipment.

  • Start Level
    Set to 1.
  • Maximum Level
    Set to 10.

Click on Add Equipment Slot.

  • Equipment Slot
    Select Weapon.
  • Equipment
    Select Staff.

Animations & Movement > Animations #

We’ll add the Battle Movement animations as animations for battle.

Click on Add Animations (Battle).

  • Animations
    Select Battle Movement.

Save Changes #

That’s it for the settings – before updating the StartGame schematic, we need to save the changes.

Save the changes using the Save Settings button at the bottom of the editor.

Start Game Schematic #

Navigate to Schematics and open the StartGame schematic.

Join Group #

Copy the first Join Group node and put it between it and the Spawn ORK Player node.

You can change connections between nodes by dragging them from their slot to the node you want. Or, when copying a node to the clipboard and pasting it while having a node selected, it’ll be added like any new node with connections.

Change the following setting.

  • Combatant
    Select Caster.

Click on Save Schematic to save the changes.

Testing #

Hit play and start a battle.
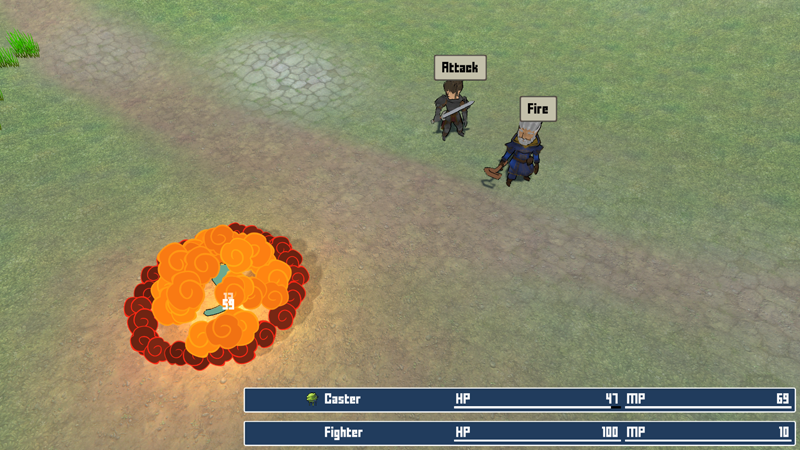
BOOM!

You now have 2 player combatants available. The caster can cast magic attack and support spells, doing great damage!


Next, we’ll add new enemies to fight in the dungeon.

Share This Article :
  • Facebook
  • Twitter
  • LinkedIn
  • Pinterest
Updated on March 9, 2023
Table of Contents
  • Status Development
    • Development Settings
      • Level Range
    • Value Development
      • Status Value 0: Max HP
      • Status Value 1: Max MP
      • Status Value 2: EXP
      • Status Value 3: ATK
      • Status Value 4: DEF
      • Status Value 5: MATK
      • Status Value 6: MDEF
  • Caster Combatant
    • Content Information
    • Base Settings > Prefab Settings
    • Status Settings > Status Value Settings
    • Attacks & Abilities > Ability Development
    • Inventory & Equipment > Available Equipment
      • Available Equipment Slots
      • Available Equipment
    • Inventory & Equipment > Start Equipment
    • Animations & Movement > Animations
  • Save Changes
  • Start Game Schematic
    • Join Group
  • Testing
Sitemap
  • Features
  • Showcase
  • Guide
    • Documentation
    • Tutorials
    • API
  • ORK 2 Hub
    • Tutorials
    • Plugins
    • API
  • Support
  • Forum
  • Get ORK
  • Contact
  • Blog
  • Makinom
  • gamingislove.com
Categories
  • News (60)
  • ORK 2 (137)
    • Tutorial (137)
      • Game tutorial (50)
      • Gameplay (32)
      • How-to (55)
  • Release (130)
Search

© 2015 Gaming is Love e.U.

Disclosure: This site may contain affiliate links, which means I may receive a commission if you click a link and purchase something that I have recommended. While clicking these links won’t cost you any money, they will help me fund my development projects while recommending great assets!