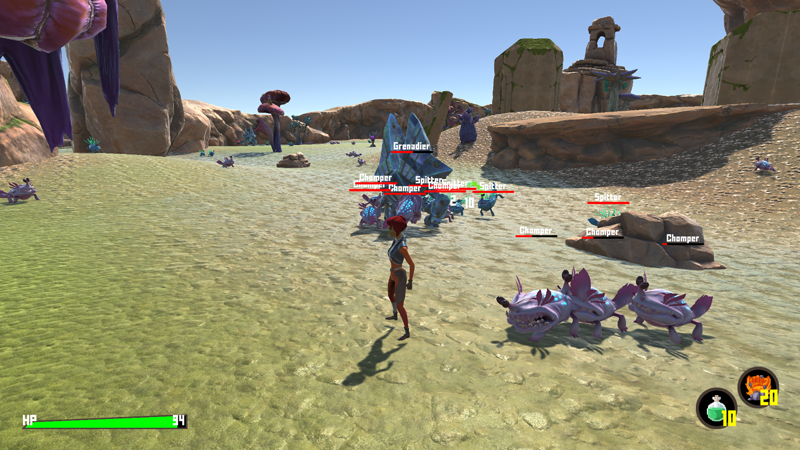
In this tutorial we’ll set up the last enemy.
The Grenadier isn’t like the chomper or spitter – and doesn’t like them either.
We’ll use this enemy in a different faction that’ll be enemies with the player and the other enemies, i.e. everyone will fight each other. However, the grenadier isn’t aggressive until it is attacked by another combatant.
The grenadier will have 3 attacks, a melee punch, a melee spin and a ranged flamethrower attack (we’ll set them up in the following tutorials).
In this tutorial we’ll set up:
- animations
- grenadier faction
- move AI
- combatant
- grenadier prefab setup
- scene setup
Let’s get to it!
Animations #
We’ll start with the animations, we can just copy the Chomper animations and adjust them.
Navigate to Base/Control > Animations and copy the Chomper animation setup.
- Name
Set to Grenadier.
We’ll adjust the name of the animation states used by the different Mecanim animations.
Mecanim Animation 0 #
We’ll also add additional animations for the Damage animation type.
Animation 0 #
- State Name
Set to GrenadierHit1.
Animation 1 #
- State Name
Set to GrenadierHit2.
Animation 2 #
Copy Animation 1.
- State Name
Set to GrenadierHit3.
Animation 3 #
Copy Animation 2.
- State Name
Set to GrenadierHit4.
Mecanim Animation 1 > Animation 0 #
- State Name
Set to GrenadierDeath.
Mecanim Animation 2 > Animation 0 #
- State Name
Set to GrenadierMeleeAttack.
Mecanim Animation 3 > Animation 0 #
- State Name
Set to GrenadierCloseRangeAttack.
Mecanim Animation 4 #
Copy Mecanim Animation 3.
- Animation Type
Select Attack 3.
Animation 0 #
- State Name
Set to GrenadierCloseRangeAttack.
Grenadier Faction #
As said, the grenadier will have it’s own faction – it’ll be an enemy to both the Player and Enemies factions.
Navigate to Combatants > Factions and add a new faction.
- Name
Set to Grenadiers.
Yeah … that’s all we have to do for a faction.
General Settings #
Navigate to Combatants > Factions > General Settings, we’ll now set up the initial sympathy for the new faction.
Faction Sympathies #
Click on Add Faction Sympathy.
- Faction 1
Select Player. - Faction 2
Select Grenadiers. - Sympathy
Set to -1000.
Copy Faction Sympathy 3.
- Faction 1
Select Enemies.
And with that the Grenadiers faction is the enemy of the player and other enemies.
Grenadier Move AI #
Next, we’ll set up the grenadier’s move AI. We’ll again base the new move AI on an existing one, but this time we’ll not react to points of interest and also use hunting instead of caution.
Navigate to Combatants > Move AI and copy the Spitter move AI.
Base Settings #
- Name
Set to Grenadier.
Waypoint Settings > Points Of Interest #
- Use Points Of Interest
Disable this setting.
Enemy Detection #
- Range (Base Detection Range)
Select Value > Value.
Set the value to 20.
Move Detection 1 #
- Range
Select Value > Value.
Set the value to 3.
Move Detection 2 #
Remove this move detection (no PoIs are used).
Hunting Settings #
The hunt mode hunts the target and doesn’t back down – unlike the caution mode, the combatant doesn’t move back when coming too close.
- Use Hunting
Enable this setting. - Use Target Change
Enable this setting.
The target can be changed if a closer target is detected.
Stop Range #
This defines at which distance to the target the combatant will stop.
- Use Stop Range
Enable this setting. - Range
Select Value > Value.
Set the value to 1.
Caution Settings #
- Use Caution
Disable this setting.
Grenadier Combatant #
Next, we’ll set up a new combatant for the grenadier.
Navigate to Combatants > Combatants and add a new combatant.
- Name
Set to Grenadier.
Base Settings #
- Combatant Type
Select Default.
Prefab Settings #
- Prefab
Select Grenadier Variant.
You can find the prefab in Assets/Tutorial Assets/Prefabs/Combatants/.
Status Settings #
- Class
Select Default.
Status Value Settings > Status Values #
Click on Set Default, this adds all Normal type status values (e.g. Max HP, ATK, etc.) with their default initial value.
We now only need to adjust the values as we want them. I’ll just list the status values and their names here – you need to change the Start Value setting of the corresponding status value.
- Max HP
Set to 100. - Max Stamina
Set to 1. - ATK
Set to 20. - RATK
Set to 10.
Battle Settings > Override Settings > AI Settings #
We’ll now set up a custom AI setting for the combatant.
We don’t want it to be aggressive (default setup has any combatant be aggressive) until it’s attacked and also to notify other combatants of it’s faction when it’s attacked (within a certain range).
Not aggressive combatants will not hunt (move AI) or attack anyone.
- Own AI Settings
Enable this setting.
Aggression Settings #
- Aggression Type
Select On Damage.
Since all combatants in our game are spawned on their own (i.e. they’re the only one in their group), we don’t need to notify group members when becoming aggressive.
- Notify Group
Disable this setting. - React to Group
Disable this setting.
However, we want to notify faction members.
- Notify Faction
Enable this setting. - React to Faction
Enable this setting.
The Faction Notification Range defines at which range other faction members will get notified of someone of their faction becoming aggressive. Notified combatants will also become aggressive.
- Range (Faction Notification Range)
Select Value > Value.
Set the value to 30.
Animations & Movement #
We’ll now add the animations we set up, set up the move speed used by the grenadier and the move AI.
Animations #
Click on Add Animations.
- Animations
Select Grenadier.
Movement > Move Speed #
- Own Move Speed
Enable this setting. - Walk Speed
Select Value > Value.
Set the value to 1. - Walk Speed
Select Value > Value.
Set the value to 2. - Walk Speed
Select Value > Value.
Set the value to 4.
Movement > Move AI #
- Own Move AI
Enable this setting. - Use Move AI
Enable this setting. - Move AI
Select Grenadier.
Sound Settings #
Click on Add Sound.
- Sound Type
Select Attack. - Audio Clip
Select metalPot1.
Copy Audio Clip 0.
- Audio Clip
Select metalPot2.
Copy Audio Clip 1.
- Audio Clip
Select metalPot3.
Click on Add Sound to add another sound setup.
- Sound Type
Select Death. - Audio Clip
Select explode.
Save Changes #
That’s it for the setup in the editor.
Don’t forget to save your changes by clicking on Save Settings at the bottom of the editor.
Prefab Setup #
Open the Grenadier Variant prefab for editing – you can find it in Assets/Tutorial Assets/Prefabs/Combatants/.
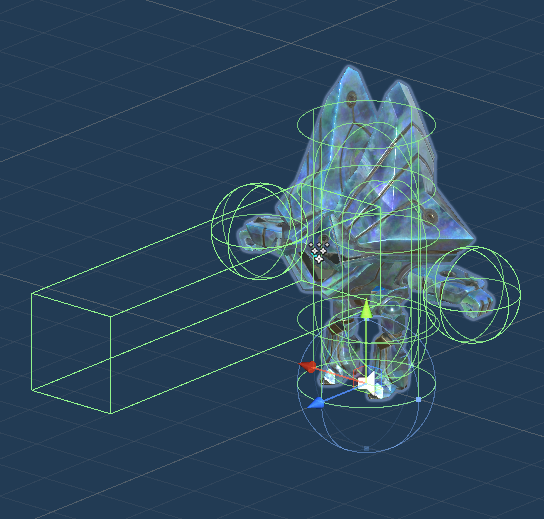
We’ll add multiple Damage Dealer and Damage Zone components, as well as a Radius component.
Add Radius #
Add a Radius component to the prefab’s root using the component menu.
It should automatically set the radius according to the added colliders.
- Radius
Select Value > Value. - Value
Set to 1.
Add Damage Zones #
We’ll add 2 damage zones, one with reduced damage factor and one for a vulnerable spot.
Reduced Damage #
Add a Damage Zone component to the prefab’s root using the component menu.
This time, we’ll change it’s Damage Factor to impact how much the damage is scaled when hitting this damage zone.
- Damage Factor
Set to 0.2.
Damage to this damage zone will only deal 20% of it’s damage.
Vulnerable Spot #
Select the Vulnerable child object (it has a Capsule Collider attached).
Add a Damage Zone component using the component menu.
- Damage Factor
Set to 1.5.
Damage to this damage zone will deal 50% more damage.
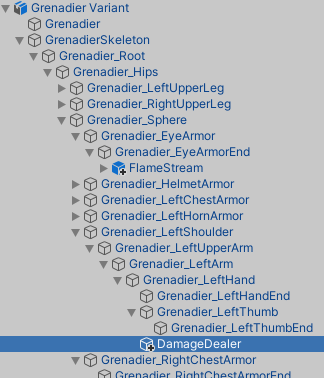
Left Hand Damage Dealer #
The damage dealer on the left hand will be used for a punch attack that’ll deal damage once per combatant.
Find the DamageDealer child object attached to the grenadier’s left hand.
Add a Damage Dealer component using the component menu.
- Start Type
Select Trigger Enter. - Damage Zone From Children
Enable this setting. - Damage Zone From Parent
Enable this setting. - One Time Damage
Enable this setting.
Activation Settings #
We’ll use the activation tag attack for this damage dealer – we’re going to use this in the grenadier’s punch attack.
- Field
Enable this setting. - All Battle Systems
Enable this setting.
Click on Add Activation Tag.
- Activation Tag
Set to attack.
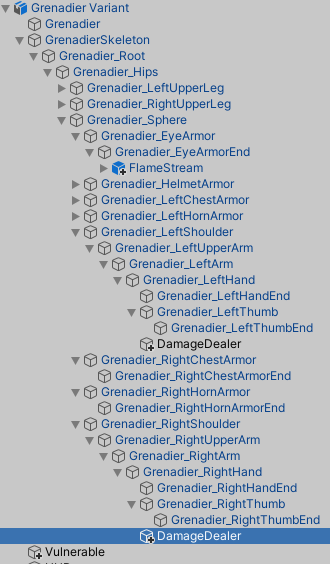
Right Hand Damage Dealer #
The damage dealer on the right hand will be used for a spin attack that’ll deal damage every time it hits a combatant (i.e. multiple damages possible).
Find the DamageDealer child object attached to the grenadier’s right hand.
Add a Damage Dealer component using the component menu.
- Start Type
Select Trigger Enter. - Damage Zone From Children
Enable this setting. - Damage Zone From Parent
Enable this setting.
Activation Settings #
We’ll use the activation tag attack2 for this damage dealer – we’re going to use this in the grenadier’s spin attack.
- Field
Enable this setting. - All Battle Systems
Enable this setting.
Click on Add Activation Tag.
- Activation Tag
Set to attack2.
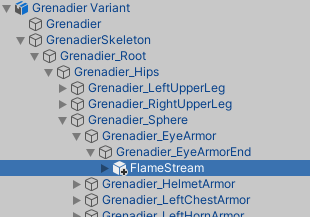
Flame Damage Dealer #
The grenadier’s flamethrower attack will keep dealing damage while combatants are within it’s trigger.
Find the FlameStream child object attached to the grenadier’s eye armor.
Add a Damage Dealer component using the component menu.
- Start Type
Select Trigger Stay. - Damage Zone From Children
Enable this setting. - Damage Zone From Parent
Enable this setting. - Damage Every
Set to 1.
Combatants staying in the trigger will get damaged every second.
Activation Settings #
We’ll use the activation tag flame for this damage dealer – we’re going to use this in the grenadier’s spin attack.
- Field
Enable this setting. - All Battle Systems
Enable this setting.
Click on Add Activation Tag.
- Activation Tag
Set to flame.
We’ll return to the flame in a later tutorial when we add the flamethrower attack. We’re going to use trigger machines to start and stop the flame effect.
And that’s it for the prefab – save the changes.
Scene Setup #
And finally, we’ll add a couple of grenadiers to the Scene scene (Assets/Scenes/).
We’re going to use single spawners, i.e. spawning them at defined positions.
Add a combatant spawner either using the scene hierarchy context menu (ORK Framework > Combatant > Combatant Spawner) or the Makinom scene wizard (Create Game Object > Combatant Spawner (Single)).
Rename the game object to Grenadier and change the game object’s layer to Ignore Raycast (in case you later want to add an area)
- Use Scene ID
Disable this setting.
Combatant Settings #
A combatant is already added for us, let’s set it up.
- Faction
Select Grenadiers. - Use Group
Disable this setting. - Combatant
Select Grenadier. - Quantity
Set to 1. - Respawn
Enable this setting. - Respawn Time
Set to 60.
Spawn Settings #
We’ll enable spawning directly on the NavMesh.
- Use NavMesh Positions
Enable this setting. - Sample Distance
Set to 1.
Placement #
Copy the spawner a couple of times and place them around the scene (between the other spawner areas).
I’m adding 9 grenadiers in total at these locations:
The 3 grenadiers in the upper left area are ideal for testing the faction notification.
Make sure to also check their Y-axis position, so that they’re not too low or high in relation to the ground they’re placed on.
That’s it, save the changes we made in the scene.
Testing #
Hit play and seek out one of the grenadiers.
They can’t do much yet, all they have is the default Do Nothing battle AI and no attacks.
However, if you reach a grenadier before it gets swarmed by the other enemies, you can notice that it’ll ignore you (or other combatants) until it’s attacked.
Next, we’ll add the grenadier’s melee attacks.


