
Use multiple interaction controllers to interact with different things at different ranges.
Want to pick up items all around you but only speak to NPCs or interact with other things when they are right in front of you? This can be done by using a multi interaction controller setup.
In this tutorial we’ll create such a setup:
- 1 interaction controller with a larger range around the player to interact with items
- 1 interaction controller in front of the player to interact with everything
This tutorial is based on the 3D RPG Playground series, but you can use this for any kind of project – just keep the size of your player in mind when creating the interaction controller prefab.
Adding a Machine Type #
First, we’ll add a machine type for our item interactions.
Machine types can be assigned to interactions (and other machine components). Interaction Controllers and Interaction HUDs can be limited to only use defined machine types. E.g. we’ll add an Item machine type and have the larger interaction controller for items only interact with the Item machine type.
Open the editor, navigate to Base/Control > Machine Types and add a new type.
- Name
Set to Item.
Save Changes #
And that’s it for the editor setup for now.
Don’t forget to save your changes by clicking on Save Settings at the bottom of the editor.
You can close the editor now.
Prefab Setup #
Create an empty game object in your scene. We’ll add our 2 interaction controllers as child objects of this game object (and make a prefab out of it).
Item Interactions #
Add an interaction controller as a child object to the empty game object using the scene hierarchy context menu: Makinom > Interaction Controller (3D)
Rename the created game object to Item Interactions.
For interacting with items, we’ll use a Sphere Collider to just pick up anything around the player.
Interaction Controller #
We want to limit this interaction controller to only use the Item machine type, i.e. it can only interact with interactions that use the defined machine type.
- Priority
Set to 0.
The priority of interaction controllers decides the order in which they’ll be checked for available interactions.
They’re sorted by descending priority, i.e. the highest priority value will be used first.
We’ll keep the priority at 0 for the item interactions and prioritize other interactions. - Interact With Nearest
Enable this setting.
The interaction closest to the interaction controller will be used first. - Any Interaction
Disable this setting.
We want to limit this to only use item interactions.
Click on Add Machine Type.
- Machine Type
Select Item.
Box Collider #
We’ll use a Sphere Collider instead, so remove the Box Collider component.
Sphere Collider #
Add a Sphere Collider component using the component menu.
- Is Trigger
Enable this setting. - Radius
Set to 4.
Other Interactions #
Again, add a new interaction controller as a child object of the empty game object using the scene hierarchy context menu: Makinom > Interaction Controller (3D)
Rename the created game object to Other Interactions.
For other interactions, we want to interact with what’s right in front of the player, so we’ll stick with the default Box Collider.
Transform #
To have the box in front of the player, we need to move it forward on the Z axis.
- Position
Set to X=0, Y=0, Z=1.
The position is based on the 3D RPG Playground’s player, which has a radius of 0.7.
Interaction Controller #
This interaction controller should be able to interact with anything, so we don’t limit it.
- Priority
Set to 1.
Due to having a higher priority than the item interaction controller it’ll be used first (if it has an available interaction). - Interact With Nearest
Enable this setting. - Any Interaction
Enable this setting.
We want to interact without limitations.
Box Collider #
We’ll adjust the hight to match the player’s height of 3.
- Size
Set to X=1.5, Y=3, Z=1.
The finished interaction controller will look like this.

Create Prefab #
Create a prefab out of the root game object, e.g. name it Multi Interaction Controller.
You can remove the game object from the scene now.
Interaction Settings #
Next, we use the prefab we created in the interaction settings to automatically add it to the player.
Open the editor and navigate to Base/Control > Game Controls.
Interaction Settings #
I’ll also list the general setup for using an interaction controller.
- Interaction Control
Select Interaction Controller. - Interact Key
Select the input key you want to interact with, e.g. the Accept key.
We’ll automatically add the interaction controller to the player using our prefab.
- Add Automatically (Interaction Controller)
Enable this setting. - IC Prefab
Select the Multi Interaction Controller prefab we created.
We’ll also place it at half height of our player combatant (height is 3, i.e. 1.5) to match it with the prefab’s setup. The box interaction controller (for all interactions) should be placed in front of the player covering it’s full height.
- Offset
Set to X=0, Y=1.5, Z=0.
Inventory Settings (Optional) #
Let’s also change how items are collected – instead of showing a dialogue, we’ll just collect them immediately and use a notification to show what we collected.
Navigate to Inventory > Inventory Settings.
Item Collection #
If you’re also basing this on the 3D RPG Playground tutorials, you’ll have set up using an animation and audio clip after collection – we’ll at least remove the animation.
After Collection (Ok) #
- Use Animation
Disable this setting. - Play Sound
Enable this setting if you want to play a sound. - Audio Clip
Select the audio clip you want to play, e.g. chainmail1 when using the 3D RPG Playground assets.
Collection Dialogue #
- Show Dialogue
Disable this setting.
We don’t show the collection dialogue, using inventory notifications instead.
Tip!
You can also set up the Collection Dialogue to work similar to a notification, but you can’t make use of UI layouts or notification queues in that case.
For this, enable Auto Close in the collection dialogue’s settings.
Notification Settings #
If you haven’t set up notifications in your project yet, check out this tutorial from the 3D RPG Playground series (you only need to follow the Notification UI Box and Notifications setup).
We’ll only use Add notifications for adding items to the player’s inventory and sitck with the default notification setup from the tutorial. So, we only have to enable showing the notifications and can even keep the default texts (I’ll list them anyway).
Item Added #
- Show Notification
Enable this setting. - Text (Message Content)
Set to: <name> (<quantity>) added
Equipment Added #
- Show Notification
Enable this setting. - Text (Message Content)
Set to: <name> (<quantity>) added
Currency Added #
- Show Notification
Enable this setting. - Text (Message Content)
Set to: <name> (<quantity>) added
If you use AI behaviours or AI rulesets in your project, you can also set up the AI Behaviour Added and AI Ruleset Added notifications.
For crafting recipes, you can find the notifications in Inventory > Crafting Settings & Types > General Settings.
Save Changes #
And that’s it for the editor setup.
Don’t forget to save your changes by clicking on Save Settings at the bottom of the editor.
Item Collectors #
To get Item Collectors recognized by the larger interaction controller, we need to use the Item machine type we set up.
This is done in the Start Settings of an Item Collector component.
If you’re looking for a tutorial on adding item collectors, check out this tutorial from the 3D RPG Playground series.
Start Settings #
- Machine Type
Select Item.
Object Turn Settings #
Since we simply collect the items without any dialogue or animation, we also don’t want the player to turn to the item.
- Turn Starting Object
Disable this setting.
Testing #
Test your interaction controllers on regular interactions and item collectors (using the Item machine type).

Having the regular interaction right in front of the player works as usual (the interaction being in the Other Interactions controller).
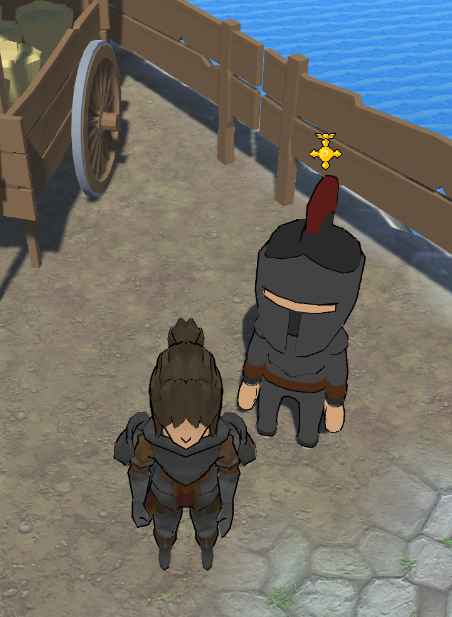
Not facing it will not allow us to interact with it (it’s still in the Item Interactions controller). So far, this is the usual behaviour when using a single interaction controller.
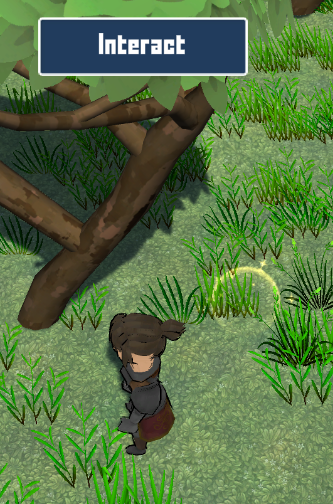
However, the item collector (with Item machine type) is also available when not facing it and being a bit away from it.
Interacting with it now will immediately collect it and show the item notification.
Here’s the whole thing in action:
Tip: Unwanted Notifications #
When setting up Item Added and similar notifications you might get spammed with these notifications at certain times, e.g. from a combatant’s start inventory or your project’s start game schematic.
Nodes like the Add To Inventory node have an option for showing or not showing notifications.
However, you can also completely block notifications using a Block Notifications node – e.g. use one at the start of your start game schematic to block notifications and one at the end to allow notifications again to prevent any notifications from your initial game and inventory setup to show notifications.


