
In this tutorial we’ll add areas to the game.
Areas are used to give content information to, well, areas in your game. They can also be used to separate bestiary data or teleports in menus.
Learn more about areas in this documentation.
Notification UI Box #
First, it’s time for another new UI box, which we’ll use for notifications that are popping up, e.g. when we enter an area.
The notification should be displayed in the upper right corner of the screen and adjust to it’s content.
UI Box Prefab #
We’ve arleady set up such a UI box, the Blue Center Fit we used for the start menu. Copy it’s prefab (UI Box Blue Center Fit) and edit the copy.
Style it to your liking, e.g. I’m using the Box Beige background image for content and title, a dark font color and increase the content’s font size a bit.
The content box is anchored to the upper right corner of the screen and I’ve increased it’s width to 600. Additionally, I’ve centered the title box at the top of the content box and also center the content’s text.

Rename your finished prefab, e.g. UI Box Beige Top Right Notification.
UI Box Setup #
Navigate to UI > UI Boxes and add a new UI box.
Base Settings #
- Name
Set to Beige Top Right Notification. - UI Layer
Select HUDs.
Unity UI #
- UI Box Prefab
Select UI Box Beige Top Right Notification.
Override Default Settings > Schematics #
I’m also using the move from right and move to right schematics from the UI animations schematics to animate this UI box.
- Own Schematics
Enable this setting. - Before Open Schematic
Select the UIMoveFromRightFadeIn schematic. - Wait
Enable this setting. - Before Close Schematic
Select the UIMoveToRightFadeOut schematic. - Wait
Enable this setting.
UI Layout #
Additionally, we’ll set up an UI Layout that’ll be used to list multiple UI boxes (e.g. notifications) in a vertical arrangement.
Navigate to UI > UI Layouts and change the Default layout.
UI Layout Settings #
- Name
Set to Top Right Notifications. - Layout Type
Select List.
List Layout Settings #
- Anchor
Select Upper Right.
Things will be listed from the upper right corner of the screen. - Padding
Set to X=0, Y=100, Z=100, W=0.
This’ll add 100 to the top and right side for listing things. - Spacing
Set to 20. - List Fill
Select Vertical. - Fill Anchor
Select Upper Right.
Move Settings #
We’ll also animate moving things in the layout when something was removed, e.g. moving everything up if the first thing in the list was removed.
- Use Move
Enable this setting. - Time
Set to 0.2. - Interpolation
Select Quadratic > Quadratic In + Out.
Notifications #
Navigate to UI > Notifications, we’ll set up the default notification settings and area notifications.
Notification Settings #
These settings define the default notification handling used by all notifications, but all notifications can optionally use their own setup as well.
- Default Queue Mode
Select Add.
New notifications will just be added to already displaying notifications.
We’ll use the UI layout we set up to keep things organized.
Default UI Box #
Here we’ll define the UI box and UI layout all notifications will use. As said, if you want a notification to use a different UI box, you can let it override these settings.
- UI Box
Select Beige Top Right Notification. - Use UI Layout
Enable this setting. - UI Layout
Select Top Right Notifications - Shared Layout
Enable this setting.
In case we use the layout somewhere else (and also as a shared layout) all content will use the same layout instance. - Can Accept
Disable this setting.
The notification can’t be controlled, e.g. to close it by accepting the dialogue. - Visible Time
Set to 3.
The notification is displayed for 3 seconds before it’s closed.
Area Notifications #
The area notifications can also be set up in Game > Area Settings & Types.
- Close On Scene Change
Enable this setting.
In case we display an area notification while changing scenes it’ll immediately be removed. - Own Queue Mode
Enable this setting.
We also want to immediately replace an already displaying area notification with the new area. - Queue Mode
Select Replace.
Area Notification #
- Show Notification
Enable this setting.
We’ll show the area’s type as the notification UI box’s title.
- Show Title
Enable this setting. - Text (Title Content)
Set to: <typename>
We’ll show the area’s name as the actual content of the notification.
- Text (Message Content)
Set to: <name>
Area Types #
Next, we’ll set up the area types – navigate to Game > Area Settings & Types, we’ll change the Default type and add additional types.
0: Settlements #
- Name
Set to Settlements. - Description
Set to: Where people live.
1: Fields #
- Name
Set to Fields. - Description
Set to: Where animals and monsters live.
2: Dungeons #
- Name
Set to Dungeons. - Description
Set to: Where evil lives.
Areas Setup #
Next, we’ll set up the areas.
Navigate to Game > Areas, we’ll change the Default area and add additional areas.
0: Town #
- Name
Set to Town. - Description
Set to: A small town with lovely people.
Area Settings #
- Area Type
Select Settlements.
1: Outpost #
Copy the Town area.
- Name
Set to Outpost. - Description
Set to: A small outpost out in the wild.
2: Forest #
Add a new area.
- Name
Set to Forest. - Description
Set to: You know what a forest is.
Area Settings #
- Area Type
Select Fields.
3: Forest Ruins #
Copy the Forest area.
- Name
Set to Forest Ruins. - Description
Set to: Ruins of a long lost civilization, overgrown by the forest.
4: Swamp Ruins #
Copy the Forest Ruins area.
- Name
Set to Swamp Ruins. - Description
Set to: A swamp, filled with ruins of a dead civilization.
5: Rolling Hills #
Copy the Swamp Ruins area.
- Name
Set to Rolling Hills. - Description
Set to: Hills covered in grass and green.
6: Dungeon Floor 1 #
Add a new area.
- Name
Set to Dungeon Floor 1. - Description
Set to: The first floor of the dungeon.
Area Settings #
- Area Type
Select Dungeons.
7: Dungeon Floor 2 #
Copy the Dungeon Floor 1 area.
- Name
Set to Dungeon Floor 2. - Description
Set to: The second floor of the dungeon.
8: Dungeon Floor 3 #
Copy the Dungeon Floor 2 area.
- Name
Set to Dungeon Floor 3. - Description
Set to: The third floor of the dungeon.
9: Dungeon Floor 4 #
Copy the Dungeon Floor 3 area.
- Name
Set to Dungeon Floor 4. - Description
Set to: The fourth floor of the dungeon.
10: Dungeon Final Floor #
Copy the Dungeon Floor 4 area.
- Name
Set to Dungeon Final Floor. - Description
Set to: The last floor of the dungeon.
Don’t forget to save your changes by clicking on Save Settings at the bottom of the editor.
Scene Setup #
We’ll add our areas to the game using Area components.
You can add them either via the scene hierarchy context menu (ORK Framework > Zone > Area) or the Makinom scene wizard (Create Game Object > Area).
There are different variations available:
- Area
Creates an area that changes the game’s current area automatically on Start, e.g. when the scene is loaded. - Area 2D
Creates an area that changes the game’s current area when the player enter’s the 2D trigger of the area. - Area 3D
Creates an area that changes the game’s current area when the player enter’s the 3D trigger of the area.
We’ll use the start and 3D trigger variations.
Dungeon Level 1 – 5 #
For the Dungeon Level 1 to Dungeon Level 5 scenes (not the Dungeon Battle Arena), we’ll also use the Area that changes automatically. The dungeon scenes can be found in Assets/Scenes/Dungeon/.
- Area
Select Dungeon Floor 1 to Dungeon Final Floor (level 5 being the final floor).
Due to the Auto Name setting being enabled by deault, your area game object’s name will automatically adjust to it’s selected area.
World #
Open the World scene (Assets/Scenes/), this time we’ll use the Area 3D, which has a Sphere Collider added, used as a trigger.
We need to place multiple areas – however, some of them will match with our already placed music players, so we can add an Area component to some of them instead of creating new game objects.
Town #
Select the Music Player Town game object and add an Area component to it.
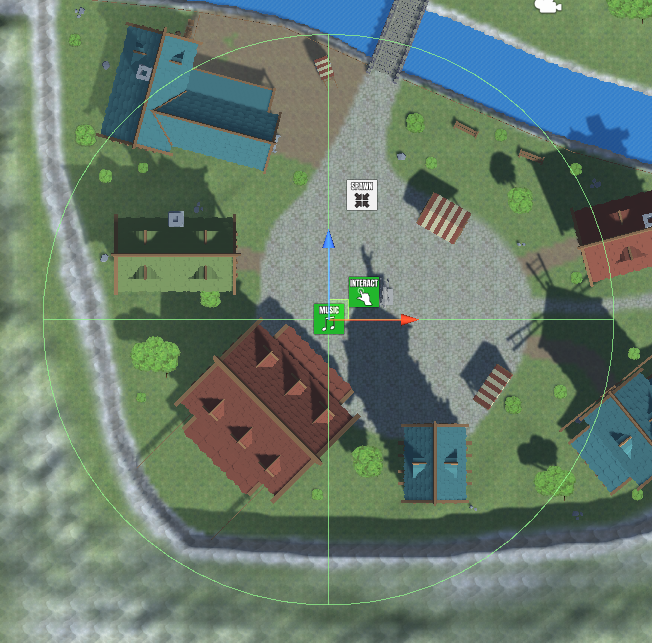
- Area
Select Town.
Outpost #
Select the Music Player Outpost game object and add an Area component to it.
- Area
Select Outpost.
Forest #
Select the Music Player Forest Town game object and add an Area component to it.

- Area
Select Forest.
Add a new area at the upper end of the other bridge on the right side of the terrain. Increase the Radius of the Sphere Collider a bit, I’m using a radius of 10.
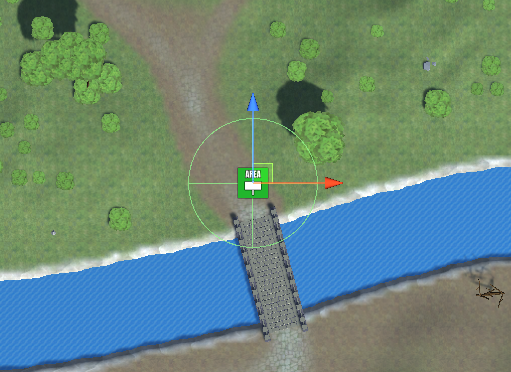
- Area
Select Forest.
Forest Ruins #
Add the area ruins in the forest (upper right area of the terrain) and increase the Radius of the Sphere Collider to cover the ruins. I’m using a radius of 40.
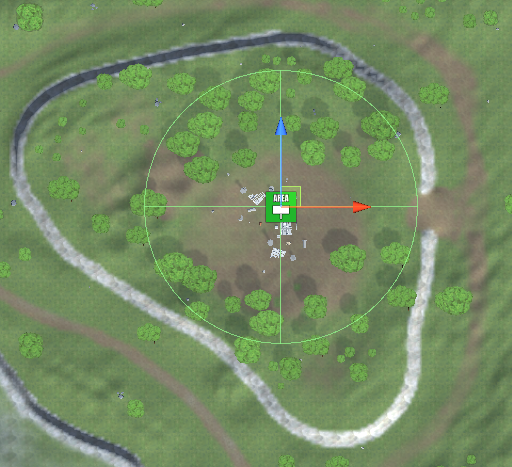
- Area
Select Forest Ruins.
Now, we want to change back to the forst area when leaving the ruins – we could add another Area component to the same game object, just changing areas on trigger enter, but that might lead to quickly switching area notifications when moving on the edge of the collider.
Instead, add another area at the same position and use a slightly bigger Radius on the Sphere Collider. I’m using a radius of 45.

- Area
Select Forest.
We also need to change the start settings to use Trigger Exit. You can find these settings in Start Settings > Trigger of the component.
- Trigger Enter
Disable this setting. - Trigger Exit
Enable this setting.
Swamp Ruins #
Add the area ruins in the swamp (lower right area of the terrain) and increase the Radius of the Sphere Collider to cover the ruins and lower exit of the bridge. I’m using a radius of 150.

- Area
Select Forest Ruins.
Rolling Hills #
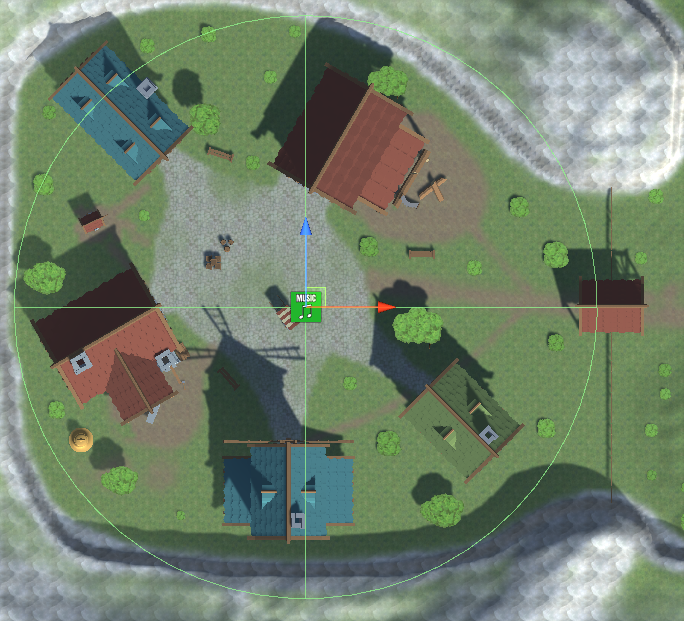
Select the Music Player Forest Outpost game object and add an Area component to it.

- Area
Select Rolling Hills.
Select the Music Player Forest Dungeon game object and add an Area component to it.

- Area
Select Rolling Hills.
Add the new area somewhere at the border between the green and brown areas.
Remove the Sphere Collider and add a Box Collider instead. Increase the Size of the Box Collider and change the rotation of the game object to cover all possible ways between swamp and rolling hills. E.g. I’m using a rotation of Y=-25 and a size of X=10, Y=50, Z=250.
Don’t forget to set up the Box Collider as a trigger:
- Is Trigger
Enable this setting.
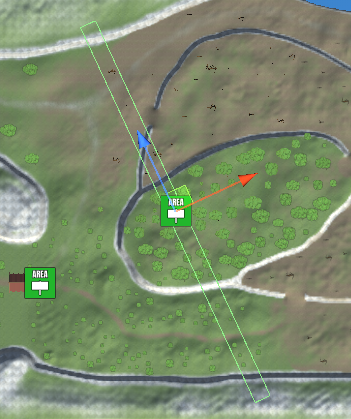
- Area
Select Forest Ruins.
Testing #
And that’s it – save the scene.
Hit play and you’ll now hear the town theme when spawning, switching to the forest theme when leaving town, etc.
Next, we’ll look into collecting items.
(Optional) Organizing the scene, again #
In case you organzed your music players under a parent object, add the areas to them as well and rename it to Music and Areas.


