In this tutorial we’ll add items to pick up.
You can use Item Collector components to add items to your scene that can be collected by the player. Item collectors can be used in 2 ways – either to collect a single kind of item (e.g. a potion) or as a box, containing multiple items that can be selected.
We’ll only place single items for now, this also allows us to spawn a prefab at the place of the item collector for the item that is used.
Pick Up Animation #
Before handling our item collection, let’s add a pick up animation that we’ll play when collecting an item.
Animation Type #
Navigate to Base/Control > Animation Types and add a new animation type.
- Name
Set to Pick Up.
Animation #
Navigate to Base/Control > Animations and add a new animation setting.
Base Settings #
- Name
Set to Pick Up.
Legacy Settings #
Click on Add Legacy Animation.
- Animation Type
Select Pick Up. - Animation Name
Set to PickUp. - Set Layer
Enable this setting. - Animation Layer
Set to 2.
Combatants General Settings #
Navigate to Combatants > Combatants > General Settings, we’ll add the pick up animation as a default animation for all combatants.
Animations & Movement > Default Animations #
Click on Add Animation (not battle).
- Animations (in new Animation 1)
Select Pick Up.
Item Collection Setup #
Navigate to Inventory > Inventory Settings and change the following settings.
Inventory Settings > Default Item Prefab #
First, we’ll set up the default item prefab that’ll be used by all items, equipment, etc. – individual items/equipment/etc. can optionally override that to use a different prefab.
- Item Prefab
Select the Item prefab (can be found in Assets/Tutorial Assets/Prefabs/).
This prefab is a simple game object with a Box Collider (for being able to interact with it) and a particle effect to make it noticable.
If you use a different prefab, check where the game object’s root position is, i.e. local X=0, Y=0, Z=0. The Item prefab used here is set up to have that position at the bottom of the collider. If the prefab’s root position would be somewhere else, e.g. in the center of a collider, you can use the Spawn Offset to adjust for that position, otherwise items could spawn in the ground.
Item Collection #
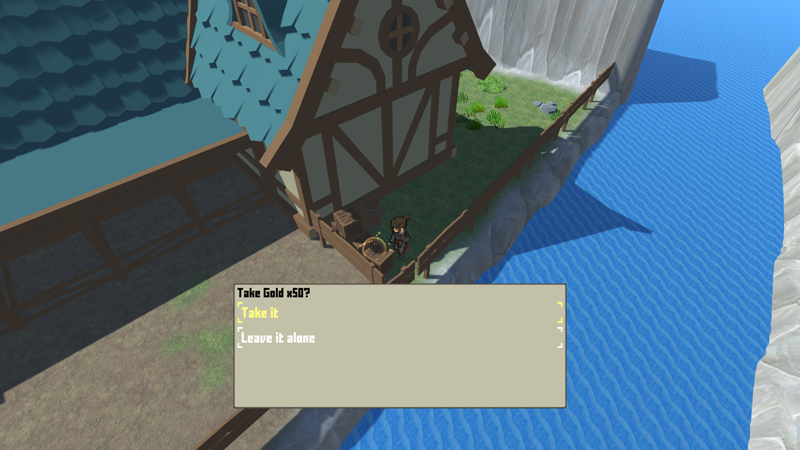
These settings handle how collecting single items (not item boxes) is handled. We’ll set up using our pickup animation and the item collection dialogue.
After Collection (Ok) #
You can play an animation and sound when picking up something – we’ll do both.
- Use Animation
Enable this setting. - Animation Type
Select Pick Up. - Play Sound
Enable this setting. - Audio Clip
Select chainmail1.
Collection Dialogue #
- Show Dialogue
Enable this setting. - UI Box
Select Beige Bottom Dialogue.
Collection Dialogue > Collect Item #
- Text (Item Message)
Set to: Take <name> x<quantity>?
Collection Dialogue > Collect Currency #
- Text (Currency Message)
Set to: Take <name> x<quantity>?
Collection Dialogue > Choice Settings #
- Allow Choice
Enable this setting.
The player can decide if the item is collected or not. - Use Choice
Enable this setting.
We’ll use choice input buttons instead of ok/cancel buttons (or just accept/cancel input keys). - Text (Yes Button)
Set to: Take it - Text (No Button)
Set to: Leave it alone
That’s it four our editor setup – don’t forget to save your changes by clicking on Save Settings at the bottom of the editor.
Scene Setup #
I’ll just give you a few examples of how to set up an Item Collector in the scene, feel free to add additional items.
You can add an item collector either via the scene hierarchy context menu (ORK Framework > Item Collector) or the Makinom scene wizard (Create Game Object > Item Collector).
Usually, an item should only be collected once – this is automatically handled for us by the Scene ID setup of the item collector. This is by default enabled and each new item collector will automatically receive a new, unused scene ID. When the player collects the item, that scene ID is marked as collected (for the current scene) and the item will not be available again when returning to the scene.
Potion #
Now, let’s add a first item to the scene. Add an Item Collector to the scene using the context menu or scene wizard.
I’m adding mine near the trees at the town’s exit.
Change the following settings on the Item Collector component in the inspector.
- Use Scene ID
This should be enabled and have the scene ID 0 assigned, since this is the first item collector added to the scene.
Collection Settings #
- Collection Type
Select Single.
We collect a single item and don’t use this as an item box.
We can use the default setup, but let’s take a look at some of the settings.
- Destroy Object
Enable this setting.
The item collector will be destroyed after collection (or when it is already collected when returning to the scene). - Show Dialogue
Enable this setting.
The item collection dialogue will be displayed.
The Control Block Settings handle blocking player controls as well as blocking the move AI for all combatants – this would e.g. prevent enemies hunting the player from getting closer during item collection.
Item Settings #
- Spawn Prefab
Enable this setting.
The item’s prefab will be spawned, the player can also interact with the spawned prefab (or in our setup, only with the spawned prefab, since the item collector itself doesn’t have a collider).
You can add multiple items to an item collector – in Single collection type, one of the added items will be used randomly. We’ll just change the already added item.
- Type
Select Item. - Item
Select Potion. - Quantity
Select Value >Value.
Set the value to 3.
You can also use the item’s Chance to determine if the item is available for collection or not. The item can be marked as collected if the chance fails when also enabling Set On Fail.
Start Settings #
The item collector is by default set up as an interaction, i.e. using the Interact start type. You can also use different start types, e.g. on trigger enter (requires a collider with Is Trigger enabled).
Currency, but only from the front #
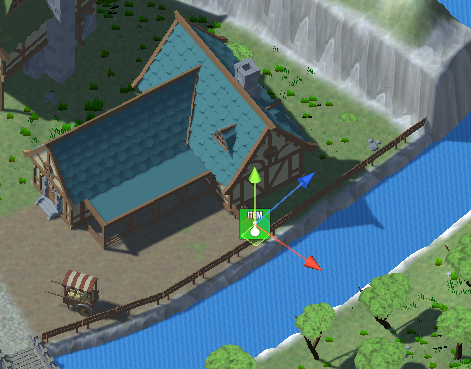
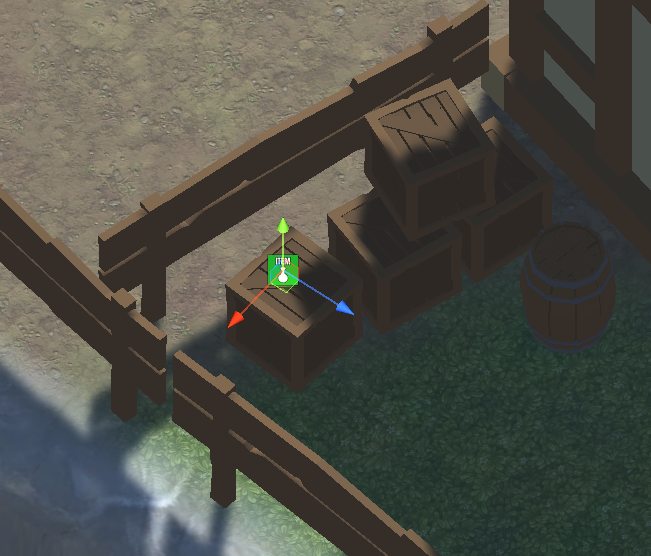
Add another item collector on the crates beside the river.
To be more precise, add it so that it’s on a crate behind the fence.
With that setup, we player could collect it from behind the fence or going around the building – we want to limit that, so that the player has to go around the building to collect the item.
For this, we’ll first change the rotation
Transform #
- Rotation
Set to X=0, Y=-90, Z=0.
This’ll make the game object’s front face away from the fence.
Change the following settings on the Item Collector component in the inspector.
Collection Settings #
- Use Scene ID
You can notice that the scene ID of this new item collector is set to 1. - Collection Type
Select Single.
Item Settings #
- Spawn Prefab
Enable this setting. - Type (Item)
Select Currency. - Currency
Select Gold. - Quantity
Select Value >Value.
Set the value to 50.
Conditions #
We’ll add an Orientation condition to limit interaction to the front.
Click on Add Condition.
- Condition Type
Select Orientation. - Front
Enable this setting. - Back/Left/Right
Disable these settings.
Now, the player can only interact with this item collector when standing in front of it.
More! #
Add more items throughout the World scene, e.g. collecting various potions, equipment and other riches.
You can also add them to the dungeon levels if you want.
Testing #
And that’s it – save the scene.
Hit play, run to one of your items and collect it by interacting with it.
Next, we’ll add visible equipment.


