ORK Framework Logo - RPG Editor for Unity
  • Features
  • Showcase
  • Guide
    • Documentation
    • Tutorials
    • API
  • ORK 2
    • Tutorials
    • Plugins
    • API
  • Support
  • Forum
  • Get ORK

2D RPG Quickstart

  • START 2D RPG Quickstart
  • 01 Initial Setup
  • 02 Player Setup
  • 03 Music & Scenes
  • 04 UI System Setup
  • 05 UI Boxes
  • 06 Flying Texts
  • 07 Status Values
  • 08 Status Effects
  • 09 First Abilities
  • 10 Fighter Setup
  • 11 First Enemies & Battle AI
  • 12 Battle System Setup
  • 13 Animating Battle Start and End
  • 14 Random Battles
  • 15 Animating Actions
  • 16 Player Battle HUD
  • 17 Elemental Attacks
  • 18 Animating More Actions
  • 19 Inventory & Loot
  • 20 Equipment
  • 21 Loot, Start Equipment & Viewers
  • 22 Magic Abilities
  • 23 Caster Setup
  • 24 More Enemies
  • 25 Start Menu & Save Games
  • 26 Menu Screens
  • 27 Interactions
  • 28 Item Collectors
  • END 2D RPG Quickstart

3D RPG Quickstart

  • START 3D RPG Quickstart
  • 01 Initial Setup
  • 02 Player Setup
  • 03 Music & Scenes
  • 04 UI System Setup
  • 05 UI Boxes
  • 06 Flying Texts
  • 07 Status Values
  • 08 Status Effects
  • 09 First Abilities
  • 10 Fighter Setup
  • 11 First Enemies & Battle AI
  • 12 Battle System Setup
  • 13 Animating Battle Start and End
  • 14 Random Battles
  • 15 Animating Actions
  • 16 Player Battle HUD
  • 17 Elemental Attacks
  • 18 Animating More Actions
  • 19 Inventory & Loot
  • 20 Equipment
  • 21 Loot, Start Equipment & Viewers
  • 22 Magic Abilities
  • 23 Caster Setup
  • 24 More Enemies
  • 25 Start Menu & Save Games
  • 26 Menu Screens
  • 27 Interactions
  • 28 Item Collectors
  • END 3D RPG Quickstart

Status System Setup

  • START Status System Setup
  • 01 Status Values
  • 02 Status Development
  • 03 Attack/Defence Modifiers
  • 04 Status Effects
  • 05 Formulas
  • 06 Ability & Item Types
  • 07 Abilities Part 1: Attacks
  • 08 Abilities Part 2: Support & Sabotage
  • 09 Abilities Part 3: Elemental Magic
  • 10 Items
  • 11 Equipment Part 1: Slots & Slot Set Templates
  • 12 Equipment Part 2: Weapons
  • 12.5 (Optional) Equipment Part 2.5: Weapons
  • 13 Equipment Part 3: Shields, Armor & Accessories
  • 13.5 (Optional) Equipment Part 3.5: Shields, Armor & Accessories
  • 14 Equipment Part 4: Available Equipment Templates
  • 15 Loot
  • 16 Battle AIs
  • 17 Combatants Part 1: General Settings
  • 18 Combatants Part 2: Players
  • 19 Combatants Part 3: Enemies
  • 20 Combatant Groups
  • END Status System Setup

3D RPG Playground

  • START 3D RPG Playground
  • 01 Player Setup
  • 02 Start Menu
  • 03 First Interaction
  • 04 Music
  • 05 Areas
  • 06 Collecting Items
  • 07 Displaying Equipment
  • 08 Combatant Prefabs, Icons & Portraits
  • 09 Combatant Animations
  • 10 Camera Positions
  • ANIM 01 Battle Start/End Schematics
  • ANIM 02 Use, Cast & Camera
  • ANIM 03 Abilities & Items
  • ANIM 04 Physical Attacks
  • ANIM 05 Special Actions
  • BATTLE 01 Battle Menu
  • BATTLE 02 Prepare for Battle
  • TURN 01 Turn Based Setup
  • TURN 02 Turn Order HUD
  • ATB 01 Active Time Setup
  • ATB 02 Cast Times
  • ATB 03 Timebar HUD
  • BATTLE 03 The First Battle
  • BATTLE 04 Hunting Move AI
  • BATTLE 05 Spawning Combatants
  • 11 Save Games
  • MENU 01 UI Boxes
  • MENU 02 Template HUDs
  • MENU 03 Overview Menu
  • MENU 04 Menu Screens
  • 12 Shop
  • BATTLE 06 Random Battles
  • DUNGEON 01 Enter the Dungeon
  • DUNGEON 02 The Trapdoor
  • DUNGEON 03 Enemies on Level 1 & 2
  • DUNGEON 04 Traps on Level 3
  • DUNGEON 05 Going Deeper
  • 13 Bestiary (+MENU+ANIM)
  • QUEST 01 Hunting Quests (+MENU)
  • QUEST 02 Guard NPC
  • QUEST 03 Forest Ruin Cheese
  • QUEST 04 Witch NPC with Cheese
  • QUEST 05 Quest Mark HUDs
  • 14 Research Trees (+MENU)
  • CRAFT 01 Crafting Materials
  • CRAFT 02 Crafting Recipes
  • CRAFT 03 Crafting Menu
  • CRAFT 04 Crafting Proficiency & Critical Crafting
  • CRAFT 05 Materials Loot
  • 15 Changing Choice Dialogue
  • 16 Follow Me!
  • BATTLE 07 Sequence Loot Dialogue

3D Action RPG

  • START 3D Action RPG
  • 01 Status System Setup
  • 02 Player Setup
  • 03 Player Weapon
  • 04 Player Attacks
  • 05 Enemy: Chomper
  • 06 Chomper Attack
  • 07 Hit & Death
  • 08 HUDs
  • 09 Rolling on the Floor
  • 10 Enemy: Spitter
  • 11 Spit Attack
  • 12 Potion
  • 13 Grenade
  • 14 Item HUD
  • 15 Enemy: Grenadier
  • 16 Grenadier Melee Attacks
  • 17 Grenadier Flamethrower
  • 18 Item Drops
  • END 3D Action RPG

2D Grid Battle RPG

  • START 2D Grid Battle RPG
  • 01 Player Setup
  • 02 Prefab & Music Setup
  • 03 Randomizing Combatants
  • 04 UI Setup
  • 05 Battle Start, End & Phase Schematics
  • 06 Battle System Setup
  • 07 Battle Grid Setup
  • 08 Grid Move
  • 09 Forest Battle Grid
  • 10 Battle AI
  • 11 Ability Ranges
  • 12 Death & Use Schematics
  • 13 Attack Schematic
  • 14 Shoot Schematics
  • 15 Battle Selection Interaction
  • END 2D Grid Battle RPG

Schematics

  • Simple Start Schematic
  • Battle Start Schematic
  • Battle End Schematic
  • Moving to Target and Back
  • Animating a Base Attack
  • Animating a Magic Ability
  • Grid Movement
  • Open and Close UI Animations
  • Flying Text Mover

UI Setups

  • Unity UI: Initial Setup
  • Unity UI: TextMesh Pro Setup
  • Unity UI: UI Box
  • Unity UI: Flying Text
  • Unity UI: Dragging Notification
  • Unity UI: Canvas with Screen Space Camera
  • Unity UI: Interaction HUD
  • Unity UI: Simple Player HUD
  • Unity UI: Quest HUD
  • Unity UI: Shortcuts HUD
  • Unity UI: Currency HUD
  • Unity UI: Tooltip HUD
  • Unity UI: Control HUD
  • Unity UI: Attack Modifiers
  • Unity UI: Defence Modifiers

Gameplay Bits

  • Combining Input Origins
  • Combining Status Value Flying Texts
  • Fun With Flying Text
  • HUD Effects With Conditional Schematics
  • Inventory Containers
  • Multi Interaction Controllers
  • World Space HUD
  • World Space Dialogue
  • Home
  • Guide
  • Tutorials
  • 3D RPG Playground
  • DUNGEON 01 Enter the Dungeon

DUNGEON 01 Enter the Dungeon

Table of Contents
  • Dungeon Entry
    • Adding a Spawn Point
      • Transform
      • Spawn Point
    • Adding a Scene Changer
      • Scene Change Settings > Scene Settings > Target Scene 0
  • Dungeon Exit
    • Adding a Game Starter
    • Adding a Spawn Point
      • Transform
      • Spawn Point
    • Adding a Scene Changer
      • Scene Change Settings > Scene Settings > Target Scene 0
  • Testing
  • Camera Control Update
    • ORK Control Settings > Camera Controls
  • Testing, again

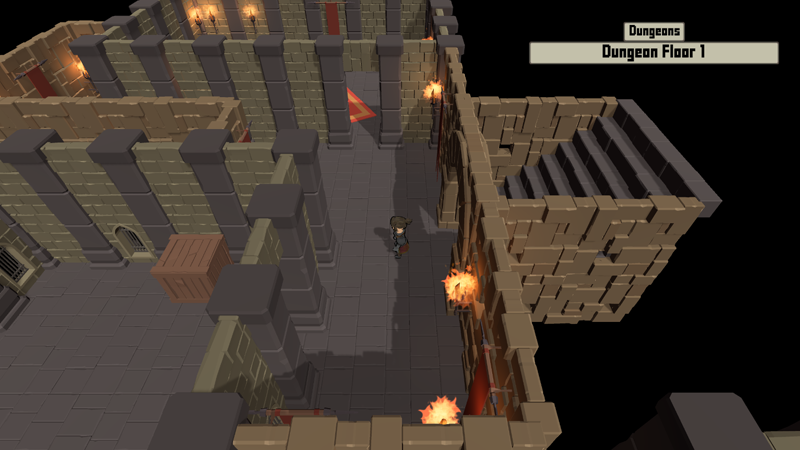
In this tutorial we’ll enter the first level of the dungeon.

This tutorial is the start of the sub-series for setting up the dungeon.

Scenes are connected using Scene Changers and Spawn Points – the player enters a scene changer in a scene, the game loads the next scene and spawns the player at a spawn point.

We’ll connect the World scene to the first level of the dungeon to be able to enter and exit the dungeon.

Dungeon Entry #

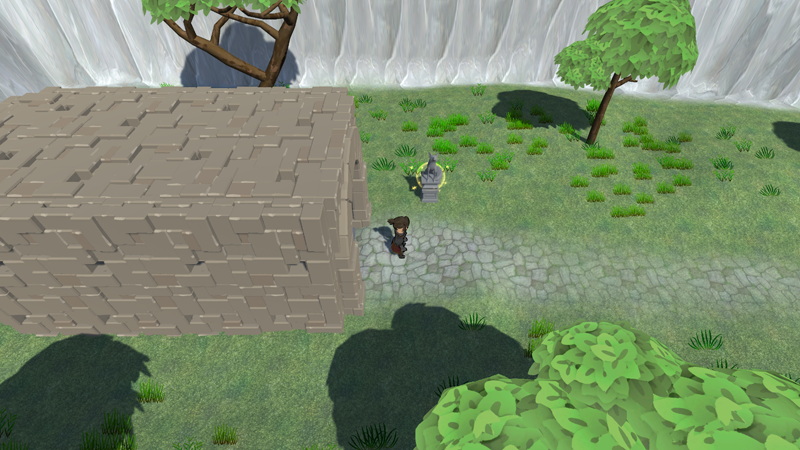
We’ll start in the World scene (Assets/Scenes/), open it and navigate to the dungeon entry.

We’ve already added an Area, Music Player and a Save Point there.

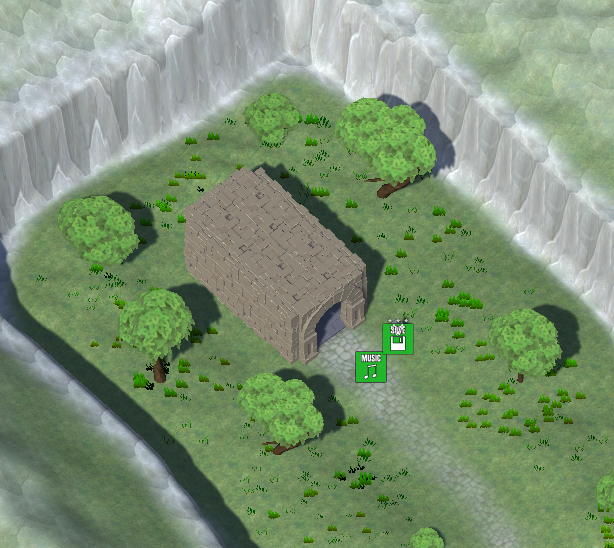
Now, we’ll add a Spawn Point for returning from the dungeon and a Scene Changer to enter the dungeon.

Adding a Spawn Point #

Create a Spawn Point either using the scene hierarchy context menu (Makinom > Spawn Point) or the Makinom scene wizard (Create Game Object > Spawn Point).

The spawn point automatically receives the next unused Spawn ID, which should be 1, since we only have 1 spawn point in our town (which has spawn ID 0). When returning from the dungeon, the scene changer will use spawn ID 1 to place us at this new spawn point.

Transform #

We’ll adjust the rotation of the spawn point’s game object, as we’ll use it for the rotation of our spawning player.

  • Rotation
    Set to X=0, Y=90, Z=0.

Spawn Point #

And we’ll have to enable using the spawn point’s rotation when spawning the player.

  • Use Rotation
    Enable Y, disable X and Z.

Adding a Scene Changer #

Usually we’ll add scene changers like spawn points, i.e. using scene hierarchy context menu or scene wizard to create a new game object.

For our dungeon entry, there’s already most of the setup done for us, as there is already a collider used as trigger added to it.

All we need to do is add a Scene Changer component to the Dungeon Entry game object.

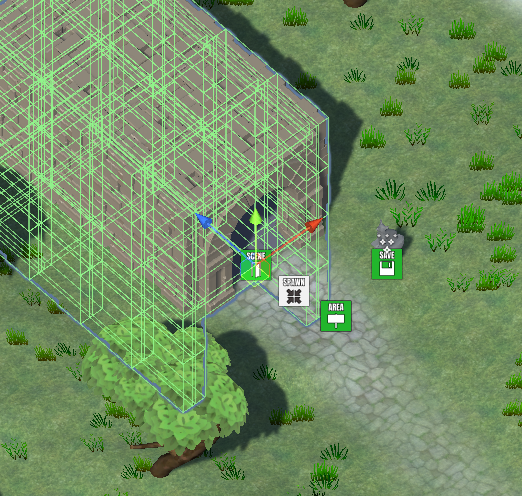
So, select the Dungeon Entry game object (i.e. the root of the dungeon entry) and use the component menu to add a Scene Changer component.

Scene Change Settings > Scene Settings > Target Scene 0 #

All we need to do is set which scene should be loaded by the scene changer.

  • Target Scene
    Set to Dungeon Level 1.
  • Position Type
    Select Spawn ID.
  • Spawn ID
    Select Value > Value.
  • Value (Spawn ID)
    Set to 0.
    This will be the spawn ID of the spawn point we’ll add to the dungeon level 1 scene.

The rest of the scene changer’s setup is arleady how we need it, using Trigger Enter to start the scene change.

That’s it for the World scene – don’t forget to save your changes.

Dungeon Exit #

Open the Dungeon Level 1 scene (Assets/Scenes/Dungeon/).

Adding a Game Starter #

Don’t forget that you need to add a Game Starter to a scene if you want to do a quick playtest right in the scene.

Create an ORK Game Starter either using the scene hierarchy context menu (ORK Framework > ORK Game Starter) or the Makinom scene wizard (Add ORK Game Starter > Add ORK Game Starter).

It doesn’t really matter where you place the game starter, but make sure to enable Start Game for quick game testing.

  • Start Game
    Enable this setting.

Adding a Spawn Point #

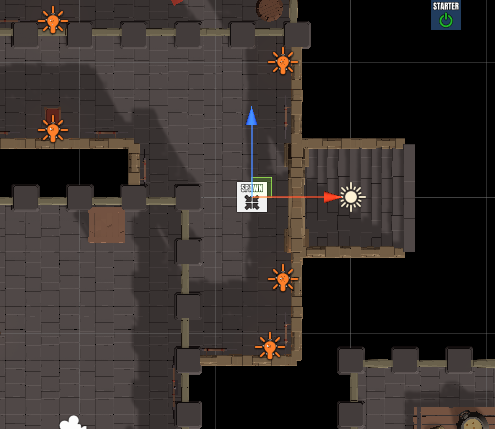
Again, create a Spawn Point either using the scene hierarchy context menu (Makinom > Spawn Point) or the Makinom scene wizard (Create Game Object > Spawn Point).

Place the spawn point in front of the stairs leading upwards – but not too close, as we’ll also add a scene changer to the stairs.

Like before, we’ll use the spawn point’s rotation for rotating the player.

Transform #

  • Rotation
    Set to X=0, Y=-90, Z=0.

Spawn Point #

  • Use Rotation
    Enable Y, disable X and Z.

Adding a Scene Changer #

Like with the dungeon entry, the staircase already has a collider used as trigger added to it, so we just need to add the Scene Changer component.

Select the Entrance_Staircase_Block game object – you can easily select it by clicking on the arch of the staircase.

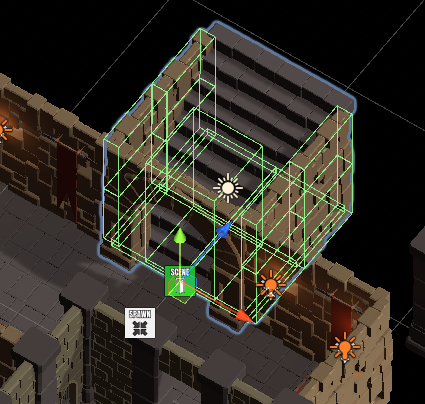
The scene changer has to be added to the root game object (Entrance_Staircase_Block), not one of it’s child objects. Use the component menu to add a Scene Changer component.

Scene Change Settings > Scene Settings > Target Scene 0 #

All we need to do is set which scene should be loaded by the scene changer.

  • Target Scene
    Set to World.
  • Position Type
    Select Spawn ID.
  • Spawn ID
    Select Value > Value.
  • Value (Spawn ID)
    Set to 1.
    This was the spawn ID of the spawn point we added in front of the dungeon entry.

And that’s it for now – don’t forget to save your changes.

Testing #

Since we added a Game Starter to the scene, we can directly hit play in the Dungeon Level 1 scene and test our scene connection.

Run into the stairs and the World scene will load, spawning the player in front of the dungeon entry. Running back into the entry will load the Dungeon Level 1 scene again.

If you didn’t mute the audio, you’ll also hear the music change as it should.

However, you probably noticed the camera somewhat moving after loading the next scene – let’s fix that.

Camera Control Update #

Navigate to Base/Control > Game Controls and change the following setting.

ORK Control Settings > Camera Controls #

  • Initial Damping
    Disable this setting.
    This’ll prevent the first camera change in a scene from using position damping, immediately setting it to the player’s position.

Testing, again #

Hit play, change scenes – no strange camera move, great!

Next, we’ll handle … the trapdoor!

Share This Article :
  • Facebook
  • Twitter
  • LinkedIn
  • Pinterest
Updated on January 3, 2022
Table of Contents
  • Dungeon Entry
    • Adding a Spawn Point
      • Transform
      • Spawn Point
    • Adding a Scene Changer
      • Scene Change Settings > Scene Settings > Target Scene 0
  • Dungeon Exit
    • Adding a Game Starter
    • Adding a Spawn Point
      • Transform
      • Spawn Point
    • Adding a Scene Changer
      • Scene Change Settings > Scene Settings > Target Scene 0
  • Testing
  • Camera Control Update
    • ORK Control Settings > Camera Controls
  • Testing, again
Sitemap
  • Features
  • Showcase
  • Guide
    • Documentation
    • Tutorials
    • API
  • ORK 2 Hub
    • Tutorials
    • Plugins
    • API
  • Support
  • Forum
  • Get ORK
  • Contact
  • Blog
  • Makinom
  • gamingislove.com
Categories
  • News (60)
  • ORK 2 (137)
    • Tutorial (137)
      • Game tutorial (50)
      • Gameplay (32)
      • How-to (55)
  • Release (130)
Search

© 2015 Gaming is Love e.U.

Disclosure: This site may contain affiliate links, which means I may receive a commission if you click a link and purchase something that I have recommended. While clicking these links won’t cost you any money, they will help me fund my development projects while recommending great assets!