ORK Framework Logo - RPG Editor for Unity
  • Features
  • Showcase
  • Guide
    • Documentation
    • Tutorials
    • API
  • ORK 2
    • Tutorials
    • Plugins
    • API
  • Support
  • Forum
  • Get ORK

Status System Setup

  • START Status System Setup
  • 01 Status Values
  • 02 Status Development
  • 03 Attack/Defence Modifiers
  • 04 Status Effects
  • 05 Formulas
  • 06 Ability & Item Types
  • 07 Abilities Part 1: Attacks
  • 08 Abilities Part 2: Support & Sabotage
  • 09 Abilities Part 3: Elemental Magic
  • 10 Items
  • 11 Equipment Part 1: Slots & Slot Set Templates
  • 12 Equipment Part 2: Weapons
  • 12.5 (Optional) Equipment Part 2.5: Weapons
  • 13 Equipment Part 3: Shields, Armor & Accessories
  • 13.5 (Optional) Equipment Part 3.5: Shields, Armor & Accessories
  • 14 Equipment Part 4: Available Equipment Templates
  • 15 Loot
  • 16 Battle AIs
  • 17 Combatants Part 1: General Settings
  • 18 Combatants Part 2: Players
  • 19 Combatants Part 3: Enemies
  • 20 Combatant Groups
  • END Status System Setup

3D RPG Playground

  • START 3D RPG Playground
  • 01 Player Setup
  • 02 Start Menu
  • 03 First Interaction
  • 04 Music
  • 05 Areas
  • 06 Collecting Items
  • 07 Displaying Equipment
  • 08 Combatant Prefabs, Icons & Portraits
  • 09 Combatant Animations
  • 10 Camera Positions
  • ANIM 01 Battle Start/End Schematics
  • ANIM 02 Use, Cast & Camera
  • ANIM 03 Abilities & Items
  • ANIM 04 Physical Attacks
  • ANIM 05 Special Actions
  • BATTLE 01 Battle Menu
  • BATTLE 02 Prepare for Battle
  • TURN 01 Turn Based Setup
  • TURN 02 Turn Order HUD
  • ATB 01 Active Time Setup
  • ATB 02 Cast Times
  • ATB 03 Timebar HUD
  • BATTLE 03 The First Battle
  • BATTLE 04 Hunting Move AI
  • BATTLE 05 Spawning Combatants
  • 11 Save Games
  • MENU 01 UI Boxes
  • MENU 02 Template HUDs
  • MENU 03 Overview Menu
  • MENU 04 Menu Screens
  • 12 Shop
  • BATTLE 06 Random Battles
  • DUNGEON 01 Enter the Dungeon
  • DUNGEON 02 The Trapdoor
  • DUNGEON 03 Enemies on Level 1 & 2
  • DUNGEON 04 Traps on Level 3
  • DUNGEON 05 Going Deeper
  • 13 Bestiary (+MENU+ANIM)
  • QUEST 01 Hunting Quests (+MENU)
  • QUEST 02 Guard NPC
  • QUEST 03 Forest Ruin Cheese
  • QUEST 04 Witch NPC with Cheese
  • QUEST 05 Quest Mark HUDs
  • 14 Research Trees (+MENU)
  • CRAFT 01 Crafting Materials
  • CRAFT 02 Crafting Recipes
  • CRAFT 03 Crafting Menu
  • CRAFT 04 Crafting Proficiency & Critical Crafting
  • CRAFT 05 Materials Loot
  • 15 Changing Choice Dialogue
  • 16 Follow Me!
  • BATTLE 07 Sequence Loot Dialogue

3D Action RPG

  • START 3D Action RPG
  • 01 Status System Setup
  • 02 Player Setup
  • 03 Player Weapon
  • 04 Player Attacks
  • 05 Enemy: Chomper
  • 06 Chomper Attack
  • 07 Hit & Death
  • 08 HUDs
  • 09 Rolling on the Floor
  • 10 Enemy: Spitter
  • 11 Spit Attack
  • 12 Potion
  • 13 Grenade
  • 14 Item HUD
  • 15 Enemy: Grenadier
  • 16 Grenadier Melee Attacks
  • 17 Grenadier Flamethrower
  • 18 Item Drops
  • END 3D Action RPG

2D Grid Battle RPG

  • START 2D Grid Battle RPG
  • 01 Player Setup
  • 02 Prefab & Music Setup
  • 03 Randomizing Combatants
  • 04 UI Setup
  • 05 Battle Start, End & Phase Schematics
  • 06 Battle System Setup
  • 07 Battle Grid Setup
  • 08 Grid Move
  • 09 Forest Battle Grid
  • 10 Battle AI
  • 11 Ability Ranges
  • 12 Death & Use Schematics
  • 13 Attack Schematic
  • 14 Shoot Schematics
  • 15 Battle Selection Interaction
  • END 2D Grid Battle RPG

Schematics

  • Simple Start Schematic
  • Battle Start Schematic
  • Battle End Schematic
  • Moving to Target and Back
  • Animating a Base Attack
  • Animating a Magic Ability
  • Grid Movement
  • Open and Close UI Animations
  • Flying Text Mover

UI Setups

  • Unity UI: Initial Setup
  • Unity UI: TextMesh Pro Setup
  • Unity UI: UI Box
  • Unity UI: Flying Text
  • Unity UI: Dragging Notification
  • Unity UI: Interaction HUD
  • Unity UI: Simple Player HUD
  • Unity UI: Quest HUD
  • Unity UI: Shortcuts HUD
  • Unity UI: Currency HUD
  • Unity UI: Tooltip HUD
  • Unity UI: Control HUD
  • Unity UI: Attack Modifiers
  • Unity UI: Defence Modifiers

Gameplay Bits

  • Combining Input Origins
  • Combining Status Value Flying Texts
  • Fun With Flying Text
  • HUD Effects With Conditional Schematics
  • Inventory Containers
  • Multi Interaction Controllers
  • World Space HUD
  • World Space Dialogue
  • Home
  • Guide
  • Tutorials
  • 3D RPG Playground
  • BATTLE 05 Spawning Combatants

BATTLE 05 Spawning Combatants

Table of Contents
  • Prefab Setup
    • Move AI Range Component
      • Box Collider
    • Battle Component
      • Battle Settings
      • Combatant Settings
      • Start Settings
    • Combatant Spawner Component
      • Spawner Settings
      • Combatant Settings
      • Start Settings
    • Create Prefab
  • Adding Prefabs
  • Level Zone
    • Level Settings
  • Testing

In this tutorial we’ll spawn combatants in our scene and let them hunt the player.

This tutorial continues the sub-series for setting up battles.

With our hunting move AI set up, we’re ready to let enemies spawn in our scene and hunt the player. A battle will start when coming close to the enemy (as set up by the Auto Start Battles settings in Combatants > Combatants > General Settings).

We still use placed Battle components to define where battles take place, as otherwise we might start a battle at a bad spot, e.g. with a tree in the middle of the combatants.

We’ll set up a prefab with the following things:

  • a move AI range to limit the area the enemy will move and hunt in
  • a battle to place the battle at a position of our choosing
  • a combatant spawner to spawn a combatant

We’ll also add a Level Zone to the scene, which will manage the levels of our enemies.

Let’s get to it – we’ll add combatants to the World scene (Assets/Scenes/).

Prefab Setup #

First, create a Move AI Range, either using the scene hierarchy context menu (ORK Framework > Move AI > Move AI Range (3D)) or the Makinom scene wizard (Create Game Object > Move AI Range (3D)).

Move AI Range Component #

The newly created game object will be the basis for our prefab.

The Move AI Range component’s default setup is already what we need, limiting random patrol and move range.

However, we’ll adjust it’s Box Collider.

Box Collider #

  • Size
    Set to X=40, Y=40, Z=40.

This gives us enough room – we can adjust it for individually placed combatants/battles.

Battle Component #

Add an empty game object to the Move AI Range game object, e.g. rename it Battle.

Add a Battle component to the empty game object via the component menu in the inspector.

  • Use Scene ID
    Disable this setting.
    The battle is only used for placement and doesn’t start on it’s own.

Battle Settings #

  • Can Escape
    Enable this setting.
    Or rather, keep it enabled, unlike the first battle we want to be able to escape.

Combatant Settings #

Remove the added combatant.

It’s not really needed, but just to make sure.

Start Settings #

Click on None.

The battle will not have any start type, as it’ll be started by the spawned combatant getting close to the player.

Combatant Spawner Component #

Add a combatant spawner as a child object of the Move AI Range game object.

Add the combatant spawner either using the scene hierarchy context menu (ORK Framework > Combatant > Combatant Spawner) or the Makinom scene wizard (Create Game Object > Combatant Spawner (Single)).

  • Use Scene ID
    Disable this setting.
    We’ll use respawning, so our combatants will reappear after some time.

Spawner Settings #

  • Battle Component
    Select the Battle component we just added to the other child object.
    E.g. just drag the game object on the field.

Combatant Settings #

A combatant is already added for us, let’s set it up. We can later adjust this for individually placed prefabs.

  • Faction
    Select Enemies.
  • Use Group
    Enable this setting.
  • Combatant Group
    Select 1x Random.
  • Spawn All
    Disable this setting.
    We’ll only spawn the leader of the enemy group instead of all members.
  • Quantity
    Set to 1.
  • Respawn
    Enable this setting.
  • Respawn Time
    Set to 120.
    Enemies will respawn after 2 minutes.
    Feel free to change the time to your liking.
  • Move AI Range
    Select the parent game object’s Move AI Range component.

Start Settings #

The combatant spawner is already set up to spawn on Start, i.e. automatically.

Create Prefab #

With that, our prefab is ready – create a prefab out of the Move AI Range game object, e.g. name it Combatant Spawner Range.

Now, remove the game object from the scene.

Adding Prefabs #

Now, we’ll place prefabs in the scene, rotate them to have the battles align nicely and … just keep doing that to have battles where you want them.

Limit yourself to the forest area, i.e. the green area above the river. E.g. I’ve added prefabs here:

Don’t forget to bring a bit of variation into the used combatants/groups.

Level Zone #

Now, we’ll add a Level Zone to the scene – it’ll be used by the spawned combatants to set their level.

Add the level zone either using the scene hierarchy context menu (ORK Framework > Zome > Level Zone (Scene)) or the Makinom scene wizard (Create Game Object > Level Zone (Scene)).

This’ll create a scene-wide level zone, you can optionally also use a limited zone by adding a collider (used as trigger) to the level zone’s game object.

Level Settings #

We want the enemies to be at the player’s level or slightly above.

  • Set Levels
    Enable this setting.
  • Set Level
    Select Player.
  • Minimum Offset
    Set to 0.
  • Maximum Offset
    Set to 3.

And that’s it – don’t forget to save the scene.

Testing #

Hit play (maybe disable the first battle to avoid it) and run to areas where you placed the combatant spawner prefabs.

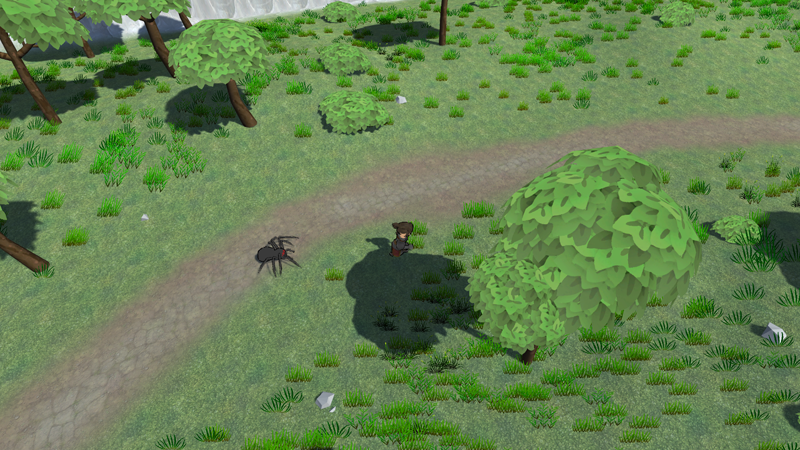
Enemies run around and hunt the player if they see him. If they catch the player, the battle starts.


Next, we’ll set up save games.

Share This Article :
  • Facebook
  • Twitter
  • LinkedIn
  • Pinterest
Updated on January 28, 2022
Table of Contents
  • Prefab Setup
    • Move AI Range Component
      • Box Collider
    • Battle Component
      • Battle Settings
      • Combatant Settings
      • Start Settings
    • Combatant Spawner Component
      • Spawner Settings
      • Combatant Settings
      • Start Settings
    • Create Prefab
  • Adding Prefabs
  • Level Zone
    • Level Settings
  • Testing
Sitemap
  • Features
  • Showcase
  • Guide
    • Documentation
    • Tutorials
    • API
  • ORK 2 Hub
    • Tutorials
    • Plugins
    • API
  • Support
  • Forum
  • Get ORK
  • Contact
  • Blog
  • Makinom
  • gamingislove.com
Categories
  • News (59)
  • ORK 2 (137)
    • Tutorial (137)
      • Game tutorial (50)
      • Gameplay (32)
      • How-to (55)
  • Release (129)
Search

© 2015 Gaming is Love e.U.

Disclosure: This site may contain affiliate links, which means I may receive a commission if you click a link and purchase something that I have recommended. While clicking these links won’t cost you any money, they will help me fund my development projects while recommending great assets!