ORK Framework Logo - RPG Editor for Unity
  • Features
  • Showcase
  • Guide
    • Documentation
    • Tutorials
    • API
  • ORK 2
    • Tutorials
    • Plugins
    • API
  • Support
  • Forum
  • Get ORK

2D RPG Quickstart

  • START 2D RPG Quickstart
  • 01 Initial Setup
  • 02 Player Setup
  • 03 Music & Scenes
  • 04 UI System Setup
  • 05 UI Boxes
  • 06 Flying Texts
  • 07 Status Values
  • 08 Status Effects
  • 09 First Abilities
  • 10 Fighter Setup
  • 11 First Enemies & Battle AI
  • 12 Battle System Setup
  • 13 Animating Battle Start and End
  • 14 Random Battles
  • 15 Animating Actions
  • 16 Player Battle HUD
  • 17 Elemental Attacks
  • 18 Animating More Actions
  • 19 Inventory & Loot
  • 20 Equipment
  • 21 Loot, Start Equipment & Viewers
  • 22 Magic Abilities
  • 23 Caster Setup
  • 24 More Enemies
  • 25 Start Menu & Save Games
  • 26 Menu Screens
  • 27 Interactions
  • 28 Item Collectors
  • END 2D RPG Quickstart

3D RPG Quickstart

  • START 3D RPG Quickstart
  • 01 Initial Setup
  • 02 Player Setup
  • 03 Music & Scenes
  • 04 UI System Setup
  • 05 UI Boxes
  • 06 Flying Texts
  • 07 Status Values
  • 08 Status Effects
  • 09 First Abilities
  • 10 Fighter Setup
  • 11 First Enemies & Battle AI
  • 12 Battle System Setup
  • 13 Animating Battle Start and End
  • 14 Random Battles
  • 15 Animating Actions
  • 16 Player Battle HUD
  • 17 Elemental Attacks
  • 18 Animating More Actions
  • 19 Inventory & Loot
  • 20 Equipment
  • 21 Loot, Start Equipment & Viewers
  • 22 Magic Abilities
  • 23 Caster Setup
  • 24 More Enemies
  • 25 Start Menu & Save Games
  • 26 Menu Screens
  • 27 Interactions
  • 28 Item Collectors
  • END 3D RPG Quickstart

Status System Setup

  • START Status System Setup
  • 01 Status Values
  • 02 Status Development
  • 03 Attack/Defence Modifiers
  • 04 Status Effects
  • 05 Formulas
  • 06 Ability & Item Types
  • 07 Abilities Part 1: Attacks
  • 08 Abilities Part 2: Support & Sabotage
  • 09 Abilities Part 3: Elemental Magic
  • 10 Items
  • 11 Equipment Part 1: Slots & Slot Set Templates
  • 12 Equipment Part 2: Weapons
  • 12.5 (Optional) Equipment Part 2.5: Weapons
  • 13 Equipment Part 3: Shields, Armor & Accessories
  • 13.5 (Optional) Equipment Part 3.5: Shields, Armor & Accessories
  • 14 Equipment Part 4: Available Equipment Templates
  • 15 Loot
  • 16 Battle AIs
  • 17 Combatants Part 1: General Settings
  • 18 Combatants Part 2: Players
  • 19 Combatants Part 3: Enemies
  • 20 Combatant Groups
  • END Status System Setup

3D RPG Playground

  • START 3D RPG Playground
  • 01 Player Setup
  • 02 Start Menu
  • 03 First Interaction
  • 04 Music
  • 05 Areas
  • 06 Collecting Items
  • 07 Displaying Equipment
  • 08 Combatant Prefabs, Icons & Portraits
  • 09 Combatant Animations
  • 10 Camera Positions
  • ANIM 01 Battle Start/End Schematics
  • ANIM 02 Use, Cast & Camera
  • ANIM 03 Abilities & Items
  • ANIM 04 Physical Attacks
  • ANIM 05 Special Actions
  • BATTLE 01 Battle Menu
  • BATTLE 02 Prepare for Battle
  • TURN 01 Turn Based Setup
  • TURN 02 Turn Order HUD
  • ATB 01 Active Time Setup
  • ATB 02 Cast Times
  • ATB 03 Timebar HUD
  • BATTLE 03 The First Battle
  • BATTLE 04 Hunting Move AI
  • BATTLE 05 Spawning Combatants
  • 11 Save Games
  • MENU 01 UI Boxes
  • MENU 02 Template HUDs
  • MENU 03 Overview Menu
  • MENU 04 Menu Screens
  • 12 Shop
  • BATTLE 06 Random Battles
  • DUNGEON 01 Enter the Dungeon
  • DUNGEON 02 The Trapdoor
  • DUNGEON 03 Enemies on Level 1 & 2
  • DUNGEON 04 Traps on Level 3
  • DUNGEON 05 Going Deeper
  • 13 Bestiary (+MENU+ANIM)
  • QUEST 01 Hunting Quests (+MENU)
  • QUEST 02 Guard NPC
  • QUEST 03 Forest Ruin Cheese
  • QUEST 04 Witch NPC with Cheese
  • QUEST 05 Quest Mark HUDs
  • 14 Research Trees (+MENU)
  • CRAFT 01 Crafting Materials
  • CRAFT 02 Crafting Recipes
  • CRAFT 03 Crafting Menu
  • CRAFT 04 Crafting Proficiency & Critical Crafting
  • CRAFT 05 Materials Loot
  • 15 Changing Choice Dialogue
  • 16 Follow Me!
  • BATTLE 07 Sequence Loot Dialogue

3D Action RPG

  • START 3D Action RPG
  • 01 Status System Setup
  • 02 Player Setup
  • 03 Player Weapon
  • 04 Player Attacks
  • 05 Enemy: Chomper
  • 06 Chomper Attack
  • 07 Hit & Death
  • 08 HUDs
  • 09 Rolling on the Floor
  • 10 Enemy: Spitter
  • 11 Spit Attack
  • 12 Potion
  • 13 Grenade
  • 14 Item HUD
  • 15 Enemy: Grenadier
  • 16 Grenadier Melee Attacks
  • 17 Grenadier Flamethrower
  • 18 Item Drops
  • END 3D Action RPG

2D Grid Battle RPG

  • START 2D Grid Battle RPG
  • 01 Player Setup
  • 02 Prefab & Music Setup
  • 03 Randomizing Combatants
  • 04 UI Setup
  • 05 Battle Start, End & Phase Schematics
  • 06 Battle System Setup
  • 07 Battle Grid Setup
  • 08 Grid Move
  • 09 Forest Battle Grid
  • 10 Battle AI
  • 11 Ability Ranges
  • 12 Death & Use Schematics
  • 13 Attack Schematic
  • 14 Shoot Schematics
  • 15 Battle Selection Interaction
  • END 2D Grid Battle RPG

Schematics

  • Simple Start Schematic
  • Battle Start Schematic
  • Battle End Schematic
  • Moving to Target and Back
  • Animating a Base Attack
  • Animating a Magic Ability
  • Animating Target Selection
  • Grid Movement
  • Open and Close UI Animations
  • Flying Text Mover

UI Setups

  • Unity UI: Initial Setup
  • Unity UI: TextMesh Pro Setup
  • Unity UI: UI Box
  • Unity UI: Flying Text
  • Unity UI: Dragging Notification
  • Unity UI: Canvas with Screen Space Camera
  • Unity UI: Interaction HUD
  • Unity UI: Simple Player HUD
  • Unity UI: Quest HUD
  • Unity UI: Battle Actions HUD
  • Unity UI: Shortcuts HUD
  • Unity UI: Currency HUD
  • Unity UI: Tooltip HUD
  • Unity UI: Control HUD
  • Unity UI: Attack Modifiers
  • Unity UI: Defence Modifiers

Gameplay Bits

  • 2.5D Setup
  • Click Attack
  • Combining Input Origins
  • Combining Status Value Flying Texts
  • Fun With Flying Text
  • HUD Effects With Conditional Schematics
  • Inventory Containers
  • Local Multiplayer
  • Multi Interaction Controllers
  • Target Selection Lines
  • World Space HUD
  • World Space Dialogue
  • Home
  • Guide
  • Tutorials
  • 3D RPG Playground
  • CRAFT 05 Materials Loot

CRAFT 05 Materials Loot

Table of Contents
  • New Loot
    • Materials
      • Loot Settings
    • Slime
      • Loot Settings
    • Bone
      • Loot Table 0 > Loot Settings > Item 0
    • Venom
      • Loot Table 0 > Loot Settings > Item 0
    • Bat Wing
      • Loot Table 0 > Loot Settings > Item 0
  • Adding to Combatants
    • Inventory & Equipment > Default Loot Settings
    • Wasp
      • Inventory & Equipment > Loot Settings
    • Snake
      • Inventory & Equipment > Loot Settings
    • Angry Snake
      • Inventory & Equipment > Loot Settings
    • Skeleton
      • Inventory & Equipment > Loot Settings
    • Bat
      • Inventory & Equipment > Loot Settings
    • Slime
      • Inventory & Equipment > Loot Settings
  • Save Changes
  • Testing

In this tutorial we’ll add new loot to get crafting materials from enemies.

This tutorial continues the sub-series for setting up crafting.

We’ll add some default loot for all combatants and some specific loot for individual combatants (e.g. bones from skeletons or slime from … slime).

New Loot #

Navigate to Combatants > Loot, we’ll add new loot.

Materials #

Add a new loot setup – it’ll randomly drop one of the regular crafting materials:

  • empty bottle (30% chance)
  • strange liquid (40% chance)
  • wood (15% chance)
  • iron (15% chance)

That’s a total of 100%, so we’ll get one of these items in any case.

  • Name
    Set to Materials.

Click on Add Loot Table.

Loot Settings #

  • Get Random
    Enable this setting.
    We’ll get one of the added items randomly.
  • Use Chance Selection
    Enable this setting.
    The random selection will be based on the chance values of the individual items.
    Otherwise, it’d randomly select an item and use it’s chance check to see if that item will be dropped (no other is checked).

Click on Add Item.

  • Type
    Select Item.
  • Item
    Select Empty Bottle.
  • Quantity
    Select Value > Value.
    Set the value to 1.
  • Chance
    Select Value > Value.
    Set the value to 30.

Copy the previous item.

  • Item
    Select Strange Liquid.
  • Chance
    Select Value > Value.
    Set the value to 40.

Copy the previous item.

  • Item
    Select Wood.
  • Chance
    Select Value > Value.
    Set the value to 15.

Copy the previous item.

  • Item
    Select Iron.

Slime #

Add a new loot setup, we’ll drop slime at 100% chance.

  • Name
    Set to Slime.

Click on Add Loot Table.

Loot Settings #

Click on Add Item.

  • Type
    Select Item.
  • Item
    Select Slime.
  • Quantity
    Select Value > Value.
    Set the value to 1.

Bone #

Copy the Slime loot.

  • Name
    Set to Bone.

Loot Table 0 > Loot Settings > Item 0 #

  • Item
    Select Bone.

Venom #

Copy the Bone loot.

  • Name
    Set to Venom.

Loot Table 0 > Loot Settings > Item 0 #

  • Item
    Select Venom.

Bat Wing #

Copy the Venom loot.

  • Name
    Set to Bat Wing.

Loot Table 0 > Loot Settings > Item 0 #

  • Item
    Select Bat Wing.

Adding to Combatants #

Next, we’ll add the loot we set up to the combatants.

Navigate to Combatants > Combatants > General Settings – we’ll first add the Materials loot as a default loot for all combatants.

Inventory & Equipment > Default Loot Settings #

Click on Add Loot.

  • Loot
    Select Materials.

Now we’ll add the specific loot to their combatants.

Wasp #

Select the Wasp combatant.

Inventory & Equipment > Loot Settings #

Click on Add Loot.

  • Loot
    Select Venom.

Snake #

Select the Snake combatant.

Inventory & Equipment > Loot Settings #

Click on Add Loot.

  • Loot
    Select Venom.

Angry Snake #

Select the Angry Snake combatant.

Inventory & Equipment > Loot Settings #

Click on Add Loot.

  • Loot
    Select Venom.

Skeleton #

Select the Skeleton combatant.

Inventory & Equipment > Loot Settings #

Click on Add Loot.

  • Loot
    Select Bone.

Bat #

Select the Bat combatant.

Inventory & Equipment > Loot Settings #

Click on Add Loot.

  • Loot
    Select Bat Wing.

Slime #

Select the Slime combatant.

Inventory & Equipment > Loot Settings #

Click on Add Loot.

  • Loot
    Select Slime.

Save Changes #

And that’s it for our loot!

Don’t forget to save your changes by clicking on Save Settings at the bottom of the editor.

Testing #

Hit play, leave town and kill an enemy.

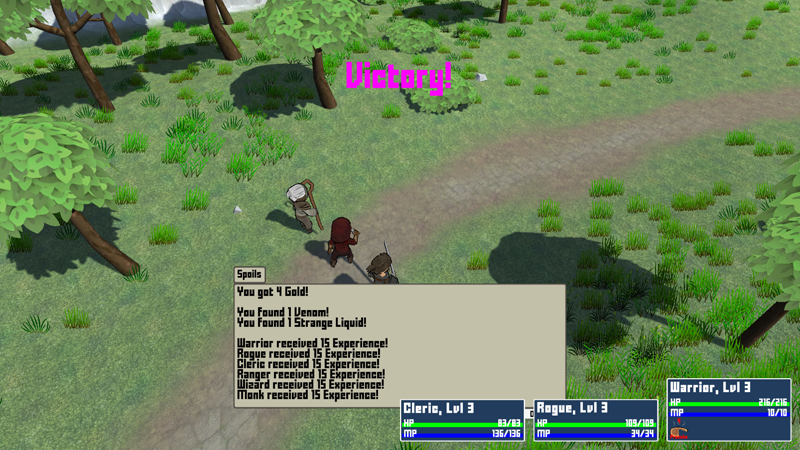
Nice, new materials to improve our crafting proficiency!


Next, we’ll annoy an NPC with a changing choice dialogue.

Share This Article :
  • Facebook
  • Twitter
  • LinkedIn
  • Pinterest
Updated on February 17, 2023
Table of Contents
  • New Loot
    • Materials
      • Loot Settings
    • Slime
      • Loot Settings
    • Bone
      • Loot Table 0 > Loot Settings > Item 0
    • Venom
      • Loot Table 0 > Loot Settings > Item 0
    • Bat Wing
      • Loot Table 0 > Loot Settings > Item 0
  • Adding to Combatants
    • Inventory & Equipment > Default Loot Settings
    • Wasp
      • Inventory & Equipment > Loot Settings
    • Snake
      • Inventory & Equipment > Loot Settings
    • Angry Snake
      • Inventory & Equipment > Loot Settings
    • Skeleton
      • Inventory & Equipment > Loot Settings
    • Bat
      • Inventory & Equipment > Loot Settings
    • Slime
      • Inventory & Equipment > Loot Settings
  • Save Changes
  • Testing
Sitemap
  • Features
  • Showcase
  • Guide
    • Documentation
    • Tutorials
    • API
  • ORK 2 Hub
    • Tutorials
    • Plugins
    • API
  • Support
  • Forum
  • Get ORK
  • Contact
  • Blog
  • Makinom
  • gamingislove.com
Categories
  • News (61)
  • ORK 2 (137)
    • Tutorial (137)
      • Game tutorial (50)
      • Gameplay (32)
      • How-to (55)
  • Release (133)
Search

© 2015 Gaming is Love e.U.

Disclosure: This site may contain affiliate links, which means I may receive a commission if you click a link and purchase something that I have recommended. While clicking these links won’t cost you any money, they will help me fund my development projects while recommending great assets!