
In this tutorial we’ll set up a battle grid in the forest battle scene.
It’s finally time to set up an actual battle grid! This is done by using a Battle Grid component, which lets you generate a grid and change it to your needs, e.g. paint new cell types.
We’ll set up:
- a battle grid in the forest battle scene
- a battle in the forest battle scene
- camera border
Let’s get to it!
Adding a Battle Grid #
Open the Forest Battle 1 scene (Assets/Scenes/).
Use the scene hierarchy context menu (ORK Framework > Battle > Battle Grid) or the scene wizard to add a Battle Grid to the scene.
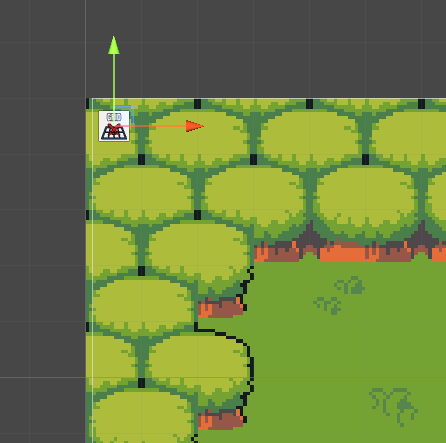
Transform #
We’ll place the battle grid in the upper left corner of the scene.
- Position
Set to X=-19.5, Y=14.5, Z=0.
Make sure to be exact with that position, or the grid cells won’t match up with the tiles.
Battle Grid Generation #
We’ll now set up how our grid should be generated. We’re creating a grid with a size of 40×30 (40 columns, 30 rows), which matches the size of the tilemap.
Grid generation uses raycasts to find positions for the cells, the individual raycasts are positioned based on the game object’s position and the cell size and offset we set up in Battles > Battle Grid Settings. With our setup, the cells should be 1 world unit away from each other, matching the size of the tilemap’s tiles.
We’ll also make use of the level’s setup – placing walkable cells on positions where we hit the Default layer (the Ground tilemap is on that layer, using a Tilemap Collider 2D set up as trigger) and blocked cells on positions where we hit the Blocked layer (the Blocking tilemap is on that layer, also using a Tilemap Collider 2D).
- Rows
Set to 30. - Columns
Set to 40. - Position Anchor
Select Upper Left.
I.e. our grid’s game object is the upper left corner of the grid, where the first cell (row/column 0/0) will be placed. - Cell Type
Select Ground.
This is the grid cell type that’s used for regularly hit positions. - Empty Cell Type
Select Blocked.
Usually this is used for positions that didn’t hit anything, but we’ll set it up to use a separate raycast on a different layer (hitting the Blocked layer).
The Raycast Settings handle which layers are used for our position raycasts when generating the grid.
- Layer Mask
Select only the Default layer.
First select Nothing, then select Default. - Use Empty Layer Mask
Enable this setting.
We’ll raycast using a different layer mask for using the empty cell type (i.e. our blocked cells). - Empty Layer Mask
Slect only the Blocked layer.
First select Nothing, then select Blocked.
Alright, we’re ready to generate our grid!
Click on Generate Grid.
You don’t see much change, but you’ll notice that there now are a lot of new child objects under the Battle Grid game object – each is one cell of the grid.
Grid Setup #
Now, let’s turn on showing the grid in our scene view.
- Show Grid (Editor)
Enable this setting.
This’ll show a handle for each cell. - Show Prefabs (Editor)
Enable this setting.
This’ll show the prefabs of the cell types on each cell. - Show Deployment Info (Editor)
Enable this setting.
This’ll show labels on deployment cells for who can deploy there.
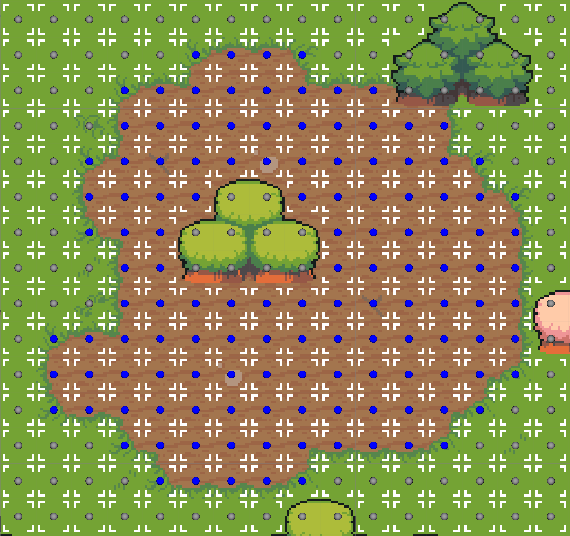
Your scene will now look like this.
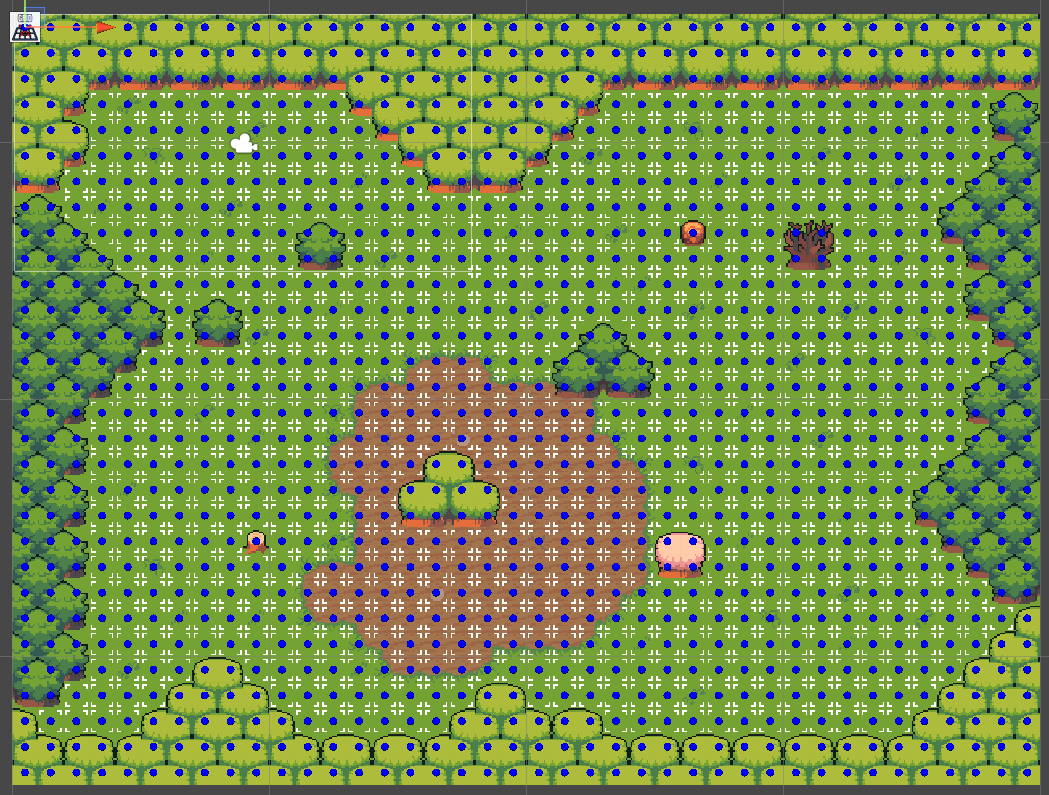
Now it’s time to do some grid painting, we want to change/add the following things.
- player deployment cells in the upper left area of the grid
- enemy deployment cells spread across the grid
- slower movement (Ground Slow) in the brown area in the grid’s center
The Grid Setup in the inspector has the Mode setting, which lets you change the current grid editing mode:
- Select
Select individual cells. - Move
Move cells (game objects). - Rotate
Rotate cells (game objects). - Paint
Paint grid cell types on cells. - Connections
Change connections between cells.
This can e.g. be used to block movement from one cell to another, e.g. allowing jumping down from a ledge, but not moving up.
You can also connect far away cells, making teleports across the grid.
We’ll change to the Paint mode. You can paint on cells using the left mouse button – holding it down let’s you keep painting while moving the mouse.
You can select 2 cell types, one for regular painting and one for holding shift while painting. Additionally, you can pick a cell’s cell type for painting by holding down CTRL when clicking (and shift + CTRL for the shit cell type).
The Brush Size is measured in cell size, so 1 is the size of 1 cell, 2 the size of 2 cells, etc.
- Mode
Select Paint. - Cell Type
Select Player Spawn. - Shift Cell Type
Select Ground.
In case we need to correct some mistakes.
When switching to Paint mode, you might notice that the cell handles switch to grey – while painting, your currently selected cell type for painting impacts the color of the handles. Cells that have the selected cell type (or shift cell type while holding shift) will be colored blue, otherwise grey. This makes it easy to see what we already painted.
Paint Player Spawn #
Now, we’ll paint a few cells for player placement using the Player Spawn grid cell type, we’ll let the player spawn in the small area in the upper left corner of the scene, where we also placed the Battle Grid.
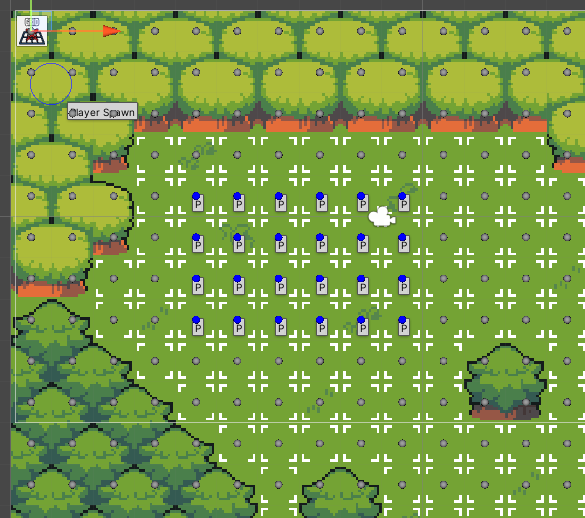
The P label marks these cells as player deployment cells.
Paint Enemy Spawn #
Change to the Enemy Spawn cell type.
- Cell Type
Select Enemy Spawn.
Paint a few cells in the lower right corner of the scene.
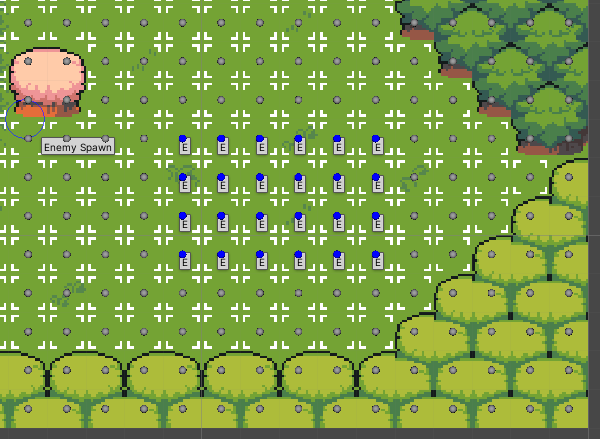
The E label marks these cells as enemydeployment cells.
Paint Ground Slow #
Change to the Ground Slow cell type.
- Cell Type
Select Ground Slow.
Paint the brown area.
Placing Combatants #
We have our player and enemy deployment cells – these are used for the combatants that are coming into battle, e.g. from enemies defined in a Battle component.
However, we can also directly place combatants on cells, so let’s add 2 combatants and deploy them directly on cells.
Switch to Select mode.
- Mode
Select Select.
Select a cell in the center of the area left of the brown area.
Grid Cell Settings #
We now have an individual cell selected, which allows us to change settings of that cell. We’ll add a custom deployment setup for the cell.
- Own Deployment
Enable this setting. - Deployment Type
Select Combatant.
We can define a combatant to deploy here. - Faction
Select Enemies. - Combatant
Select Rogue.
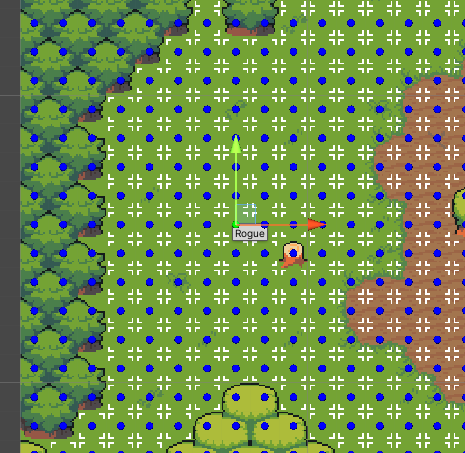
Select another cell in the upper right corner of the scene.
- Own Deployment
Enable this setting. - Deployment Type
Select Combatant. - Faction
Select Enemies. - Combatant
Select Ranger.
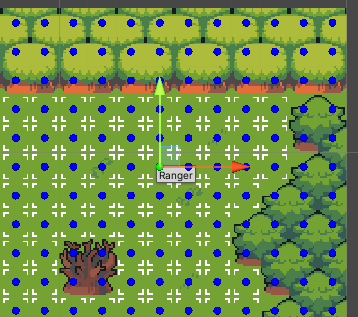
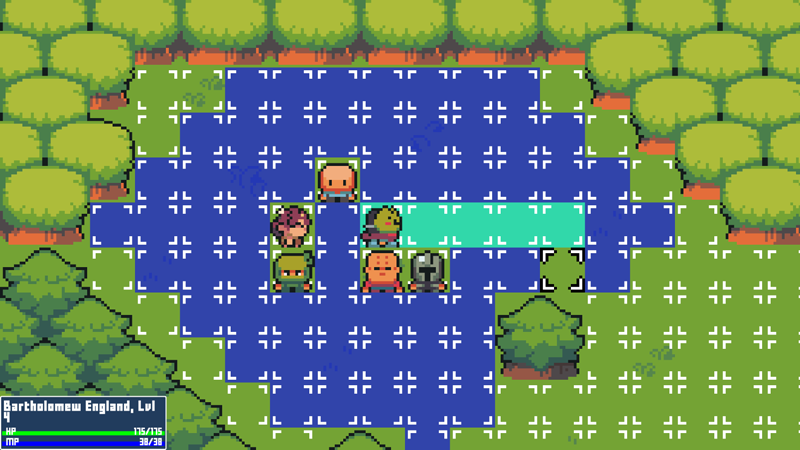
Our finished grid will look like this.

Adding the Battle #
We’ll now add a battle to the scene.
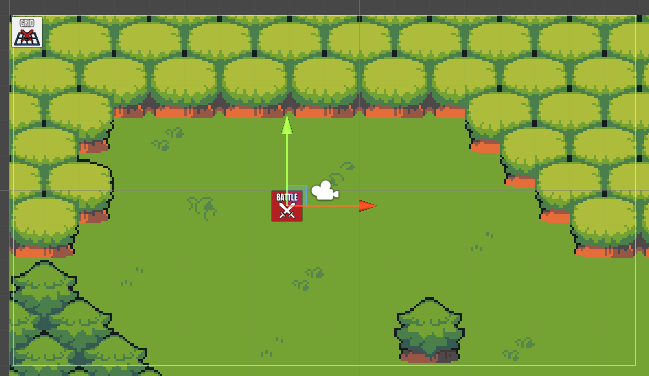
You can either use the scene hierarchy context menu (ORK Framework > Battle > Battle (None)) or the Makinom scene wizard (Create Game Object > Battle (None)) to create a ready-to-use battle. We’re using the None variant because we don’t want to start the battle by entering a trigger, we’ll set it up to automatically start when we load into the scene.
Add the battle in the player spawning area – remember, our battle start schematic will use the battle as camera target, and that’s the area we want to show when starting the battle.
Battle Component #
We’ll not use a scene ID, this allows us to fight this battle multiple times if we want.
- Use Scene ID
Disable this setting.
Battle Settings #
The default setup is already what we need, it’ll use the default battle system (we selected the Phase battle system) and uses the nearest grid (if there is one).
- Grid Use Type
Select Nearest Grid.
Combatant Settings #
This is where you can add combatants or combatant groups that’ll be part of the battle. We’ll add multiple individual combatants and want all of them to be in the battle.
- All Groups/Combatants
Enable this setting.
All individual combatants or groups we add will be in the battle.
Otherwise, one of them will be selected randomly. - Use Faction Groups
Enable this setting.
All individually added combatants or groups will join a combined group (based on their factions).
Click on Add Combatant/Group to add a combatant.
- Faction
Select Enemies. - Use Group
Disable this setting.
We’ll use a defined, single combatant. - Combatant
Select Warrior.
Copy the Combatant 0 setup.
- Combatant
Select Rogue.
Copy the Combatant 1 setup.
- Combatant
Select Ranger.
That should be enough combatants – since we already placed 2 on the grid, that makes a total of 5 enemies.
Start Settings #
Currently, the battle has no start setup enabled, i.e. it’ll not start.
We want to automatically start it when loading into the scene – we can easily set that up with the quick setup buttons.
Click on the Autostart button.
Add Camera Border #
Like in the Town scene, there already is a Camera Border game object covering the whole tilemap with it’s Box Collider 2D set up.
All we need to do is add a Camera Border component to it of them using the component menu.
And we’re done with the forest battle scene setup.
Don’t forget to save the scene.
Testing #
Yes, we can already test the grid a bit.
Hit play in the Forest Battle 1 scene, the battle will start automatically (if not, add a short Start Delay in the Start Settings > Auto settings of the Battle component, e.g. 0.1 second).
You can place your combatants and move around … but the enemy can’t. Not yet.
Next, we’ll update the battle AI to use grid move.


