ORK Framework Logo - RPG Editor for Unity
  • Features
  • Showcase
  • Guide
    • Documentation
    • Tutorials
    • API
  • ORK 2
    • Tutorials
    • Plugins
    • API
  • Support
  • Forum
  • Get ORK

2D RPG Quickstart

  • START 2D RPG Quickstart
  • 01 Initial Setup
  • 02 Player Setup
  • 03 Music & Scenes
  • 04 UI System Setup
  • 05 UI Boxes
  • 06 Flying Texts
  • 07 Status Values
  • 08 Status Effects
  • 09 First Abilities
  • 10 Fighter Setup
  • 11 First Enemies & Battle AI
  • 12 Battle System Setup
  • 13 Animating Battle Start and End
  • 14 Random Battles
  • 15 Animating Actions
  • 16 Player Battle HUD
  • 17 Elemental Attacks
  • 18 Animating More Actions
  • 19 Inventory & Loot
  • 20 Equipment
  • 21 Loot, Start Equipment & Viewers
  • 22 Magic Abilities
  • 23 Caster Setup
  • 24 More Enemies
  • 25 Start Menu & Save Games
  • 26 Menu Screens
  • 27 Interactions
  • 28 Item Collectors
  • END 2D RPG Quickstart

3D RPG Quickstart

  • START 3D RPG Quickstart
  • 01 Initial Setup
  • 02 Player Setup
  • 03 Music & Scenes
  • 04 UI System Setup
  • 05 UI Boxes
  • 06 Flying Texts
  • 07 Status Values
  • 08 Status Effects
  • 09 First Abilities
  • 10 Fighter Setup
  • 11 First Enemies & Battle AI
  • 12 Battle System Setup
  • 13 Animating Battle Start and End
  • 14 Random Battles
  • 15 Animating Actions
  • 16 Player Battle HUD
  • 17 Elemental Attacks
  • 18 Animating More Actions
  • 19 Inventory & Loot
  • 20 Equipment
  • 21 Loot, Start Equipment & Viewers
  • 22 Magic Abilities
  • 23 Caster Setup
  • 24 More Enemies
  • 25 Start Menu & Save Games
  • 26 Menu Screens
  • 27 Interactions
  • 28 Item Collectors
  • END 3D RPG Quickstart

Status System Setup

  • START Status System Setup
  • 01 Status Values
  • 02 Status Development
  • 03 Attack/Defence Modifiers
  • 04 Status Effects
  • 05 Formulas
  • 06 Ability & Item Types
  • 07 Abilities Part 1: Attacks
  • 08 Abilities Part 2: Support & Sabotage
  • 09 Abilities Part 3: Elemental Magic
  • 10 Items
  • 11 Equipment Part 1: Slots & Slot Set Templates
  • 12 Equipment Part 2: Weapons
  • 12.5 (Optional) Equipment Part 2.5: Weapons
  • 13 Equipment Part 3: Shields, Armor & Accessories
  • 13.5 (Optional) Equipment Part 3.5: Shields, Armor & Accessories
  • 14 Equipment Part 4: Available Equipment Templates
  • 15 Loot
  • 16 Battle AIs
  • 17 Combatants Part 1: General Settings
  • 18 Combatants Part 2: Players
  • 19 Combatants Part 3: Enemies
  • 20 Combatant Groups
  • END Status System Setup

3D RPG Playground

  • START 3D RPG Playground
  • 01 Player Setup
  • 02 Start Menu
  • 03 First Interaction
  • 04 Music
  • 05 Areas
  • 06 Collecting Items
  • 07 Displaying Equipment
  • 08 Combatant Prefabs, Icons & Portraits
  • 09 Combatant Animations
  • 10 Camera Positions
  • ANIM 01 Battle Start/End Schematics
  • ANIM 02 Use, Cast & Camera
  • ANIM 03 Abilities & Items
  • ANIM 04 Physical Attacks
  • ANIM 05 Special Actions
  • BATTLE 01 Battle Menu
  • BATTLE 02 Prepare for Battle
  • TURN 01 Turn Based Setup
  • TURN 02 Turn Order HUD
  • ATB 01 Active Time Setup
  • ATB 02 Cast Times
  • ATB 03 Timebar HUD
  • BATTLE 03 The First Battle
  • BATTLE 04 Hunting Move AI
  • BATTLE 05 Spawning Combatants
  • 11 Save Games
  • MENU 01 UI Boxes
  • MENU 02 Template HUDs
  • MENU 03 Overview Menu
  • MENU 04 Menu Screens
  • 12 Shop
  • BATTLE 06 Random Battles
  • DUNGEON 01 Enter the Dungeon
  • DUNGEON 02 The Trapdoor
  • DUNGEON 03 Enemies on Level 1 & 2
  • DUNGEON 04 Traps on Level 3
  • DUNGEON 05 Going Deeper
  • 13 Bestiary (+MENU+ANIM)
  • QUEST 01 Hunting Quests (+MENU)
  • QUEST 02 Guard NPC
  • QUEST 03 Forest Ruin Cheese
  • QUEST 04 Witch NPC with Cheese
  • QUEST 05 Quest Mark HUDs
  • 14 Research Trees (+MENU)
  • CRAFT 01 Crafting Materials
  • CRAFT 02 Crafting Recipes
  • CRAFT 03 Crafting Menu
  • CRAFT 04 Crafting Proficiency & Critical Crafting
  • CRAFT 05 Materials Loot
  • 15 Changing Choice Dialogue
  • 16 Follow Me!
  • BATTLE 07 Sequence Loot Dialogue

3D Action RPG

  • START 3D Action RPG
  • 01 Status System Setup
  • 02 Player Setup
  • 03 Player Weapon
  • 04 Player Attacks
  • 05 Enemy: Chomper
  • 06 Chomper Attack
  • 07 Hit & Death
  • 08 HUDs
  • 09 Rolling on the Floor
  • 10 Enemy: Spitter
  • 11 Spit Attack
  • 12 Potion
  • 13 Grenade
  • 14 Item HUD
  • 15 Enemy: Grenadier
  • 16 Grenadier Melee Attacks
  • 17 Grenadier Flamethrower
  • 18 Item Drops
  • END 3D Action RPG

2D Grid Battle RPG

  • START 2D Grid Battle RPG
  • 01 Player Setup
  • 02 Prefab & Music Setup
  • 03 Randomizing Combatants
  • 04 UI Setup
  • 05 Battle Start, End & Phase Schematics
  • 06 Battle System Setup
  • 07 Battle Grid Setup
  • 08 Grid Move
  • 09 Forest Battle Grid
  • 10 Battle AI
  • 11 Ability Ranges
  • 12 Death & Use Schematics
  • 13 Attack Schematic
  • 14 Shoot Schematics
  • 15 Battle Selection Interaction
  • END 2D Grid Battle RPG

Schematics

  • Simple Start Schematic
  • Battle Start Schematic
  • Battle End Schematic
  • Moving to Target and Back
  • Animating a Base Attack
  • Animating a Magic Ability
  • Grid Movement
  • Open and Close UI Animations
  • Flying Text Mover

UI Setups

  • Unity UI: Initial Setup
  • Unity UI: TextMesh Pro Setup
  • Unity UI: UI Box
  • Unity UI: Flying Text
  • Unity UI: Dragging Notification
  • Unity UI: Canvas with Screen Space Camera
  • Unity UI: Interaction HUD
  • Unity UI: Simple Player HUD
  • Unity UI: Quest HUD
  • Unity UI: Shortcuts HUD
  • Unity UI: Currency HUD
  • Unity UI: Tooltip HUD
  • Unity UI: Control HUD
  • Unity UI: Attack Modifiers
  • Unity UI: Defence Modifiers

Gameplay Bits

  • Combining Input Origins
  • Combining Status Value Flying Texts
  • Fun With Flying Text
  • HUD Effects With Conditional Schematics
  • Inventory Containers
  • Multi Interaction Controllers
  • World Space HUD
  • World Space Dialogue
  • Home
  • Guide
  • Tutorials
  • 3D RPG Playground
  • TURN 02 Turn Order HUD

TURN 02 Turn Order HUD

Table of Contents
  • HUD Prefab Setup
    • Rect Transform
    • Image
    • Rect Mask 2D
    • Portrait
      • Rect Transform
      • HUD Portrait Content
      • UI Portrait
      • Image
    • Create Prefab
  • Turn Order HUD Setup
    • UI Layout
      • UI Layout Settings
      • List Layout Settings
      • Move Settings
    • HUD
      • HUD Settings
      • Turn Order Settings
      • Display Conditions
      • Unity UI
      • Schematics
  • Save Changes

In this tutorial we’ll set up a turn order HUD.

A turn order HUD displays each combatant in it’s own individual HUD – we’ll use an UI layout to arrange them in a horizontal list.

HUD Prefab Setup #

First, we’ll create the prefab for our HUD, we’ll simply display the combatant’s portrait and use a box background image.

Use the scene hierarchy context menu to create a new HUD: Makinom > HUD > HUD (i.e. without any layout)

Let’s adjust the HUD game object to our needs.

Rect Transform #

Since we’ll use an UI layout to position the individual HUDs, we’ll only set the width and height and can ignore the positioning.

  • Width
    Set to 150.
  • Height
    Set to 75.

Image #

Add an Image component to the HUD game object. We’ll use it to add a background image (box) to the HUD.

  • Source Image
    Select the BoxBeige sprite (or any other you like).

Rect Mask 2D #

Add a Rect Mask 2D component to the HUD game object. This’ll hide parts of the HUD that’ll otherwise exceed it’s bounds – our portrait would otherwise be larger than the actual HUD.

  • Padding
    Set all to 3.
    I.e. left, right, top and bottom.
  • Softness
    Set to X=5, Y=5.

Portrait #

Now, we’ll add a portrait content child object to the HUD game object.

We’ll use the scene hierarchy context menu on the HUD game object: Makinom > HUD > Content > Portrait Content (Sprite)

We’re using the Sprite variant due to our portraits being sprites.

Rect Transform #

The Portrait Content child object should be placed like this:

  • Pos X
    Set to 0.
  • Pos Y
    Set to -37.5.
  • Width
    Set to 150.
  • Height
    Set to 150.

HUD Portrait Content #

This component handles which portrait type will be displayed.

  • Portrait Type
    Select Default.

UI Portrait #

This component manages which components are used to display the portrait (e.g. sprite or texture).

We need to disable setting the sprite to it’s native size, adjusting to the size of the game object instead.

  • Sprite Native Size
    Disable this setting.

Image #

We want the portrait to keep it’s aspect ratio – to have access to this setting, we need to first select any sprite (not sliced like the box) in the Source Image field.

Afterwards, change this setting:

  • Preserve Aspect
    Enable this setting.

Remove the sprite afterwards by selecting the None asset in the Source Image field.

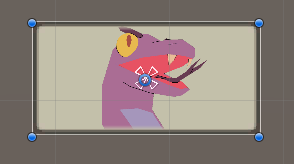
The finished HUD will look something like this (e.g. when using one of the portrait sprites for testing):

Create Prefab #

Create a prefab out of the HUD game object, e.g. naming it Turn Order Portrait HUD.

If you’ve done the setup in one of your game’s scenes, don’t forget to remove the canvas (with the HUD game object).

Turn Order HUD Setup #

Now, we’ll set up our UI layout and turn order HUD.

UI Layout #

Open the Makinom editor and navigate to UI > UI Layouts, we’ll add a new layout.

UI Layout Settings #

  • Name
    Set to Turn Order HUDs.
  • Layout Type
    Select List.

List Layout Settings #

  • Anchor
    Select Upper Left.
  • Padding
    Set to X=100, Y=100, Z=0, W=0.
  • Spacing
    Set to 10.
  • List Fill
    Select Horizontal.
  • Fill Anchor
    Select Upper Left.

Move Settings #

  • Use Move
    Enable this setting.
  • Time
    Set to 0.2.
  • Interpolation
    Select Quadratic > Quadratic In + Out.

HUD #

Next, we’ll set up the HUD. Navigate to UI > HUDs, add a new HUD and change the following settings.

HUD Settings #

  • Name
    Set to Turn Order.
  • HUD Type
    Select Turn Order.
  • Auto Display
    Enable this setting.

Turn Order Settings #

  • Add Selecting Combatant
    Enable this setting.
    The combatant who’s currently selecting actions will also be listed.
  • Multi-Box Layout
    Select UI Layout.
  • UI Layout
    Select Turn Order HUDs (the UI layout we just created).
  • Shared Layout
    Enable this setting.
    It’s usually a good idea to used shared layouts – in case the UI layout is used for multiple things, all content will share the same instance, being arranged together.

Display Conditions #

A Turn Order type HUD will only be displayed during running Turn Based battles, so we could just keep the display conditions as they are.

We’ll set up our Show Battle HUD game state check anyway, maybe we want to hide the battle HUDs in the future (e.g. during a ‘cinematic’ attack, or something like that).

Click on Add Game State.

  • Condition Type
    Select Game State.
  • Game State 
    Select Show Battle HUD.
  • Check State
    Select Active.

Unity UI #

  • UI Layer
    Select HUDs.
  • HUD Prefab
    Select the Turn Order Potrait HUD prefab we just created.

Schematics #

I’m also using the move from right and move to left schematics from the UI animations schematics to animate the HUD.

  • Own Schematics
    Enable this setting.
  • Before Open Schematic
    Select the UIMoveFromRightFadeIn schematic.
  • Wait
    Enable this setting.
  • Before Close Schematic
    Select the UIMoveToLeftFadeOut schematic.
  • Wait
    Enable this setting.

Save Changes #

And that’s it!

Don’t forget to save your changes by clicking on Save Settings at the bottom of the editor.

Next, we’ll set up our first battle!

Share This Article :
  • Facebook
  • Twitter
  • LinkedIn
  • Pinterest
Updated on December 19, 2021
Table of Contents
  • HUD Prefab Setup
    • Rect Transform
    • Image
    • Rect Mask 2D
    • Portrait
      • Rect Transform
      • HUD Portrait Content
      • UI Portrait
      • Image
    • Create Prefab
  • Turn Order HUD Setup
    • UI Layout
      • UI Layout Settings
      • List Layout Settings
      • Move Settings
    • HUD
      • HUD Settings
      • Turn Order Settings
      • Display Conditions
      • Unity UI
      • Schematics
  • Save Changes
Sitemap
  • Features
  • Showcase
  • Guide
    • Documentation
    • Tutorials
    • API
  • ORK 2 Hub
    • Tutorials
    • Plugins
    • API
  • Support
  • Forum
  • Get ORK
  • Contact
  • Blog
  • Makinom
  • gamingislove.com
Categories
  • News (60)
  • ORK 2 (137)
    • Tutorial (137)
      • Game tutorial (50)
      • Gameplay (32)
      • How-to (55)
  • Release (130)
Search

© 2015 Gaming is Love e.U.

Disclosure: This site may contain affiliate links, which means I may receive a commission if you click a link and purchase something that I have recommended. While clicking these links won’t cost you any money, they will help me fund my development projects while recommending great assets!