ORK Framework Logo - RPG Editor for Unity
  • Features
  • Showcase
  • Guide
    • Documentation
    • Tutorials
    • API
  • ORK 2
    • Tutorials
    • Plugins
    • API
  • Support
  • Forum
  • Get ORK

2D RPG Quickstart

  • START 2D RPG Quickstart
  • 01 Initial Setup
  • 02 Player Setup
  • 03 Music & Scenes
  • 04 UI System Setup
  • 05 UI Boxes
  • 06 Flying Texts
  • 07 Status Values
  • 08 Status Effects
  • 09 First Abilities
  • 10 Fighter Setup
  • 11 First Enemies & Battle AI
  • 12 Battle System Setup
  • 13 Animating Battle Start and End
  • 14 Random Battles
  • 15 Animating Actions
  • 16 Player Battle HUD
  • 17 Elemental Attacks
  • 18 Animating More Actions
  • 19 Inventory & Loot
  • 20 Equipment
  • 21 Loot, Start Equipment & Viewers
  • 22 Magic Abilities
  • 23 Caster Setup
  • 24 More Enemies
  • 25 Start Menu & Save Games
  • 26 Menu Screens
  • 27 Interactions
  • 28 Item Collectors
  • END 2D RPG Quickstart

3D RPG Quickstart

  • START 3D RPG Quickstart
  • 01 Initial Setup
  • 02 Player Setup
  • 03 Music & Scenes
  • 04 UI System Setup
  • 05 UI Boxes
  • 06 Flying Texts
  • 07 Status Values
  • 08 Status Effects
  • 09 First Abilities
  • 10 Fighter Setup
  • 11 First Enemies & Battle AI
  • 12 Battle System Setup
  • 13 Animating Battle Start and End
  • 14 Random Battles
  • 15 Animating Actions
  • 16 Player Battle HUD
  • 17 Elemental Attacks
  • 18 Animating More Actions
  • 19 Inventory & Loot
  • 20 Equipment
  • 21 Loot, Start Equipment & Viewers
  • 22 Magic Abilities
  • 23 Caster Setup
  • 24 More Enemies
  • 25 Start Menu & Save Games
  • 26 Menu Screens
  • 27 Interactions
  • 28 Item Collectors
  • END 3D RPG Quickstart

Status System Setup

  • START Status System Setup
  • 01 Status Values
  • 02 Status Development
  • 03 Attack/Defence Modifiers
  • 04 Status Effects
  • 05 Formulas
  • 06 Ability & Item Types
  • 07 Abilities Part 1: Attacks
  • 08 Abilities Part 2: Support & Sabotage
  • 09 Abilities Part 3: Elemental Magic
  • 10 Items
  • 11 Equipment Part 1: Slots & Slot Set Templates
  • 12 Equipment Part 2: Weapons
  • 12.5 (Optional) Equipment Part 2.5: Weapons
  • 13 Equipment Part 3: Shields, Armor & Accessories
  • 13.5 (Optional) Equipment Part 3.5: Shields, Armor & Accessories
  • 14 Equipment Part 4: Available Equipment Templates
  • 15 Loot
  • 16 Battle AIs
  • 17 Combatants Part 1: General Settings
  • 18 Combatants Part 2: Players
  • 19 Combatants Part 3: Enemies
  • 20 Combatant Groups
  • END Status System Setup

3D RPG Playground

  • START 3D RPG Playground
  • 01 Player Setup
  • 02 Start Menu
  • 03 First Interaction
  • 04 Music
  • 05 Areas
  • 06 Collecting Items
  • 07 Displaying Equipment
  • 08 Combatant Prefabs, Icons & Portraits
  • 09 Combatant Animations
  • 10 Camera Positions
  • ANIM 01 Battle Start/End Schematics
  • ANIM 02 Use, Cast & Camera
  • ANIM 03 Abilities & Items
  • ANIM 04 Physical Attacks
  • ANIM 05 Special Actions
  • BATTLE 01 Battle Menu
  • BATTLE 02 Prepare for Battle
  • TURN 01 Turn Based Setup
  • TURN 02 Turn Order HUD
  • ATB 01 Active Time Setup
  • ATB 02 Cast Times
  • ATB 03 Timebar HUD
  • BATTLE 03 The First Battle
  • BATTLE 04 Hunting Move AI
  • BATTLE 05 Spawning Combatants
  • 11 Save Games
  • MENU 01 UI Boxes
  • MENU 02 Template HUDs
  • MENU 03 Overview Menu
  • MENU 04 Menu Screens
  • 12 Shop
  • BATTLE 06 Random Battles
  • DUNGEON 01 Enter the Dungeon
  • DUNGEON 02 The Trapdoor
  • DUNGEON 03 Enemies on Level 1 & 2
  • DUNGEON 04 Traps on Level 3
  • DUNGEON 05 Going Deeper
  • 13 Bestiary (+MENU+ANIM)
  • QUEST 01 Hunting Quests (+MENU)
  • QUEST 02 Guard NPC
  • QUEST 03 Forest Ruin Cheese
  • QUEST 04 Witch NPC with Cheese
  • QUEST 05 Quest Mark HUDs
  • 14 Research Trees (+MENU)
  • CRAFT 01 Crafting Materials
  • CRAFT 02 Crafting Recipes
  • CRAFT 03 Crafting Menu
  • CRAFT 04 Crafting Proficiency & Critical Crafting
  • CRAFT 05 Materials Loot
  • 15 Changing Choice Dialogue
  • 16 Follow Me!
  • BATTLE 07 Sequence Loot Dialogue

3D Action RPG

  • START 3D Action RPG
  • 01 Status System Setup
  • 02 Player Setup
  • 03 Player Weapon
  • 04 Player Attacks
  • 05 Enemy: Chomper
  • 06 Chomper Attack
  • 07 Hit & Death
  • 08 HUDs
  • 09 Rolling on the Floor
  • 10 Enemy: Spitter
  • 11 Spit Attack
  • 12 Potion
  • 13 Grenade
  • 14 Item HUD
  • 15 Enemy: Grenadier
  • 16 Grenadier Melee Attacks
  • 17 Grenadier Flamethrower
  • 18 Item Drops
  • END 3D Action RPG

2D Grid Battle RPG

  • START 2D Grid Battle RPG
  • 01 Player Setup
  • 02 Prefab & Music Setup
  • 03 Randomizing Combatants
  • 04 UI Setup
  • 05 Battle Start, End & Phase Schematics
  • 06 Battle System Setup
  • 07 Battle Grid Setup
  • 08 Grid Move
  • 09 Forest Battle Grid
  • 10 Battle AI
  • 11 Ability Ranges
  • 12 Death & Use Schematics
  • 13 Attack Schematic
  • 14 Shoot Schematics
  • 15 Battle Selection Interaction
  • END 2D Grid Battle RPG

Schematics

  • Simple Start Schematic
  • Battle Start Schematic
  • Battle End Schematic
  • Moving to Target and Back
  • Animating a Base Attack
  • Animating a Magic Ability
  • Grid Movement
  • Open and Close UI Animations
  • Flying Text Mover

UI Setups

  • Unity UI: Initial Setup
  • Unity UI: TextMesh Pro Setup
  • Unity UI: UI Box
  • Unity UI: Flying Text
  • Unity UI: Dragging Notification
  • Unity UI: Canvas with Screen Space Camera
  • Unity UI: Interaction HUD
  • Unity UI: Simple Player HUD
  • Unity UI: Quest HUD
  • Unity UI: Shortcuts HUD
  • Unity UI: Currency HUD
  • Unity UI: Tooltip HUD
  • Unity UI: Control HUD
  • Unity UI: Attack Modifiers
  • Unity UI: Defence Modifiers

Gameplay Bits

  • Combining Input Origins
  • Combining Status Value Flying Texts
  • Fun With Flying Text
  • HUD Effects With Conditional Schematics
  • Inventory Containers
  • Multi Interaction Controllers
  • World Space HUD
  • World Space Dialogue
  • Home
  • Guide
  • Tutorials
  • 3D RPG Playground
  • BATTLE 01 Battle Menu

BATTLE 01 Battle Menu

Table of Contents
  • UI Box
    • UI Box Prefab
    • UI Box Setup
      • Base Settings
      • Unity UI
      • Override Default Settings > Schematics
  • Battle Menu
    • Base Settings
      • Title Settings
      • Sub-Menu Settings
      • Options
    • Layout Settings > Content Layout
    • User Highlight
    • Option 0
    • Option 1
    • Option 2
    • Option 3
      • Slot Content Layout
    • Option 4
    • Option 5
    • Option 6
  • Save Changes

In this tutorial we’ll set up the battle menu.

This tutorial is the start of the sub-series for setting up battles. The series will be interrupted by other tutorials, e.g. for setting up turn based or active time battle systems.

The battle menu can be used to select which action your players should use in battle. Learn more about battle menus in this documentation.

UI Box #

It’s time for another UI box.

UI Box Prefab #

The UI box should be scrollable (vertically), so copy one of our already existing UI boxes that do that – e.g. duplicate the UI Box Blue prefab from the initial UI setup.

Adjust the styling to your liking and place it in the lower left corner of the screen.

Make sure to have the pivot of the UI box on the bottom left corner, i.e. Pivot should be set to X=0, Y=0. We’ll need this for correct placement of sub-menus soon.

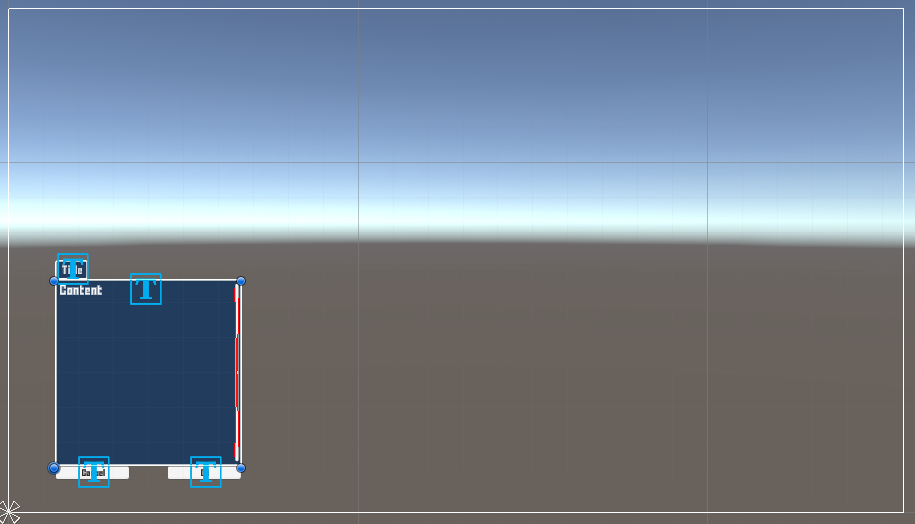
Rename your finished prefab to UI Box Blue Battle Menu.

UI Box Setup #

Navigate to UI > UI Boxes and add a new UI box.

Base Settings #

  • Name
    Set to Blue Battle Menu.
  • UI Layer
    Select Layer 1.

Unity UI #

  • UI Box Prefab
    Select UI Box Blue Battle Menu.

Override Default Settings > Schematics #

I’m also using the move from left and move to right schematics from the UI animations schematics to animate this UI box.

  • Own Schematics
    Enable this setting.
  • Before Open Schematic
    Select the UIMoveFromLeftFadeIn schematic.
  • Wait
    Enable this setting.
  • Before Close Schematic
    Select the UIMoveToRightFadeOut schematic.
  • Wait
    Enable this setting.

Battle Menu #

Navigate to UI > Battle Menus, we’ll change the Default battle menu.

Base Settings #

  • UI Box
    Select Battle Menu.

Title Settings #

  • Show Title
    Enable this setting.
  • Text (Title Content)
    Set to: <name>

Sub-Menu Settings #

These settings control how sub-menus, e.g. showing abilities or items, are handled. We’ll use multi mode, which displays sub-menus as additional UI boxes instead of closing the previous box.

  • Use Multi Mode
    Enable this setting.
  • Multi-Box Layout
    Select Relative Offset.
  • Relative To
    Select Lower Center.
    This is where the pivot of the sub-menu UI boxes will be placed.

Options #

  • Select Last Target
    Enable this setting.
  • Remember Selection
    Enable this setting.
  • Target Sort Type
    Select Screen Position.
    This’ll sort targets based on their position on screen, from top left to bottom right corner.

Layout Settings > Content Layout #

The Content Layout settings control how the content of buttons in the battle menu is displayed. The default setup shows icon and name of content (e.g. abilities) and adds information content as additional content with the content ID info.

We’ll stick with the default setup – however, if you didn’t use a button prefab with content ID info (additional content) added as the default button prefab (UI > UI System), you need to select one here. Otherwise you wouldn’t see things like item quantities or use costs of abilities.

The default Choice Info Button you can create using the scene hierarchy context menu has such a setup. See the initial UI setup for more details.

  • Custon Input Prefab
    Select a button prefab with an additional content info.

User Highlight #

Let’s also highlight the current combatant who’s selecting actions by blinking HUDs of the combatant.

  • In Target Selection
    Disable this setting.
    We’ll not highlight the user when selecting targets, as that’d interfere with the target selection highlights.

Click on Add Highlight to add a user highlight.

You can add different highlights, e.g. changing the color of the combatant’s HUDs or game object, or spawning a cursor prefab on the combatant. We’ll change the HUD color (blinking the HUD’s alpha value).

  • Highlight Type
    Select Fade HUD Color.
  • Fade HUD
    Select Blink.
  • Time
    Set to 1.
  • Interpolation
    Select Quadratic > Quadratic In + Out.
  • Fade Alpha
    Enable this setting.
  • Fade Red/Green/Blue
    Disable these settings.
  • Start Color
    Select a color with full alpha value (A=255 or 1, depending on your color picker).
  • End Color
    Select a color with half alpha value (A=127 or 0.5, depending on your color picker).

Option 0 #

Now it’s time to add the battle menu options, i.e. which actions are available.

A default option is arleady added for us, let’s change it’s setup.

  • Type
    Select Attack.
    This’ll use the combatant’s base attack.
  • Use Ability Information
    Enable this setting.
    Since some combatants have different base attacks (e.g. the wizard using Drain or a bow overriding the default attack with Shoot), we’ll use the actual name and other information of the action for the button.
    Otherwise we can define the content of the button.

Option 1 #

Click on Add Option to add a new option.

  • Type
    Select Ability.
  • Type Display
    Select Type.
    This’ll list the ability types available to the combatant directly in the base battle menu.
  • Sort By (Type Sorting)
    Select either Name or ID based on your preference.
    This handles how the ability types are sorted.
    Name sorts them by their name.
    ID sorts them by their index in the data list.
  • Sort By (List Sorting)
    Select either Name or ID based on your preference.
    This handles how the abilities are sorted.

Option 2 #

Click on Add Option to add a new option.

  • Type
    Select Item.
  • Type Display
    Select Combined.
    All items will be combined under a single button.
    You can use a sub menu to display item types, but we’ll not use that (Sub Menu setting).
  • Sort By (List Sorting)
    Select either Name or ID based on your preference.
    This handles how the items are sorted.
  • Text (Button Content)
    Set to Items.
  • Sprite
    Select icons_61.

Option 3 #

Click on Add Option to add a new option.

  • Type
    Select Equipment.
    This allows the player to change equipment during battle.
  • Sort By (List Sorting)
    Select either Name or ID based on your preference.
  • Text (Button Content)
    Set to Equipment.
  • Sprite
    Select icons_6.

Slot Content Layout #

These settings handle how the equipment slot buttons are styled.

Their default setup will show the slot’s content as a title (additional content ID title, e.g. for the default Choice Title Button setup) and the current equipment as the button’s content. We’ll stick with the default setup – if you don’t use a button with additional content title it’ll just display the current equipment’s content, which also works.

Feel free to use a button with title as the Custom Input Prefab.

Option 4 #

Click on Add Option to add a new option.

  • Type
    Select Change Member.
    This allows the player to change the current combatant for a non-battle group member.
  • Text (Button Content)
    Set to Switch.

Option 5 #

Click on Add Option to add a new option.

  • Type
    Select Escape.
    As the name suggests, this’ll use the escape command, allowing to escape the battle (after passing a chance check).
  • Text (Button Content)
    Set to Escape.

Option 6 #

Click on Add Option to add a new option.

  • Type
    Select End.
    This’ll end the combatant’s turn, doing nothing.
  • Text (Button Content)
    Set to Skip.

Save Changes #

And that’s it!

Don’t forget to save your changes by clicking on Save Settings at the bottom of the editor.

Next, we’ll finally prepare for battle!

Share This Article :
  • Facebook
  • Twitter
  • LinkedIn
  • Pinterest
Updated on December 16, 2022
Table of Contents
  • UI Box
    • UI Box Prefab
    • UI Box Setup
      • Base Settings
      • Unity UI
      • Override Default Settings > Schematics
  • Battle Menu
    • Base Settings
      • Title Settings
      • Sub-Menu Settings
      • Options
    • Layout Settings > Content Layout
    • User Highlight
    • Option 0
    • Option 1
    • Option 2
    • Option 3
      • Slot Content Layout
    • Option 4
    • Option 5
    • Option 6
  • Save Changes
Sitemap
  • Features
  • Showcase
  • Guide
    • Documentation
    • Tutorials
    • API
  • ORK 2 Hub
    • Tutorials
    • Plugins
    • API
  • Support
  • Forum
  • Get ORK
  • Contact
  • Blog
  • Makinom
  • gamingislove.com
Categories
  • News (60)
  • ORK 2 (137)
    • Tutorial (137)
      • Game tutorial (50)
      • Gameplay (32)
      • How-to (55)
  • Release (130)
Search

© 2015 Gaming is Love e.U.

Disclosure: This site may contain affiliate links, which means I may receive a commission if you click a link and purchase something that I have recommended. While clicking these links won’t cost you any money, they will help me fund my development projects while recommending great assets!