ORK Framework Logo - RPG Editor for Unity
  • Features
  • Showcase
  • Guide
    • Documentation
    • Tutorials
    • API
  • ORK 2
    • Tutorials
    • Plugins
    • API
  • Support
  • Forum
  • Get ORK

2D RPG Quickstart

  • START 2D RPG Quickstart
  • 01 Initial Setup
  • 02 Player Setup
  • 03 Music & Scenes
  • 04 UI System Setup
  • 05 UI Boxes
  • 06 Flying Texts
  • 07 Status Values
  • 08 Status Effects
  • 09 First Abilities
  • 10 Fighter Setup
  • 11 First Enemies & Battle AI
  • 12 Battle System Setup
  • 13 Animating Battle Start and End
  • 14 Random Battles
  • 15 Animating Actions
  • 16 Player Battle HUD
  • 17 Elemental Attacks
  • 18 Animating More Actions
  • 19 Inventory & Loot
  • 20 Equipment
  • 21 Loot, Start Equipment & Viewers
  • 22 Magic Abilities
  • 23 Caster Setup
  • 24 More Enemies
  • 25 Start Menu & Save Games
  • 26 Menu Screens
  • 27 Interactions
  • 28 Item Collectors
  • END 2D RPG Quickstart

3D RPG Quickstart

  • START 3D RPG Quickstart
  • 01 Initial Setup
  • 02 Player Setup
  • 03 Music & Scenes
  • 04 UI System Setup
  • 05 UI Boxes
  • 06 Flying Texts
  • 07 Status Values
  • 08 Status Effects
  • 09 First Abilities
  • 10 Fighter Setup
  • 11 First Enemies & Battle AI
  • 12 Battle System Setup
  • 13 Animating Battle Start and End
  • 14 Random Battles
  • 15 Animating Actions
  • 16 Player Battle HUD
  • 17 Elemental Attacks
  • 18 Animating More Actions
  • 19 Inventory & Loot
  • 20 Equipment
  • 21 Loot, Start Equipment & Viewers
  • 22 Magic Abilities
  • 23 Caster Setup
  • 24 More Enemies
  • 25 Start Menu & Save Games
  • 26 Menu Screens
  • 27 Interactions
  • 28 Item Collectors
  • END 3D RPG Quickstart

Status System Setup

  • START Status System Setup
  • 01 Status Values
  • 02 Status Development
  • 03 Attack/Defence Modifiers
  • 04 Status Effects
  • 05 Formulas
  • 06 Ability & Item Types
  • 07 Abilities Part 1: Attacks
  • 08 Abilities Part 2: Support & Sabotage
  • 09 Abilities Part 3: Elemental Magic
  • 10 Items
  • 11 Equipment Part 1: Slots & Slot Set Templates
  • 12 Equipment Part 2: Weapons
  • 12.5 (Optional) Equipment Part 2.5: Weapons
  • 13 Equipment Part 3: Shields, Armor & Accessories
  • 13.5 (Optional) Equipment Part 3.5: Shields, Armor & Accessories
  • 14 Equipment Part 4: Available Equipment Templates
  • 15 Loot
  • 16 Battle AIs
  • 17 Combatants Part 1: General Settings
  • 18 Combatants Part 2: Players
  • 19 Combatants Part 3: Enemies
  • 20 Combatant Groups
  • END Status System Setup

3D RPG Playground

  • START 3D RPG Playground
  • 01 Player Setup
  • 02 Start Menu
  • 03 First Interaction
  • 04 Music
  • 05 Areas
  • 06 Collecting Items
  • 07 Displaying Equipment
  • 08 Combatant Prefabs, Icons & Portraits
  • 09 Combatant Animations
  • 10 Camera Positions
  • ANIM 01 Battle Start/End Schematics
  • ANIM 02 Use, Cast & Camera
  • ANIM 03 Abilities & Items
  • ANIM 04 Physical Attacks
  • ANIM 05 Special Actions
  • BATTLE 01 Battle Menu
  • BATTLE 02 Prepare for Battle
  • TURN 01 Turn Based Setup
  • TURN 02 Turn Order HUD
  • ATB 01 Active Time Setup
  • ATB 02 Cast Times
  • ATB 03 Timebar HUD
  • BATTLE 03 The First Battle
  • BATTLE 04 Hunting Move AI
  • BATTLE 05 Spawning Combatants
  • 11 Save Games
  • MENU 01 UI Boxes
  • MENU 02 Template HUDs
  • MENU 03 Overview Menu
  • MENU 04 Menu Screens
  • 12 Shop
  • BATTLE 06 Random Battles
  • DUNGEON 01 Enter the Dungeon
  • DUNGEON 02 The Trapdoor
  • DUNGEON 03 Enemies on Level 1 & 2
  • DUNGEON 04 Traps on Level 3
  • DUNGEON 05 Going Deeper
  • 13 Bestiary (+MENU+ANIM)
  • QUEST 01 Hunting Quests (+MENU)
  • QUEST 02 Guard NPC
  • QUEST 03 Forest Ruin Cheese
  • QUEST 04 Witch NPC with Cheese
  • QUEST 05 Quest Mark HUDs
  • 14 Research Trees (+MENU)
  • CRAFT 01 Crafting Materials
  • CRAFT 02 Crafting Recipes
  • CRAFT 03 Crafting Menu
  • CRAFT 04 Crafting Proficiency & Critical Crafting
  • CRAFT 05 Materials Loot
  • 15 Changing Choice Dialogue
  • 16 Follow Me!
  • BATTLE 07 Sequence Loot Dialogue

3D Action RPG

  • START 3D Action RPG
  • 01 Status System Setup
  • 02 Player Setup
  • 03 Player Weapon
  • 04 Player Attacks
  • 05 Enemy: Chomper
  • 06 Chomper Attack
  • 07 Hit & Death
  • 08 HUDs
  • 09 Rolling on the Floor
  • 10 Enemy: Spitter
  • 11 Spit Attack
  • 12 Potion
  • 13 Grenade
  • 14 Item HUD
  • 15 Enemy: Grenadier
  • 16 Grenadier Melee Attacks
  • 17 Grenadier Flamethrower
  • 18 Item Drops
  • END 3D Action RPG

2D Grid Battle RPG

  • START 2D Grid Battle RPG
  • 01 Player Setup
  • 02 Prefab & Music Setup
  • 03 Randomizing Combatants
  • 04 UI Setup
  • 05 Battle Start, End & Phase Schematics
  • 06 Battle System Setup
  • 07 Battle Grid Setup
  • 08 Grid Move
  • 09 Forest Battle Grid
  • 10 Battle AI
  • 11 Ability Ranges
  • 12 Death & Use Schematics
  • 13 Attack Schematic
  • 14 Shoot Schematics
  • 15 Battle Selection Interaction
  • END 2D Grid Battle RPG

Schematics

  • Simple Start Schematic
  • Battle Start Schematic
  • Battle End Schematic
  • Moving to Target and Back
  • Animating a Base Attack
  • Animating a Magic Ability
  • Grid Movement
  • Open and Close UI Animations
  • Flying Text Mover

UI Setups

  • Unity UI: Initial Setup
  • Unity UI: TextMesh Pro Setup
  • Unity UI: UI Box
  • Unity UI: Flying Text
  • Unity UI: Dragging Notification
  • Unity UI: Canvas with Screen Space Camera
  • Unity UI: Interaction HUD
  • Unity UI: Simple Player HUD
  • Unity UI: Quest HUD
  • Unity UI: Shortcuts HUD
  • Unity UI: Currency HUD
  • Unity UI: Tooltip HUD
  • Unity UI: Control HUD
  • Unity UI: Attack Modifiers
  • Unity UI: Defence Modifiers

Gameplay Bits

  • Combining Input Origins
  • Combining Status Value Flying Texts
  • Fun With Flying Text
  • HUD Effects With Conditional Schematics
  • Inventory Containers
  • Multi Interaction Controllers
  • World Space HUD
  • World Space Dialogue
  • Home
  • Guide
  • Tutorials
  • 3D RPG Quickstart
  • 18 Animating More Actions

18 Animating More Actions

Table of Contents
  • Player Death Schematic
    • Play Sound
    • Combatant Animation
    • Calculate Action
  • Enemy Death Schematic
    • Play Sound
    • Combatant Animation
    • Enable Component
    • Change Color
    • Move Into Direction
    • Calculate Action
  • Use Schematic
    • Settings
      • Prefabs
      • Audio Clips
    • Combatant Animation
    • Wait
    • Play Sound
    • Spawn Prefab
    • Wait
    • Calculate Action
    • Wait
  • Default Battle Animations
    • Battle Settings > Default Battle Animations
      • Defend Animation
      • Death Animation
  • Save Changes
  • Testing

In this tutorial we’ll set up some more schematics to animate battle actions.

Currently, our enemy’s game object is just destroyed when killed, and our player also shows no reaction on death. Like abilities, we can animate the death of a combatant using schematics – and that’s what we’ll do now.

We’ll also set up a schematic to animate the use of items and non-physical attacks (spells, support).

We’ll set up 3 schematics:

  • player death
  • enemy death
  • use (items/magic)

Let’s get to it.

Player Death Schematic #

First, we’ll set up the schematic to animate the player’s death. It’s pretty simple.

We’ll start with the player’s death – it’ll play the Death sound type on the combatant and play the Death animation.

As usual, the user of the action (i.e. the dying combatant) is the Machine Object.

Open the Makinom editor and navigate to Schematics.

Play Sound #

Add Node > Audio > Audio > Play Sound

Play the Death sound type on the user.

  • Object (Play On)
    Select Machine Object.
  • Use Sound Type
    Enable this setting.
  • Sound Type
    Select Death.
  • Play One Shot
    Enable this setting.

Combatant Animation #

Add Node > Animation > Combatant > Combatant Animation

We’ll play the Death animation.

  • Object
    Select Machine Object.
  • Animation Type
    Select Death.
  • Wait
    Enable this setting.

Calculate Action #

Add Node > Battle > Action Outcome > Calculate Action

Death doesn’t need to be calculated, but it sets some things that are used by other features, e.g. as the latest damaged combatant for the (optional) battle camera. It’s good practice to always do this for your schematics animating battle actions.

And that’s it for the schematic. Click on Save Schematic to save it, e.g. as DeathPlayer.

Enemy Death Schematic #

Next, we’ll let the enemy die – beside playing the death sound/animation, we’ll also fade it’s game object to black and let it sink into the ground.

Play Sound #

Add Node > Audio > Audio > Play Sound

Play the Death sound type on the user.

  • Object (Play On)
    Select Machine Object.
  • Use Sound Type
    Enable this setting.
  • Sound Type
    Select Death.
  • Play One Shot
    Enable this setting.

Combatant Animation #

Add Node > Animation > Combatant > Combatant Animation

We’ll play the Death animation.

  • Object
    Select Machine Object.
  • Animation Type
    Select Death.
  • Wait
    Enable this setting.

Enable Component #

Add Node > Game Object > Component > Enable Component

This node enables or disables a defined component.

We’ll use it to disable a NavMeshAgent component on our enemy, otherwise it’d block our movement into the ground if one is added.

  • Enable/Disable
    Disable this setting.
  • Component Name
    Set to: NavMeshAgent
  • Scope
    Select In Children.
  • Object
    Select Machine Object.

Change Color #

Add Node > Animation > Fade > Change Color

We’ll fade the color of the combatant’s game object.

  • Color Type
    Select Renderer.
  • Fade
    Select Fade.
  • Time
    Select Value > Value.
    Set the value to 1.
  • Fade Alpha/Red/Green/Blue
    Enable these settings.
  • From Current
    Enable this setting.
  • End Color
    Select a black color with no alpha.
    Though, the used renderer doesn’t really support transparency.
  • Object
    Select Machine Object.
  • Scope
    Select All In Children.

Move Into Direction #

Add Node > Movement > Movement > Move Into Direction

Now we’ll move the combatant down into the ground.

  • Object (Moving Object)
    Select Machine Object.
  • Move Component
    Select Transform.
    This’ll prevent any physics from getting in the way.
  • Time
    Select Value > Value.
    Set the value to 1.
  • Wait
    Enable this setting.
  • Speed Type
    Select Value.
  • Speed
    Select Value > Value.
    Set the value to 1.
  • Vector3 Type (Direction)
    Select Value > Direction.
  • Direction
    Select Down.
  • Local Space
    Disable this setting.

Calculate Action #

Add Node > Battle > Action Outcome > Calculate Action

Like with the player’s death, we’ll calculate the death outcome.

And that’s it for the schematic. Click on Save Schematic to save it, e.g. as DeathEnemy.

Use Schematic #

And finally, we’ll set up a schematic to animate using something, e.g. an item or magic spell. We’ll play the Use animation, play an audio clip and spawn a prefab.

Create a new schematic.

Settings #

We’ll add a prefab and audio clip to the schematic – however, we don’t select assets for them.

We’ll later use the asset override settings to set them depending on which item or ability they’re used in.

Prefabs #

Click on Add Prefab Resource.

Audio Clips #

Click on Add Audio Clip Resource.

Combatant Animation #

Add Node > Animation > Combatant > Combatant Animation

  • Object
    Select Machine Object.
  • Animation Type
    Select Use.
  • Wait
    Enable this setting.

Wait #

Add Node > Base > Wait

We’ll wait for a short time.

  • Time
    Select Value > Value.
    Set the value to 0.2.

Play Sound #

Add Node > Audio > Audio > Play Sound

Play the audio clip on the target.

  • Object (Play On)
    Select Starting Object.
  • Audio Clip
    Select 0: (the audio clip we set up).
  • Play One Shot
    Enable this setting.

Spawn Prefab #

Add Node > Game Object > Prefab > Spawn Prefab

We’ll spawn the prefab on the target (Starting Object).

  • Prefab
    Select Prefab 0.
  • Use Prefab Rotation
    Enable this setting.
  • Target Type
    Select Object.
  • Object (Target Object)
    Select Starting Object.
  • Child Object
    Set to: Center
    We’ll spawn the prefab at the center of the target’s game object.
    The Center child object is already set up on all combatant prefabs.
  • Spawn At
    Select All.

Wait #

Add Node > Base > Wait

We’ll wait again.

  • Time
    Select Value > Value.
    Set the value to 0.5.

Calculate Action #

Add Node > Battle > Action Outcome > Calculate Action

We now calculate the outcome of the action.

No further settings needed.

Wait #

Add Node > Base > Wait

We’ll wait again.

  • Time
    Select Value > Value.
    Set the value to 1.

And that’s it for the schematic. Click on Save Schematic to save it, e.g. as Use.

Default Battle Animations #

Back to the default battle animations.

Navigate to Combatants > Combatants > General Settings.

Battle Settings > Default Battle Animations #

We’ll set up the death animations for player and enemies, and also use the Use animation to animate the defend command.

Defend Animation #

Click on Add Battle Animation.

  • Schematic Asset
    Select the Use schematic.

Death Animation #

We’ll use different setups for player and enemy combatants.

Click on Add Battle Animation.

  • Schematic Asset
    Select the DeathPlayer schematic.
  • Player/Ally
    Enable these settings.
  • Enemy
    Disable this setting.

Click on Add Battle Animation again, now it’s time for the enemy.

  • Schematic Asset
    Select the DeathEnemy schematic.
  • Player/Ally
    Disable these settings.
  • Enemy
    Enable this setting.

Save Changes #

And that’s it!

Save the changes using the Save Settings button at the bottom of the editor.

Testing #

Hit play and start a battle.

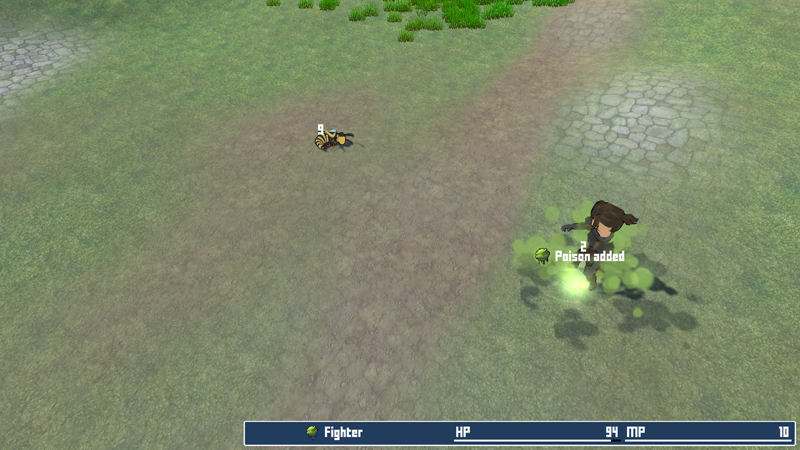
The enemy dies properly (so does the player), defend is animated – everything works.


Next, we’ll add some items.

Share This Article :
  • Facebook
  • Twitter
  • LinkedIn
  • Pinterest
Updated on March 9, 2023
Table of Contents
  • Player Death Schematic
    • Play Sound
    • Combatant Animation
    • Calculate Action
  • Enemy Death Schematic
    • Play Sound
    • Combatant Animation
    • Enable Component
    • Change Color
    • Move Into Direction
    • Calculate Action
  • Use Schematic
    • Settings
      • Prefabs
      • Audio Clips
    • Combatant Animation
    • Wait
    • Play Sound
    • Spawn Prefab
    • Wait
    • Calculate Action
    • Wait
  • Default Battle Animations
    • Battle Settings > Default Battle Animations
      • Defend Animation
      • Death Animation
  • Save Changes
  • Testing
Sitemap
  • Features
  • Showcase
  • Guide
    • Documentation
    • Tutorials
    • API
  • ORK 2 Hub
    • Tutorials
    • Plugins
    • API
  • Support
  • Forum
  • Get ORK
  • Contact
  • Blog
  • Makinom
  • gamingislove.com
Categories
  • News (60)
  • ORK 2 (137)
    • Tutorial (137)
      • Game tutorial (50)
      • Gameplay (32)
      • How-to (55)
  • Release (130)
Search

© 2015 Gaming is Love e.U.

Disclosure: This site may contain affiliate links, which means I may receive a commission if you click a link and purchase something that I have recommended. While clicking these links won’t cost you any money, they will help me fund my development projects while recommending great assets!