
Use input IDs to add local multiplayer to your game.
You can set up local multiplayer – i.e. have multiple players each control their own combatant – by adding multiple input ID setups to your input keys and assign an input ID to the individual combatants.
Input IDs, in short, are used to get input from different input origins, e.g. the standard player (input ID 0) using keyboard input, a 2nd player (input ID 1) using joystick input. Setting the input ID for a combatant will have all menus (e.g. battle menus, menu screens) with that combatant as user use inputs with the combatant’s input ID. Additionally, ORK can automatically add interaction controllers and player controls to each player combatant with a set input ID and allow multiple players to control their own combatant.
In this tutorial, we’ll create a setup to allow a 2nd player to control a selected combatant of the player group, including player controls and interactions. We’ll set up:
- add input ID setup for input keys
- player control setup for 2nd player
- global machine with a schematic to let the 2nd player join the game
This tutorial is based on the 3D RPG Playground series, but you can use this for any kind of project.
Input Key Setup #
We’ll start with the input key setup – we’ll add an additional input ID setup to all input keys for input ID 1 and use the keyboard’s keypad keys.
Feel free to use other input origins (e.g. a joystick) instead, I simply use the keypad keys to not require any other input device in this tutorial (e.g. in case you don’t own a joystick).
We’ll also add a new input key that’ll be used to start the global machine to let the 2nd player join the game.
Open the Makinom editor and navigate to Base/Control > Input Keys. We’ll change all input keys and add a new one.
Horizontal Menu #
Click on Add Input ID.
- Input ID
Set to 1. - Input Origin
Select Key Code. - Positive Key
Select Keypad 6. - Negative Key
Select Keypad 4. - Input Handling
Select Hold.
Vertical Menu #
Click on Add Input ID.
- Input ID
Set to 1. - Input Origin
Select Key Code. - Positive Key
Select Keypad 8. - Negative Key
Select Keypad 2. - Input Handling
Select Hold.
Accept #
Click on Add Input ID.
- Input ID
Set to 1. - Input Origin
Select Key Code. - Positive Key
Select Keypad Enter.
Cancel #
Click on Add Input ID.
- Input ID
Set to 1. - Input Origin
Select Key Code. - Positive Key
Select Keypad 0.
Horizontal Move #
We’ll use the same input as the Horizontal Menu key.
Click on Add Input ID.
- Input ID
Set to 1. - Input Origin
Select Key Code. - Positive Key
Select Keypad 6. - Negative Key
Select Keypad 4. - Input Handling
Select Hold.
Vertical Move #
We’ll use the same input as the Vertical Menu key.
Click on Add Input ID.
- Input ID
Set to 1. - Input Origin
Select Key Code. - Positive Key
Select Keypad 8. - Negative Key
Select Keypad 2. - Input Handling
Select Hold.
Menu #
Click on Add Input ID.
- Input ID
Set to 1. - Input Origin
Select Key Code. - Positive Key
Select Keypad Minus.
Next #
Click on Add Input ID.
- Input ID
Set to 1. - Input Origin
Select Key Code. - Positive Key
Select Keypad 9.
Previous #
Click on Add Input ID.
- Input ID
Set to 1. - Input Origin
Select Key Code. - Positive Key
Select Keypad 7.
New Player #
This is a the new key we’ll add.
- Name
Set to: New Player
Change the already added Input ID Setting 0 – we’ll only use input ID 1 for this input key.
- Input ID
Set to 1. - Input Origin
Select Key Code. - Positive Key
Select Keypad Multiplay.
That’s it for the input keys.
Local Multiplayer Settings #
There are a few settings to set up for local multiplayer.
Game Controls #
We’ll now set up that ORK automatically adds interaction controllers and player controls to combatants of the player group that have an input ID set.
Navigate to Base/Control > Game Controls.
ORK Control Settings > Other Controls > Player Input ID Settings #
- Add Interaction Controllers
Enable this setting.
Player combatants with an input ID set will get interaction controllers added (based on the IC prefab set up) and registered with the system. - Add Player Controls
Enable this setting.
Player combatants with an input ID set will get player controls added (based on the player control settings) and registered with the system.
Tip!
Other playes should only control their combatants via battle menus and menu screens?
Simply don’t use the Player Input ID Settings – setting the input ID of the combatant (done further below in this tutorial) without adding player controls still gives control over menus.
Menu Screens #
We want the 2nd player to be able to call the in-game menu and automatically use their combatant as user (allowing them menu control).
Navigate to UI > Menu Screens and select the Overview menu screen.
Menu Screen Settings > Settings > Call Screen Key #
- Use Multi Input ID
Enable this setting.
The call key will check all individual combatants of the player group for input IDs.
Combatants General Settings #
Since we use spawned enemies that start battles when getting close to them, we also want our other player combatants to be able to initiate them.
I.e. if a 2nd player runs up to an enemy, they can start a battle as well.
Navigate to Combatants > Combatants > General Settings.
Battle Settings > Auto Start Battles #
- Only Leader
Disable this setting.
Save Changes #
That’s it for the editor setup for now.
Don’t forget to save your changes by clicking on Save Settings at the bottom of the editor.
2nd Player Schematic #
Next, we’ll set up the schematic that’ll have a 2nd (human) player join the game and take control over one of the player group combatants.
The schematic will show the available combatants to control and let the player select one. We can do this by first storing the combatants into selected data and afterwards show a dialogue with the things we stored in selected data as choices.
Navigate to Schematics.

Settings #
We’ll block player and camera controls.
- Block Player Control
Enable this setting. - Block Camera Control
Enable this setting.
Select Combatant #
Add Node > Value > Selected Data > Select Combatant
This node is used to store combatants into selected data.
We’ll store all player battle group members, except the leader.
Selected Data Settings #
We’ll store the combatants into local selected data.
- Data Key
Set to: list - Data Origin
Select Local. - Change Type
Select Set.
Combatant Settings #
- Use All Combatants
Enable this setting. - Combatant Scope
Select Group Battle Sorted.
Uses the whole group, listing battle group members first. - Combatant Origin
Select Combatant.
Uses the individual combatants – otherwise you could e.g. use the group members of a used combatant. - Object
Select Player.
Filter Settings #
We’ll filter the combatants to exclude the leader.
- Use Requirements
Enable this setting. - Use Conditions
Enable this setting.
Click on Add Condition.
- Condition Type
Select Combatant Status.
Click on Add Status Condition.
- Status Needed
Select Group Leader. - Is Leader
Disable this setting.
Selected Data Choice #
Add Node > UI > Dialogue > Selected Data Choice
This node shows a choice dialogue with things stored in selected data as individual choices.
The choice selected by the player will be stored into a separate selected data.
- UI Box
Select Blue Menu Center Scroll. - Text (Message)
Set to: Select 2nd Player - Allow Cancel
Enable this setting. - Add Cancel Button
Select Last.
Button Layout #
We can use HUD templates to add additional content information – we’ll use it to add status information like in a menu screen.
- Content Type
Select None. - HUD Type
Select HUD. - HUD
Select Combatant Information.
Origin Selected Data #
This defines where the available choices are stored in.
- Data Key
Set to: list - Data Origin
Select Local.
Store Selected Data #
This defines where the selected choice (combatant) is stored to.
- Data Key
Set to: selected - Data Origin
Select Local. - Change Type
Select Set.
Change Combatant Input ID #
Add Node > Combatant > Combatant > Change Combatant Input ID
This node is used to set or reset the input ID of a combatant. We’ll first use this node to reset all input IDs of the combatants (e.g. in case a 2nd player was already controlled).
This node is connected to the Accept slot of the Selected Data Choice node.
- Reset
Enable this setting. - Object
Select Selected Data. - Data Key
Set to: list - Data Origin
Select Local.
Change Combatant Input ID #
Add Node > Combatant > Combatant > Change Combatant Input ID
And finally, we’ll set the input ID of the selected combatant.
- Reset
Disable this setting. - Override Input ID
Enable this setting.
We’ll define the input ID, otherwise it’ll use the input ID of the schematic. - Input ID
Select Value > Value.
Set the value to 1. - Object
Select Selected Data. - Data Key
Set to: selected - Data Origin
Select Local.
And that’s it for the schematic – click on Save Schematic and save it as e.g. 2ndPlayerSelection.
Global Machine #
Back to the editor – we’ll now set up the global machine that starts the 2nd player selection.
Navigate to Base/Control > Global Machines and either change the Default machine or add a new one.
Machine Execution Settings #
- Name
Set to: 2nd Player Selection - Schematic Asset
Select the 2ndPlayerSelection schematic we just created. - Override Input ID
Enable this setting.
This input ID will be used by the call key we’re using. - Input ID
Select Value > Value.
Set the value to 1.
Execution Settings #
Here we’ll set up how and when the global machine can be started.
- Global Machine Type
Select Key.
The machine is started by an input key. - Call Key
Select New Player.
Game State Condition #
We’ll use a game state condition to only start the machine when the game is running and the player is in control.
- Needed
Select All.
Click on Add Game State.
- Game State
Select In Control. - Check State
Select Active.
Click on Add Game State again.
- Game State
Select In Control. - Check State
Select Active.
Save Changes #
And that’s it.
Don’t forget to save your changes by clicking on Save Settings at the bottom of the editor.
Testing #
Hit play, start a new game and hit the New Player input key.
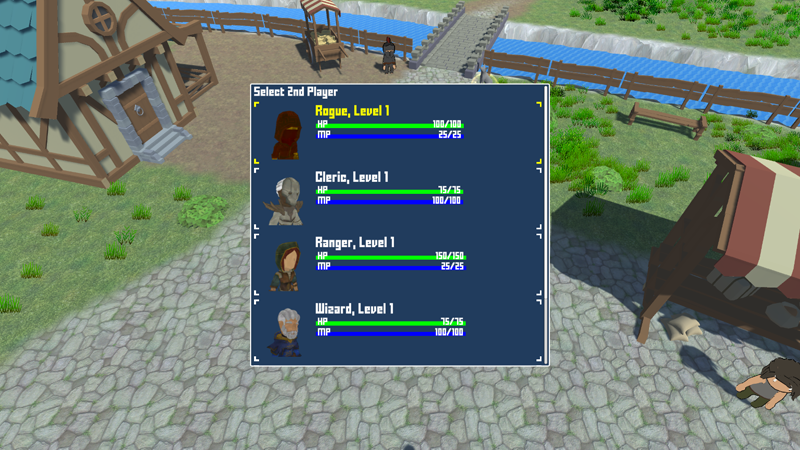
The combatant selection pops up and is already controlled by the 2nd player’s input keys.
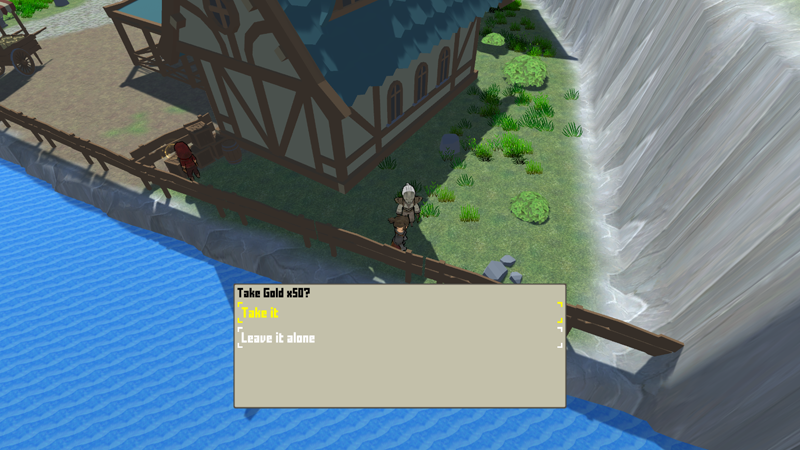
Selecting a combatant (from the battle group) will let the 2nd player run around, interact with stuff, control the battle menu in battles, etc.

The camera control still focuses on the main player – you can use custom camera controls that are able to keep multiple players tracked on screen, or implement splitscreen cameras to solve this issue.


