
You’ve just discovered ORK Framework, now what?
Since ORK Framework is an editor extension for Unity, this documentation assumes that you’ll know the basics of Unity. If you’re looking for tutorials and learning materials on Unity, head over to their website.
Importing ORK Framework #
Importing ORK Framework into your Unity project works like importing any other asset. Depending on the used Unity version, you can import it from the Asset Store window or the Unity Package Manager.
If you’ve got ORK Framework as a unitypackage file or want to import an extension or plugin (e.g. a new UI module) from a unitypackage file, just drag the file into your Unity window and drop it over the Project tab to start the import process.

ORK Framework will import Makinom and it’s core functionality and editor (in form of DLL files), the Unity UI module (also in form of DLL files) and gizmo icons for components and data assets.
UI Modules #
ORK and Makinom comes with the Unity UI module as part of the standard import.
If you don’t want to use it you can skip importing it by disabling the UI module DLL files in the import window:
- Assets/Gaming Is Love/Makinom 2/DLL/ORKFramework3.UnityUI.dll
- Assets/Gaming Is Love/Makinom 2/DLL/Makinom2.UnityUI.dll
- Assets/Gaming Is Love/Makinom 2/DLL/Editor/ORKFramework3Editor.UnityUI.dll
- Assets/Gaming Is Love/Makinom 2/DLL/Editor/Makinom2Editor.UnityUI.dll
Opening ORK Framework (via Makinom) #
ORK’s editor is integrated in the Makinom 2 editor. Once imported, you can open the Makinom editor via Unity’s menu: Window > Gaming Is Love > Makinom
Or: Window > Gaming Is Love > ORK Framework (same editor as Makinom)
You can also open the editor using a keyboard shortcut: CTRL + ALT + M (Windows) or CMD + ALT + M (Mac)
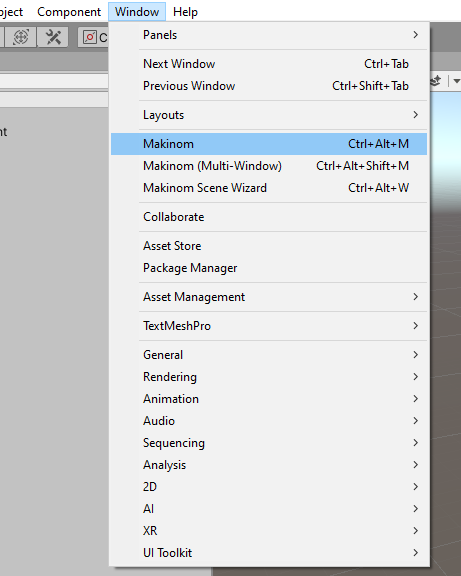
Open multiple Makinom editor windows via: Window > Gaming Is Love > Makinom (Multi-Window)
You can also open multiple editors using a keyboard shortcut: CTRL + ALT + SHIFT + M (Windows) or CMD + ALT + SHIFT + M (Mac)
This can be useful if you want to compare settings side-by-side or open multiple schematics.
ORK 3 will add new sections and sub-sections to the Makinom editor. Certain settings are also added to already existing sub-sections of Makinom:
- Base/Control > Game Controls
- Game > Game Settings
- UI > UI Settings
- UI > Save Game Settings
Learn more about the Makinom editor in the Makinom editor documentation.
First Opening #
The first time you open the Makinom editor in a Unity project will automatically create 2 assets in Makinom’s data folder: Assets/Gaming Is Love/_Data/
- Project.asset
This is your Makinom project asset, it’ll be used by Game Starters to initialize Makinom and ORK Framework in your running game.
It holds some project settings and references. - EditorData.asset
This is a purely editor-related asset and is not used in a running game.
It holds only editor data, e.g. the drag area sizes, variable key references or the list of last opened schematics.
The project asset will remain blank/empty until you save in the Makinom editor (which will also save additional data assets).
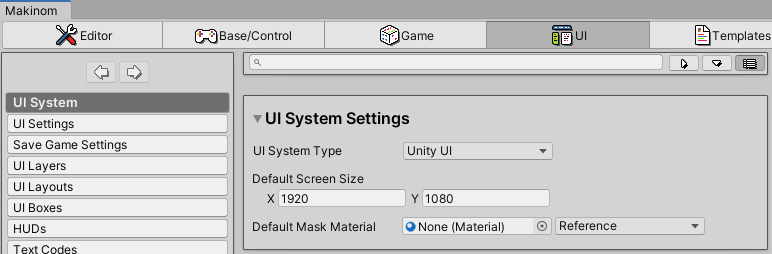
Selecting a UI System #
One of the first things you should do after importing ORK Framework and Makinom is selecting the UI system you want to use. While Makinom comes with the Unity UI module, it doesn’t have it selected in a new project.
Go to UI > UI System in the editor and select the UI module you want to use in the UI System Type setting.
Changing the UI system will prompt a confirmation dialogue:
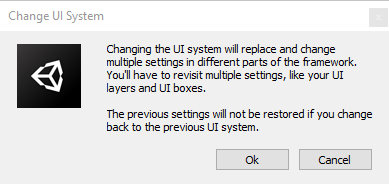
Using a different UI system will cause UI related settings to change, discarding previous setup. This is mainly the case in UI boxes and HUDs, where part of their setup depends on the used UI system, but can also impact the setup of UI related schematic nodes.
Learn more about the UI system here.
See this UI tutorial for a detailed look at the initial setup for the Unity UI module.
First Save #
The first time saving will create additional assets in sub-folders of Assets/Gaming Is Love/_Data/.
The individual settings of list content (e.g. input keys or combatants) are saved in their individual data assets. E.g. each input key will have it’s own data asset in the Input Key sub-folder.
To save the settings, click on the Save Settings button in the bottom right of the Makinom editor window. This’ll show you the changes that will be saved and offer some additional options (more on them below).
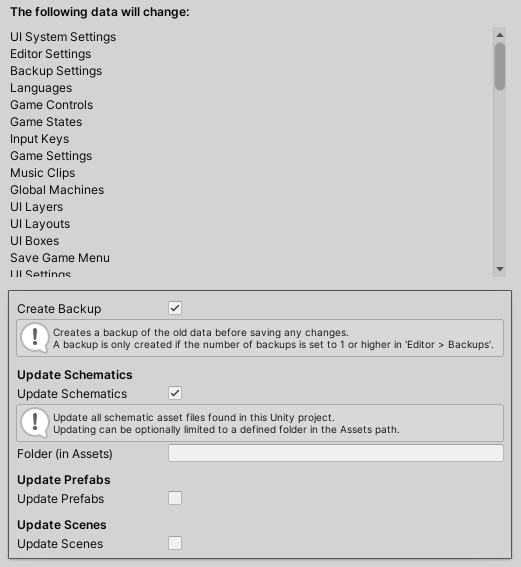
Since it’s the first save, it’ll show a long list, since everything is new.
Learn more about saving settings in the Makinom editor documentation.
Scene Wizard #
Makinom’s scene wizard is a small window to help you add ORK Framework and Makinom game objects or components to your scenes.
Open it using the Unity menu: Window > Gaming Is Love > Makinom Scene Wizard
You can open the scene wizard via a keyboard shortcut, e.g. in Windows: Ctrl + Alt + W
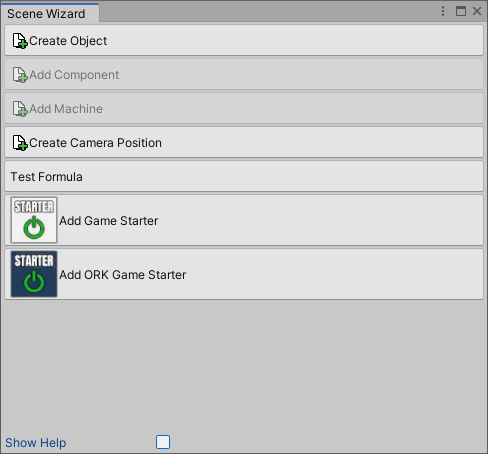
The scene wizard allows you to create new game objects with already added ORK/Makinom components (e.g. music players, scene changers, battles, etc.), add components and machines to selected game objects, create new camera positions by using a scene camera and a game object as references, test formulas using 2 game objects in your scene (for position related mechanics) and add a game starter to your scene.
The scene wizard can also display help texts from ORK/Makinom settings you hover over. E.g. help texts from inspectors can be displayed that way without having the Makinom editor opened.
Extension Manager #
The extension manager can be used to browse, download and import available extensions (e.g. plugins, custom nodes, other scripts or schematics) for ORK and Makinom.
Open it using the Unity Menu: Window > Gaming Is Love > Makinom Extension Manager

Make sure to save your open Makinom project or schematics (in the Makinom editor) before importing any package, as importing a package will reset all unsaved changes.
Adding a Game Starter #
To use ORK and Makinom in your running game, you need to initialize it before being able to access any functionality (e.g. a machine running a schematic).
Initializing ORK/Makinom in your scene is done using a Game Starter or ORK Game Startercomponent, which selects the Makinom project asset that should be used.
![]()
![]()
Add game startes using the scene wizard or simply add the component via Unity’s component menu:
- Makinom > Makinom Game Starter
- ORK Framework > ORK Game Starter
You can have a game starter in each of your scenes to be able to hit play in the Unity editor right there, once Makinom is initialized, other game starters will not be used.
Both the Game Starter and the ORK Game Starter components can be used – the ORK Game Starter has additional options to either load ORK’s start menu scene or show ORK’s start menu after initialization. Other than that, it doesn’t matter which game starter component is used.
Learn more about game starters here.
Getting Started #
You’re probably eager to try out ORK Framework – but where to start?
2D RPG Quickstart Tutorial Series #
For a quickstart into a 2D ORK 3 project without any prior knowledge (except for basic Unity knowledge), follow the 2D RPG Quickstart tutorial series. See a 3D version of this below.

The goal is to create a small top down 2D RPG with Turn Based battles, setting up the entire project from scratch (only using provided assets).
For an in-depth look into status system setup or a wide range of features, check out the Status System Setup and/or 3D RPG Playground tutorial series below.
3D RPG Quickstart Tutorial Series #
For a quickstart into a 3D ORK 3 project without any prior knowledge (except for basic Unity knowledge), follow the 3D RPG Quickstart tutorial series. See a 2D version of this above.
The goal is to create a small top down 3D RPG with Turn Based battles, setting up the entire project from scratch (only using provided assets).
For an in-depth look into status system setup or a wide range of features, check out the Status System Setup and/or 3D RPG Playground tutorial series below.
Status System Setup Tutorial Series #
To learn about setting up a status system, follow the status system setup tutorial series.
It’s an in-depth look into creating a status system from scratch and covers all relevant topics, from status values over abilities to combatant groups. This status system will be used by other tutorial series to build upon.
It’s highly recommended to follow this tutorial series if you’re just starting to learn ORK 3, as it’ll teach you the ins and outs of setting up a status system.
3D RPG Playground Tutorial Series #
To learn about setting up a 3D RPG with turn based or active time battles, follow the 3D RPG Playground tutorial series.

This long series uses the status system setup (see above) as it’s basis and goes through every detail, from adding your player over the battle system to menu setup.
It’s highly recommended to follow this tutorial series if you’re just starting to learn ORK 3 (after completing the status system setup tutorials). It’ll teach you all the basics, from setting up your player, UI, interactions to battles, quests and more.
3D Action RPG Tutorial Series #
To learn about setting up a 3D RPG with real time action combat, follow the 3D Action RPG tutorial series.
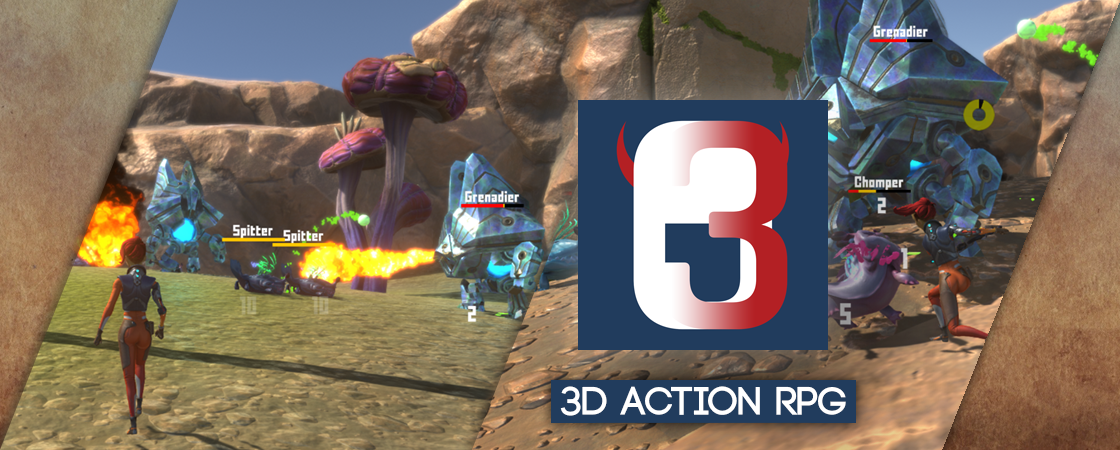
This shorter tutorial series focuses on setting up a real time battle system for action combat. This series is for a more advanced users, who are already a bit familiar with ORK 3.
For more detailed look into various other systems, check out the 3D RPG Playground tutorial series.
2D Grid Battle RPG Tutorial Series #
To learn about setting up a 2D RPG or grid battles, follow the 2D Grid Battle RPG tutorial series.
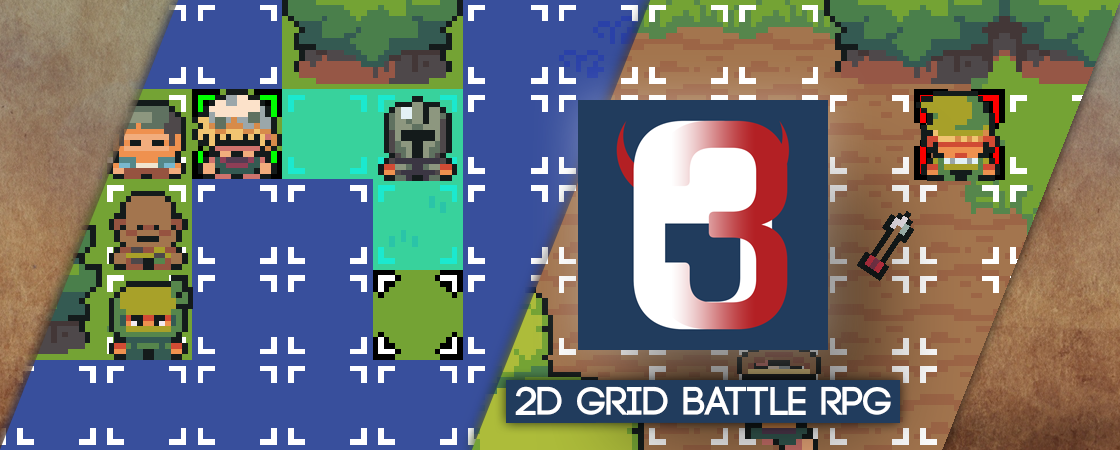
This short tutorial series will focus on setting up a Phase battle system using Battle Grids for a 2D top down RPG. It’ll use the status system setup tutorial series as it’s base, using the set up status system and combatants.
Other Tutorials #
Check ORK 3’s tutorials – there are many different tutorials available covering different topics, e.g. animating a base attack or setting up a simple player HUD (Unity UI).
Learn about Makinom #
To learn more about Makinom, check out Makinom’s getting started documentation.


