

In this tutorial we’ll set up attack modifiers and add elemental attacks for the player.
Modifiers are used by damage calculations (when they’re set up to use them) and allow giving attributes to attacks and combatants, e.g. a fire elemental attack or a small combatant. They work as percent-based changes to damage, e.g. an attribute value of 100 will do 100% (normal) damage, while 50 would only do 50% damage and 200 would do 200% damage (i.e. double damage). Attributes have an attack and a defence value – for attack modifiers, the user’s attack value and the target’s defence value is used.
Attack modifiers are added to an attack (e.g. an ability’s damage). Defence modifiers are added to a combatant (e.g. the size or race of a combatant). We’ll only use attack modifiers in this tutorial series to set up elements for some of our attacks.
The elemental attacks will do 1.5 times the damage of a regular attack and have an element (i.e. attack modifier attribute) assigned to them. Using them will cost 2 MP. As a bonus, we’ll also set up a stun attack, similar to the poison attack of enemies, but stunning the target.
We’ll set up:
- attack modifiers (elements)
- elemental attacks (fire, water, earth and wind)
- stun attack
- add the abilities to the player
- add elemental strength/weaknesses to enemies
Let’s get to it!
Attack Modifiers #
The attack modifier we’ll set up in our status system is Element – giving elemental attributes to attacks.
Open the ORK editor, navigate to Status > Attack Modifiers and change the settings of the already added Default setup.
Content Information #
- Name
Set to: Element
Traits Settings #
We’ll set up an immunity flying text, which is displayed when a combatant is completely immune to an attribute (i.e. the attribute’s attack or defence value being 0).
Immunity Flying Text #
Click on Add Flying Text.
- Player/Ally/Enemy
Enable - Text
Set to: <color=#FF00FFFF>Immune</color>
This’ll display the text in a pink color.
Now we just need to set up the attributes – this is basically just defining their names, as the rest of the setup can be used as is (i.e. attack/defence start values being 100, doing normal damage).
Attribute 0 #
- Name
Set to: Fire
Attribute 1 #
- Name
Set to: Water
Attribute 2 #
- Name
Set to: Earth
Attribute 3 #
- Name
Set to: Wind
Fire Attack #
With our elements set up, we can now create our elemental attacks.
Navigate to Status > Abilities and copy the Attack ability, since we already did most of our setup there. We’ll add and change a few settings.
Content Information #
- Name
Set to: Fire Attack - Description
Set to: Fire elemental physical attack - Sprite (Icon)
Select: icons_343
Click on the Find TMP Tag button to get the icon’s tag for displaying it in texts (via text codes). This uses TextMesh Pro’s sprite asset setup.
Use Costs > Status Changes #
Using the ability costs 2 MP.
Click on Add Status Change.
- Change Type
Select: Status Value - Status Value
Select: MP - Operator
Select: Sub - Change Value
Select: Value > Value
Set the value to: 2
Target Settings > Target Changes > Target Change 0 > Status Change 0 #
We’ll increase the damage by changing the efficiency of the status change.
We also add an attack modifier attribute to the status change.
- Efficiency
Select: Value > Value.
Set the value to: 1.5 - Use Modifier Changes
Enable
This adds attack/defence modifier options to the status change.
Click on Add Attack Modifier.
- Attack Modifier
Select: Element - Attribute
Select: Fire
Water Attack #
The rest of the elemental attacks will just be copies of the fire attack with small changes.
So, copy the Fire Attack ability and change the following settings.
Content Information #
- Name
Set to: Water Attack - Description
Set to: Water elemental physical attack - Sprite (Icon)
Select: icons_346
Click on the Find TMP Tag button to get the icon’s tag for displaying it in texts (via text codes). This uses TextMesh Pro’s sprite asset setup.
Target Settings > Target Changes > Target Change 0 > Status Change 0 #
We’ll change the element to water.
- Attribute
Select: Water
Earth Attack #
Copy the Water Attack ability and change the following settings.
Content Information #
- Name
Set to: Earth Attack - Description
Set to: Earth elemental physical attack - Sprite (Icon)
Select: icons_342
Click on the Find TMP Tag button to get the icon’s tag for displaying it in texts (via text codes). This uses TextMesh Pro’s sprite asset setup.
Target Settings > Target Changes > Target Change 0 > Status Change 0 #
We’ll change the element to earth.
- Attribute
Select: Earth
Wind Attack #
Copy the Earth Attack ability and change the following settings.
Content Information #
- Name
Set to: Wind Attack - Description
Set to: Wind elemental physical attack - Sprite (Icon)
Select: icons_345
Click on the Find TMP Tag button to get the icon’s tag for displaying it in texts (via text codes). This uses TextMesh Pro’s sprite asset setup.
Target Settings > Target Changes > Target Change 0 > Status Change 0 #
We’ll change the element to wind.
- Attribute
Select Wind.
Stun Attack #
The stun attack works the same as the poison attack, just using a different status effect (and prefab).
Copy the Poison Attack ability and change the following settings.
Content Information #
- Name
Set to: Stun Attack - Description
Set to: Stuns the target - Sprite (Icon)
Select: icons_239
Click on the Find TMP Tag button to get the icon’s tag for displaying it in texts (via text codes). This uses TextMesh Pro’s sprite asset setup.
Animation Settings > Battle Animation 0 > Resource Overrides > Prefabs > Prefab 0 #
We replace the schematic’s prefab.
- Prefab
Select: NegativeEffect
Target Settings > Target Changes > Target Change 0 > Status Change 1 #
We’ll change the status effect to Stun.
- Status Effect
Select: Stun
Updating the Combatants #
With our abilities set up, we’ll now add them to the player’s combatant.
Navigate to Combatants > Combatants and select the Fighter combatant.
Fighter #
The player’s combatant will get the new abilities.
Attacks & Abilities > Ability Development #
We’ll add all 4 elemental attacks and the stun attack.
I’ll set them up to be learned at different levels, but feel free to learn them all at level 1 to test them out.
Click on Add Ability.
- Learn At Level
Set to: 1
We’ll have this ability available right at level 1. - Ability
Select: Fire Attack
Click on Add Ability again.
- Learn At Level
Set to: 2 - Ability
Select: Water Attack
Click on Add Ability again.
- Learn At Level
Set to: 3 - Ability
Select: Earth Attack
Click on Add Ability again.
- Learn At Level
Set to: 4 - Ability
Select: Wind Attack
Click on Add Ability again.
- Learn At Level
Set to: 5 - Ability
Select: Stun Attack
Wasp #
Select the Wasp combatant – we’ll set up start values for the attack modifier attributes, giving strength and weakness against certain elements.
Status Settings > Modifier Settings > Attack Modifier Start Values #
The default start values for the attack modifier attributes are defined in their individual settings – in our setup (or any new setup), they have a start value of 100 (i.e. doing 100% of the damage).
We’ll override two of the attributes to give the enemy a weakness to earth and a strength against wind.
Click on Add Attack Modifier.
- Attack Modifier
Select: Element - Attribute
Select: Earth - Attack Start Value
Set to: 100
The wasp will do normal damage with earth elemental attacks. - Defence Start Value
Set to: 150
The wasp will take 150% damage from earth elemental attacks.
Copy the added attack modifier attribute and change the following settings.
- Attribute
Select: Wind - Defence Start Value
Set to: 50
The wasp will only take 50% damage from wind elemental attacks.
Snake #
Select the Snake combatant.
Modifier Settings > Attack Modifier Start Values #
We’ll give the snake a weakness to fire and a strength against water.
Click on Add Attack Modifier.
- Attack Modifier
Select Element. - Attribute
Select Fire. - Attack Start Value
Set to: 100 - Defence Start Value
Set to: 150
Copy the added attack modifier attribute and change the following settings.
- Attribute
Select: Water - Defence Start Value
Set to: 50
Save Changes #
And that’s it!
Save the changes using the Save Settings button at the bottom of the editor.
Testing #
Hit play and start a battle.
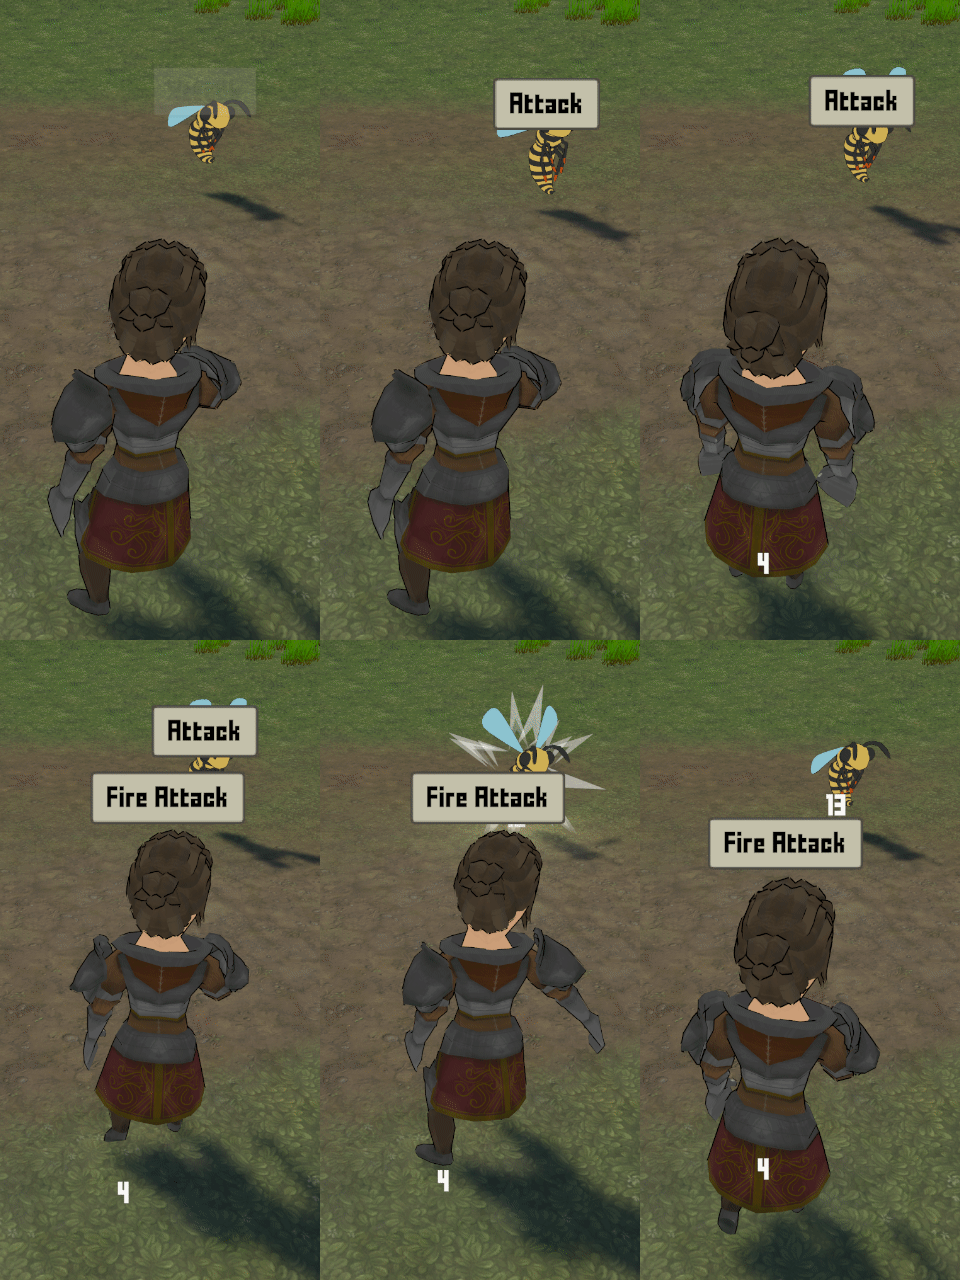
The player now has Skills available in the battle menu and can use the Fire Attack from there (or all, if you set them up to be learned at level 1).
Notice how using it on a Snake will do more damage than on a Wasp. The elemental attributes are working as they should.
Next, we’ll set up some more schematics to animate actions.