

In this tutorial we’ll set up our player and spawn it in the scene.
The player group will have 2 members, but we’ll only set up one for now – the fighter. The goal of this tutorial is to be able to run around with our player.
We’ll set up:
- animations
- the player (combatant)
- world scene (spawn, camera borders)
- start game schematic
Let’s get to it!
Animations #
We’ll start with the animations and focus on movement, i.e. idle, walk and run animations. We’ll set up more animations later.
The models used in the tutorial assets worked best using the legacy animation system, so that’s what we’re going with. Also, the legacy animation system is great at giving you control over playing animations when you want, instead of relying on state transitions like Mecanim does.
Legacy animations are played on layers, higher layers overrule lower layers, we’ll use that to ensure the correct animation has priority:
- Layer -1: idle
- Layer 0: walk, run
- Layer 1: damage, evade, etc.
- etc.
Navigate to Combatants > Animations, select the Default animation setup and change the following settings.
Base Settings #
- Name
Set to: Movement
Legacy Settings #
Since we’re using the legacy animation system, that’s where we’ll do our animation setup.
Tip!
You can use the Load From Prefab settings to load all animations from a provided prefab instead of manually setting them up. You’ll only have to adjust the settings to your needs (e.g. defining layers and changing play type).
We don’t use this because we’ll split up the animations into different setups for modular use.
- Random First Start Time
Enable
This’ll use a random time for the initial animation that is played to prevent all combatants using the same animations from looking exactly the same.
Click on Add Legacy Animation.
- Organizer Type
Select: Idle
Organizer types can have multiple animations assigned to them – one will be played randomly. There’s already an animation added, so let’s change it.
- Animation Name
Set to: Idle - Set Layer
Enable - Animation Layer
Set to: -1
We’ll use the default Play Settings for all our animations, they’re:
- Play Type
Select: Cross Fade - Play Mode
Select: Stop Same Layer - Fade Length
Set to: 0.1
Copy Legacy Animation 0 and change the following settings.
- Organizer Type
Select: Walk - Animation Name
Set to: Walk - Animation Layer
Set to: 0
Copy Legacy Animation 1 and change the following settings.
- Organizer Type
Select: Run - Animation Name
Set to: Run
That’s it for the animations.
Combatants General Settings #
Next, we’ll handle some general settings for all our combatants.
Navigate to Combatants > Combatants and select the General Settings.
Animations & Movement #
We’ll set up the default animations for all combatants, move speed and sound assignments.
Animations #
Click on Add Animations.
- Animations
Select: Movement
Auto Animation #
Auto animations are best only used with Legacy animation systems. They’ll automatically play idle/movement animations based on the current move speed of a combatant.
- Use Auto Animation
Enable - Minimum Run Speed
Set to: 4
This is the minimum speed needed to play the run animation. - Minimum Sprint Speed
Set to: 10
We don’t really use sprint animations, though.
Tip!
The auto animations use the Default Organizer Types that are set up in Combatants > Animations > General Settings. A new project has them automatically set up to use the (also automatically set up) Idle, Walk, Run, etc. organizer types. In case your auto animations don’t work, make sure they’re set up correctly and use the organizer types you use for your movement animations.
Move Speed #
The move speed handles how fast a combatant will move for walk, run and sprint movement (e.g. when used by the player controls or the move AI).
- Use Position Change
Enable
This’ll use the combatant’s actual position change to calculate the movement speed, i.e. it is independent from however the game object is actually moved.
This is the default setup and usually what you want to use. - Walk Speed
Select: Value > Value
Set the value to: 3 - Run Speed
Select: Value > Value
Set the value to: 8 - Sprint Speed
Select: Value > Value
Set the value to: 12
Sound Settings #
We’ll assign audio assets to organizer types for all our combatants. The individual combatants can replace them with their own setup if you want.
You can also assign multiple audio assets to a organizer type – one will be played randomly.
Click on Add Sound.
- Organizer Type
Select: Attack - Audio Asset
Select: swoosh01
We’ll add multiple audio clips, one of them will be used randomly.
Click on Add Audio Clip.
- Audio Asset
Select: swoosh02
Click on Add Audio Clip.
- Audio Asset
Select: swoosh03
Add another sound assignment – click on Add Sound.
- Organizer Type
Select: Damage - Audio Asset
Select: hit03
Click on Add Sound again.
- Organizer Type
Select: Death - Audio Asset
Select: random6
Fighter Combatant #
We’ll just change the name and set up a prefab, we don’t need any status setup (other than the default setup), since we don’t fight in battles yet and only want to run around.
Navigate to Combatants > Combatants and select the Default combatant.
Content Information #
- Name
Set to: Fighter
Base Settings > Prefab Settings #
- Prefab
Select: Warrior
Save Changes #
That’s it for the setup in the editor for now.
Don’t forget to save your changes by clicking on Save Settings at the bottom of the editor.
World Scene Setup #
Open the World scene (found in Assets/Scenes/).

We’ll add a Game Starter, a Spawn Point and Camera Borders.
Add Game Starter #
First, we’ll add a game starter to the scene and set it up for quick game testing.
Game starters are used to initialize your ORK project. Without it, you can’t access any functionality without causing errors.
You can either use the scene hierarchy context menu or the ORK toolbar.
I’ll use the context menu: ORK Framework > Game Starter
The added game starter should already have your Project asset set up. Change the following setting in the Game Starter component’s inspector.
- Game Start Type
Select: StartGame
This will immediately start a new game after initializing ORK.
It doesn’t really matter where you place the game starter, but it’s best to have them somewhere outside your actual level architecture to not get in the way.
Add Spawn Point #
Next, we’ll add a spawn point – we’ll spawn on the right side of town, near the gate.

Like the game starter, you can add a spawn point via the context menu or the ORK toolbar. The toolbar is a searchable dropdown, which makes it easy to find what you’re looking for.
Let’s use the ORK toolbar (see this documentation in case you haven’t added it yet) – click on the ORK button in your toolbar and search for: Spawn Point
The spawn point will be placed directly on the ground (or whatever else is hit by the raycast into the scene) at the screen’s center – and it automatically has the next free Spawn ID assigned. Spawn IDs are used to identify a spawn point, so when we (soon) spawn our player using a schematic, that’s the spawn ID we’ll use.
Since there wasn’t a spawn point in the scene before, we’ll have the spawn ID 0 assigned.
With the spawn point selected, we’ll change a few things in the inspector.
Transform #
Change the rotation of the spawn point in the inspector.
- Rotation
Set to: X=0, Y=90, Z=0
Spawn Point #
- Use Rotation
Enable: Y
We’ll use the Y-axis rotation when spawning the player on this spawn point.
Add Camera Borders #
If you look at the scene hierarchy, you’ll see a game object called Camera Borders, it’s child objects are for our camera borders:
- Town
- Gate
- Field 1
- Field 2
They already have a collider components (used as triggers) set up to cover their parts of the scene – when the player moves between them, the camera will switch over.
All we need to do is add a Camera Border component to each of them using the component menu. The component offers a few settings, but we don’t need any of them for our setup, except for the Gate camera border, so select the Gate child object and change the following setting.
- Use Border Height
Enable
This’ll place the camera at the upper edge of the game object’s collider.
That’s it for the scene, save your changes.
Start Schematic #
A schematic is a reusable, node-based blueprint for what you want to do. It consists of connected nodes that work similar to a flow chart – each node performs a task and decides the next node that’ll be executed.
Schematics are an integral part of ORK’s workflow and are used to animate your battles, talk to NPCs, progress quests and much more. We’ll cover different setups as part of this tutorial series.
For now, we’ll set up what happens when we start a new game, i.e. add a player and spawn it.
Open the schematic editor either using the Unity menu (Window > Gaming is Love > Schematic Editor) or the keyboard shortcut (CTRL/CMD + ALT + M). The schematic editor will open with a new, empty schematic ready for setup.
We’ll join the Fighter to the player group and spawn at the spawn point (spawn ID 0).

Join Group #
Add Node > Group > Group > Join Group
First, we’ll add Fighter to the player group. This will automatically join a combatant to the group’s battle group as well, unless no free slot is available.
- Group Origin
Select: Active Player Group
This’ll join the combatant to the currently active player group. - Get From
Select: Combatant
We’ll create a new combatant from a defined combatant’s settings.
You could also use combatants of a combatant group setup, a random combatant of an organizer type or an existing combatant (via an object). - Combatant
Select: Fighter
Spawn Player #
Add Node > Game > Player > Spawn Player
Now, we’ll spawn the player in the scene.
- Spawn At
Select: Spawn Point - Spawn Point ID
Set to: 0
And that’s it for the schematic. Click on Save Schematic to save it, e.g. as StartGame.
I usually save all my schematics in Assets/Schematics/ and sub folders of it.
Close the schematic editor.
Start Menu #
The start menu settings also define the schematic used when starting a new game.
Navigate to Menus > Start Menu and change the following settings.
New Game Settings #
- Start Schematic
Select: StartGame schematic
Save Changes #
And that’s it – we’re ready to take our player for a test walk!
Don’t forget to save your changes by clicking on Save Settings at the bottom of the editor.
Testing #
Alright – let’s take a walk. With the World scene still open, hit play.
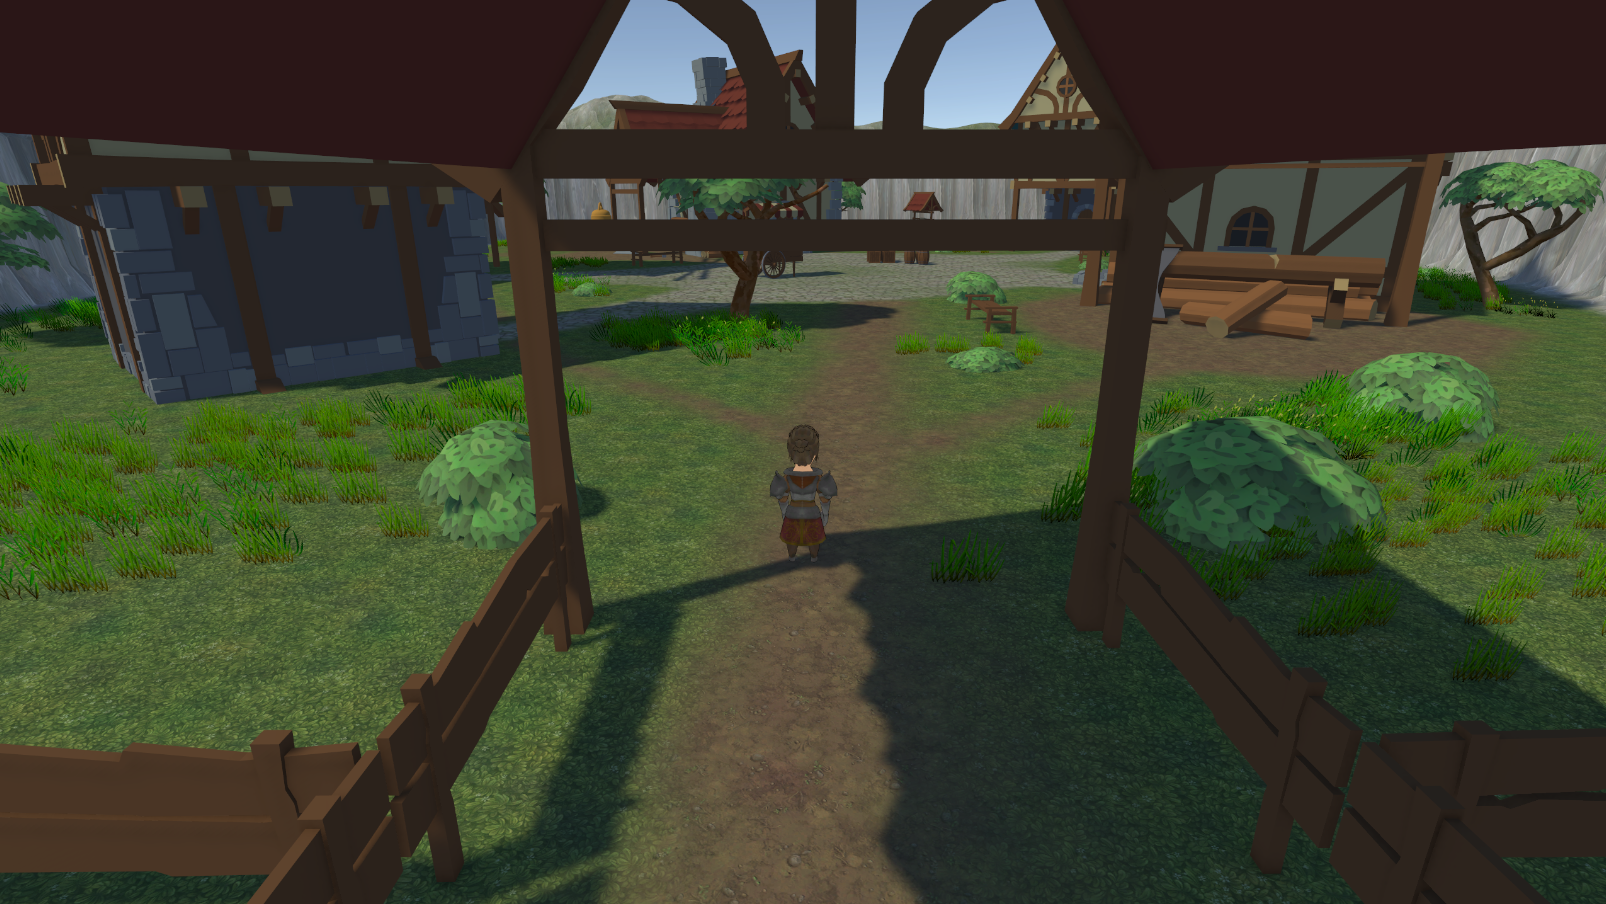
Great, we spawn, can move around and the camera border is doing it’s job!
Next, we’ll set up the game’s music and connect our scenes.