

In this tutorial we’ll set up quests that task the player to hunt specific enemies.
This tutorial is part 2 of a mini-series covering quests. You can find the start of this series here.
The quests will be available at a guard NPC, opening the hunting quest board menu screen.
This tutorial is based on the ORK 4 Unity Quickstart 3D tutorials and uses the quest menu setup, but can be used in any project.
Content Type #
One of our quests will use a content type to hunt all combatants of a type instead of specific combatants. We’ll use the content type on all enemies that spawn in the dungeon.
Open the ORK editor, navigate to Content > Content Types and add a new content type.
- Name
Set to: Dungeon Enemies
Quests #
A quest serves as a container for one or multiple quest tasks. We’ll first set up a number of quests and add tasks to them afterwards.
Navigate to Content > Quests, we’ll change the Default quest and add additional quests.
0: Hunt Wasps #
This quest will send us hunting down a couple of wasps. We’ll just need to kill them, not report back that we did it.
- Name
Set to: Hunt Wasps
Base Settings #
- Content Type
Select: Hunting Quests - Repeatable
Enable
The quest can be started again after it was finished.
Quest Text #
- Default Content
Set to: Wasps have been plaguing the townsfolk.
Kill them.
Rewards > Experience Rewards #
We’ll receive some experience for finishing the quest.
Click on Add Experience Reward.
- Combatant Scope
Select: Group
All group members will get the experience. - Status Value
Select: EXP - Reward Value
Select: Value > Value
Set the value to: 5
1: Hunt Snakes #
Copy the Hunt Wasps quest and change the following settings.
- Name
Set to: Hunt Snakes
Quest Text #
- Default Content
Set to: Snakes are scaring the children.
Kill them.
Rewards > Experience Rewards #
- Reward Value
Set the value to: 8
Rewards > Item Rewards #
We’ll also receive a revive potion in addition to the experience.
Click on Add Item Reward.
- Type
Select: Item - Item
Select: Cure Potion
2: Hunt in the Dungeon #
This quest will target combatants of a content type instead of a specific combatant.
We’ll also only make this quest available if the other 2 hunting quests are finished.
Copy the Hunt Snakes quest and change the following settings.
- Name
Set to: Hunt in the Dungeon
Base Settings > Availability Conditions #
The availability conditions are used to check if a quest should be available to the player.
We’ll check if the Hunt Wasps and Hunt Snakes quests are already finished.
- Use Conditions
Enable
Click on Add Condition.
- Condition Type
Select: Quest - Needed
Select: All
All added quest conditions must be valid.
The other option is One, i.e. only one must be valid.
Click on Add Quest Condition.
- Quest
Select: Hunt Wasps - Check Status
Select: Was Finished
Copy the quest condition and change the following setting:
- Quest
Select: Hunt Snakes
Quest Text #
- Default Content
Set to: The monsters in the dungeon are a nuisance to deal with.
Kill them.
Rewards > Experience Rewards #
- Initial Value
Set to: 20
Rewards > Item Rewards #
We’ll change the reward to give us gold.
- Type
Select: Currency - Currency
Select: Gold - Quantity
Select: Value > Value
Set the value to: 300
Quest Tasks #
Next, we’ll set up the tasks for our quests.
Navigate to Content > Quest Tasks, we’ll change the Default task and add additional tasks.
0: Kill Wasps #
This task will automatically activate (it’s the first and only task of it’s quest) and automatically finish when we killed 2 wasps – and also finish the quest.
- Name
Set to: Kill Wasps
Base Settings #
- Quest
Select: Hunt Wasps
Activate Requirements #
- Auto Activate
Enable
The task will automatically activate if the requirements are met.
Since we don’t add any requirements to the activate requirements, it’ll activate when the quest is added.
Finish Requirements #
- Auto Finish
Enable
The task will automatically finish if all requirements are met. - Finish Quest
Enable
Finishing this task will also finish our quest (giving the quest’s rewards).
Click on Add Requirement to add a finish requirement for this task.
- Requirement
Select: Enemy Kill - Kill Type
Select: Combatant - Combatant
Select: Wasp - Quantity
Set to: 2
1: Kill Snakes #
Copy the Kill Wasps task and change the following settings.
- Name
Set to: Kill Snakes
Base Settings #
- Quest
Select: Hunt Snakes
Finish Requirements > Requirement 0 #
- Combatant
Select: Snake - Quantity
Set to: 3
2: Kill in the Dungeon #
Copy the Kill Snakes task and change the following settings.
- Name
Set to: Kill in the Dungeon
Base Settings #
- Quest
Select: Hunt in the Dungeon
Finish Requirements > Requirement 0 #
- Kill Type
Select: Content Type - Content Type
Select: Dungeon Enemies - Quantity
Set to: 10
Updating Combatants #
Before adding our quests to the scene, we’ll still need to update the dungeon enemies to use the content type we’ve set up.
Navigate to Combatants > Combatants and change the following settings for:
- Rat
- Spider
- Skeleton
- Slime
Base Settings #
- Content Type
Select: Dungeon Enemies
Save Changes #
That’s all we need to set up in the editor.
Don’t forget to save your changes by clicking on Save Settings at the bottom of the editor.
Hunting Quest Board Schematic #
We’ll continue by setting up the NPC’s schematic that’ll open the quest board.
Open the schematic editor.

Settings #
We’ll block the player and camera control while the schematic is running, and add a speaker for dialogues.
- Block Player Control
Enable - Block Camera Control
Enable
Speakers #
The NPC we’ll get our hunting quests from is a guard.
Click on Add Speaker.
- Object (Speaker Object)
Select: Machine Object
I.e. the object the schematic is running on will be the guard. - Custom Object Content
Enable
We’ll define the content right here instead of using an object content set up in the ORK editor.
In case you use NPCs that appear in multiple schematics, it’s best to use defined object content instead. - Name
Set to: Guard
Check Quest Conditions #
Add Node > Game > Quest > Check Quest Conditions
We’ll check if any hunting quest (via content type) is available (i.e. not yet added and availability conditions valid).
Click on Add Quest Type Condition.
- Content Type
Select: Hunting Quests - Check Status
Select: Available
Show Dialogue #
Add Node > Dialogue > Show Dialogue
We’ll display a dialogue in case the quest condition failed.
This node is connected to the Failed slot of the Check Quest Condition node.
- Dialogue Type
Select: Message - UI Box
Select: Dialogue - Use Speaker
Enable - Speaker
Select: Speaker 0: Guard - Text (Message Content)
Set to: Sorry, I’ve got nothing new for you.
Show Dialogue #
Copy the previous Show Dialogue node, we’ll now add a choice dialogue in case quests are available.
This node is connected to the Success slot of the Check Quest Condition node.
- Dialogue Type
Select: Choice - Text (Message Content)
Set to: Hi there, good citizen!
Interested in slaying some monsters for rewards?
Choice Settings #
Click on Add Choice.
- Text (Choice 0)
Set to: Sure
Click on Add Choice again.
- Text (Choice 1)
Set to: No thanks
Call Menu Screen #
Add Node > UI > Screen > Call Menu Screen
This node is used to open a menu screen – we’ll use it to open our Hunting Quest Board menu.
This node is connected to the Choice 0 slot of the previous Show Dialogue node.
- Menu Screen
Select: Hunting Quest Board - Wait
Enable
The schematic will continue after the menu was closed.
Show Dialogue #
Copy the first Show Dialogue node (i.e. the message, not the choice dialogue).
This node is connected to the Next slot of the Call Menu Screen node.
- Text (Message Content)
Set to: Good luck out there!
And that’s it for the schematic – save it, e.g. as GuardHuntingQuests.
Guard NPC #
Finally, it’s time to add the guard NPC that’ll give the player the hunting quests.
Open the World scene and add the prefab Knight_Male near the town’s entrance (on the town’s side). You can find the NPC prefabs in Assets/Tutorial Assets/Prefabs/NPCs/.

I’m also changing the rotation on the Y-axis by 180° to let the guard face south toward the path.
Machine (Schematic) #
All that’s left is to add the schematic to the NPC using a Machine (Schematic) component.
Use the component menu to add the component.
Start Settings #
We want to start the schematic by interacting with the NPC.
Click on Interact to add set the start types to Interact.
If you want, you can also add mouse interaction, click on Add Start Type.
- Start Type
Select: Interaction > Mouse Up As Button
In case you’ve followed the interaction HUD tutorial, you can also set the organizer type to use the correct HUD.
- Organizer Type
Select: Talk Interaction
We’ll use the Object Turn Settings to let the player and NPC face each other.
- Turn Starting Object
Enable
This’ll turn the player (the one that started the interaction). - Turn Component Object
Enable
This’ll turn the object the component is on (i.e. the guard NPC). - Reset Rotation
Enable
This’ll let the component object return to it’s previous rotation, i.e. the guard will look back toward the path.
Asset Settings #
- Schematic Asset
Select: GuardHuntingQuests
And that’s it, save the changes you’ve made in the scene.
Testing #
Hit play and talk to the guard.
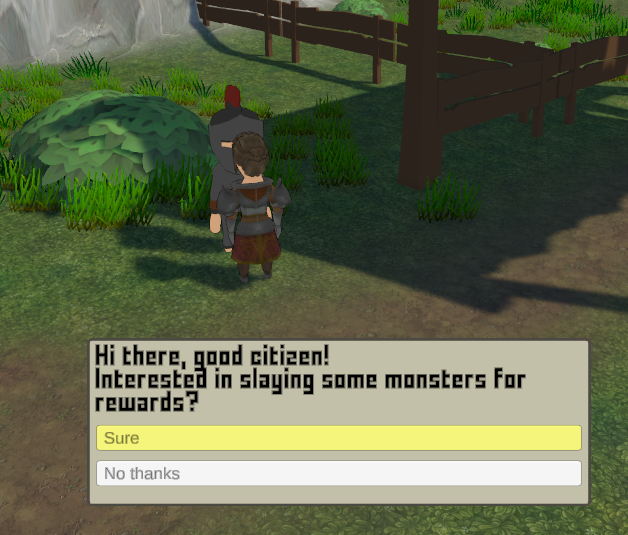
Start quests in the guard’s quest board.

And kill enough enemies to finish the quest.
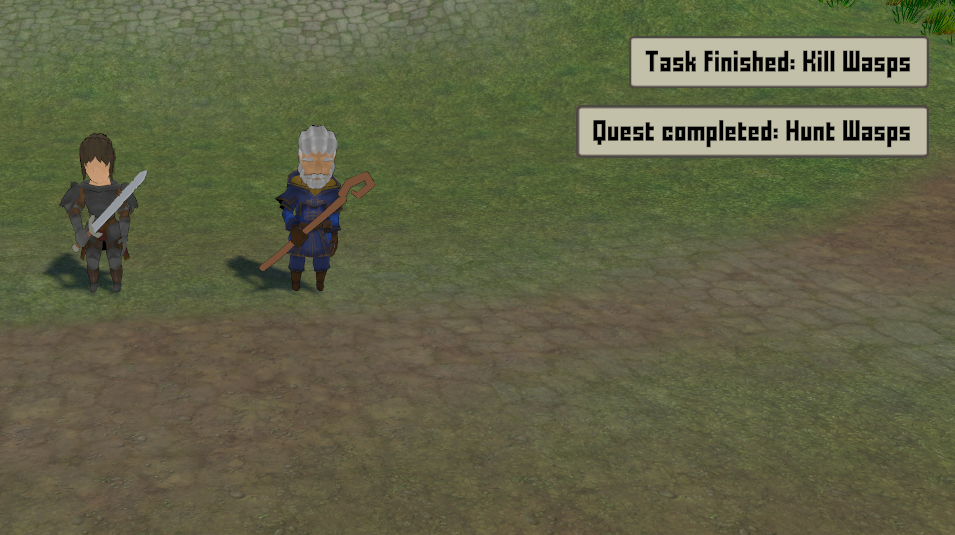
The next part of the quest mini-series will add an item fetch quest.
Quest HUD (Optional) #
Add a Quest type HUD to give the player more information (beside the menu screen).
See this UI tutorial for a setup example.