

In this tutorial we’ll add a HUD showing the cast time of a combatant.
We’ll use the Combatant Object HUD type, i.e. the cast time HUD will be shown directly at the on-screen position of the combatants.
This tutorial is based on the ORK 4 Unity Quickstart 3D tutorials using active time battles and cast times, but can be used in any project. Your project’s UI system should already be set to Unity UI. If not, check the initial setup tutorial for Unity UI.
As with all content when using Unity UI, we’ll set up prefabs. It’s best to do this in the UI Environment Scene, so open it.
HUD Prefab Setup #
We’ll start with the prefab for our HUD, we’ll simply display the combatant’s cast time using a value bar – no text or anything else.
Use the scene hierarchy context menu (ORK Framework > HUD > HUD) or ORK toolbar (search for: HUD) to create a new base HUD (without any layout).
Let’s adjust the HUD object to our needs.
Rect Transform #
Since we’ll use the HUD at the position of combatants on screen, we’ll only set the width and height and can ignore the positioning.
- Width
Set to: 150 - Height
Set to: 30
Image #
Add an Image component to the HUD object. We’ll use it to add a background image to the HUD.
- Source Image
Select: BoxBlue (or any other sprite you like)
Value Bar #
Add the value bar to the HUD either using the scene hierarchy context menu (ORK Framework > HUD > Content > HUD: Value Bar (Sprite)) or the ORK toolbar (search for: HUD Bar Sprite).
Rect Transform #
We’ll adjust the position to show the value bar nearly filling the whole HUD.
- Left
Set to: 5 - Top
Set to: 5 - Right
Set to: 5 - Bottom
Set to: 5
HUD Value Bar Content #
This component is responsible for what the value bar will actually represent.
We’ll change it to show the cast time- the timebar will only be visible in active time battles automatically.
- Value Type
Select: Cast Time
Empty and Value Sprite #
The Empty Sprite child object of the value bar shows the empty bar, the Value Sprite shows the filled part of the bar.
Select both at the same time and change the used sprite:
- Source Image
Select: White_16x16
Create Prefab #
The complete HUD will look like this:
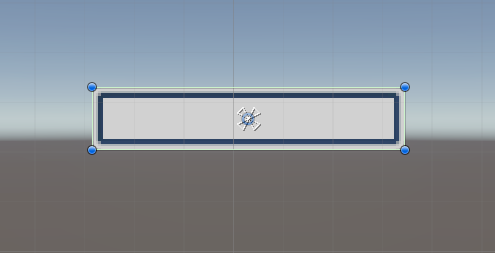
Create a prefab out of the HUD object, e.g. naming it Cast Time HUD.
If you’ve done the setup in one of your game’s scenes, don’t forget to remove the canvas (with the HUD object).
Cast Time HUD Setup #
Open the ORK editor, navigate to UI > HUDs and add a new HUD.
The HUD will use the Combatant Object HUD type, i.e. it’ll be displayed based on the position of a combatant’s object. We’ll also only display it when the combatant is casting.
HUD Settings #
- Name
Set to: Cast Time - HUD Type
Select: Combatant Object - Auto Display
Enable
Combatant Settings #
- Player/Ally/Enemy
Enable
We’ll display the HUD based on a child object of the combatant.
- Child Object
Select: Path - Find Child
Set to: Cursor
Display Conditions > Combatant Requirements #
Click on Add Status Condition.
- Condition Type
Select: Status - Status Needed
Select: Is Casting - Is Casting
Enable
Unity UI #
- UI Layer
Select: HUD - HUD Prefab
Select: Cast Time HUD
Save Changes #
And that’s it!
Don’t forget to save your changes by clicking on Save Settings at the bottom of the editor.
Testing #
Hit play and start a fight!
The cast time HUD pops up whenever a combatant uses an action that has a cast time.