

In this tutorial we’ll set up a quest to get an NPC some items.
This tutorial is part 3 of a mini-series covering quests. You can find the start of this series here.
The quest will be available at the crafting NPC, requesting the player to collect crafting materials for potions and teach new potion recipes as rewards. You’ll need the crafting tutorial mini-series for this quest (at least part 1, 2 and 3).
This tutorial is based on the ORK 4 Unity Quickstart 3D tutorials and uses the previous quest tutorials and the crafting tutorials, but can be used in any project.
Quest #
We’ll start with setting up the quest.
The crafting NPC will give the player 2 quests. Well set up the first quest in this tutorial and the second quest in the next tutorial.
The first quest will ask for crafting materials for potion recipes and reward the player with the rest of the potion recipes (after giving the player the initial potion recipe).
Open the ORK editor and navigate to Content > Quests, we’ll add a new quest.
Collect Potion Materials #
As said, the first quest requires the player to collect material items for potion recipes. The items will be defined in a quest task.
Add a new quest and change the following settings.
- Name
Set to: Collect Potion Materials
Base Settings #
- Content Type
Select: Fetching Quests
Quest Text #
- Default Content
Set to: The crafting enthusiast requires potion crafting materials in order to teach us the other potion recipes.
Rewards > Item Rewards #
Upon completion, the player will receive the remaining potion recipes – the regular Potion Recipe has already been given to the player by the crafting NPC before the quest.
We’ll add:
- high potion recipe
- magic potion recipe
- revive potion recipe
- cure potion recipe
Click on Add Item Reward.
- Type
Select: Crafting Recipe - Crafting Recipe
Select: High Potion Recipe
Coy Item Reward 0.
- Crafting Recipe
Select: Magic Potion Recipe
Coy Item Reward 1.
- Crafting Recipe
Select: Revive Potion Recipe
Coy Item Reward 2.
- Crafting Recipe
Select: Cure Potion Recipe
Quest Task #
Next, we’ll set up the quest tasks for the quest.
The quest will have 2 tasks – one for collecting the required items and one to return to the NPC and deliver the items.
Navigate to Content > Quest Tasks, we’ll add new tasks.
Find Potion Materials #
The player has to collect 1 slime, 1 bone and 1 venom.
Add a new quest task.
- Name
Set to: Find Potion Materials
Base Settings #
- Quest
Select: Collect Potion Materials
Activate Requirements #
This is the first task of the quest, so we’ll automatically activate it.
- Auto Activate
Enable
Finish Requirements #
- Auto Finish
Enable
The task will automatically finish if all requirements are met. - Finish Quest
Disable
Finishing the task will start a new task, not finish the quest.
Click on Add Requirement to add a finish requirement for this task.
- Requirement
Select: Item - Type
Select: Item - Item
Select: Slime - Quantity
Set to: 1
Copy Requirement 0.
- Item
Select: Bone
Copy Requirement 1.
- Item
Select: Venom
Deliver Potion Materials #
This task will automatically start when the Find Potion Materials task finished. The task doesn’t automatically finish, that’ll be handled in the crafting NPC’s schematic.
Add a new task.
- Name
Set to: Deliver Potion Materials
Base Settings #
- Quest
Select: Collect Potion Materials
We’ll also update the quest text.
- Update Quest Text
Enable - Replace Text
Enable
The task will completely replace the quest’s text instead of adding to it. - Default Content (Quest Text)
Set to: We’ve found the required potion materials, let’s return to the crafting enthusiast.
Activate Requirements #
We’ll automatically activate the task when the other task was finished.
- Auto Activate
Enable
Click on Add Requirement.
- Requirement
Select: Finished Task - Finished Task
Select: Find Potion Materials
Finish Requirements #
We don’t automatically finish based on requirements (because we have none), but we’ll let the quest finish when this task finishes (which we’ll handle in a schematic).
- Finish Quest
Enable
Save Changes #
That’s all we need to set up in the editor.
Don’t forget to save your changes by clicking on Save Settings at the bottom of the editor.
Crafting NPC Schematic #
With our quest and quest tasks set up, we can add the quest to the game world.
We’ll add handling the quest (i.e. the start and end of the quest) in the crafting NPC’s schematic. The crafting tutorials already set up the initial interaction, we’ll simply expand on it, starting the quest after the player received the initial potion recipe and materials.
Open the schematic editor and open the CraftingNPC schematic (or however else you named it in your project).
The schematic currently looks like this:

We’ll continue after the first Show Dialogue node (saying Crafting is fantastic). The final schematic looks like this:

Quest Status Fork #
Add Node > Game > Quest > Quest Status Fork
This node is used to check the state of a quest, with each possible state having it’s own next slot.
We’ll check the Collect Potion Materials quest – if it’s not added, we’ll add it, if it’s active or inactive, we’ll just show a dialogue, and if it’s finished, we’ll continue to the next quest. The failed state can be ignored in our case, since the quest can’t fail.
- Quest
Select: Collect Potion Materials
Show Dialogue #
We’ll first handle the case where the quest isn’t added yet.
Copy one of the Show Dialogue nodes and connect it to the Not Added slot of the Quest Status Fork node.
Change the following settings.
- Text (Message Content)
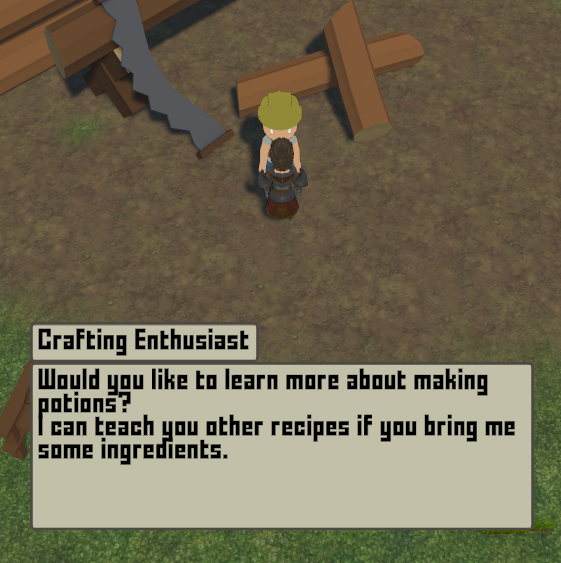
Set to: Would you like to learn more about making potions?
I can teach you other recipes if you bring me some ingredients.
Quest Choice #
Add Node > Game > Quest > Quest Choice
This node is used to show a quest’s information (using a quest layout) and allowing the player to accept or decline the quest. Please note that the node doesn’t add the quest, but it provides separate next slots based on the player’s choice.
We’ll show the Collect Potion Materials quest’s information.
- Quest
Select: Collect Potion Materials - UI Box
Select: Menu Big - Allow Cancel
Enable - Use Choice
Enable - Add Cancel Button
Select: Last - Text (Accept Button)
Set to: Ok
Add Quest #
Add Node > Game > Quest > Add Quest
We’ll add the quest in case the player accepted.
This node is connected to the Accept slot of the previous Quest Choice node.
- Quest
Select: Collect Potion Materials
Show Dialogue #
We’ll show another dialogue after accepting the quest – the same dialogue will also be displayed when speaking to the NPC while the quest is active or inactive.
Copy one of the Show Dialogue nodes and connect it to the Success slot of the previous Add Quest node and the Active and Inactive slots of the Quest Status Fork node.
Change the following settings.
- Text (Message Content)
Set to: Bring me the materials and I’ll teach you more potion recipes.
Check Quest Conditions #
Add Node > Game > Quest > Check Quest Conditions
We’ll check if the Deliver Potion Materials task is active, i.e. the player has collected all items.
This node is connected to the Next slot of the previous Show Dialogue node.
Click on Add Task Condition.
- Quest Task
Select: Deliver Potion Materials - Check Status
Select: Active
Has In Inventory #
Add Node > Inventory > Inventory > Has In Inventory
We’ll also check if the player has the items in the inventory.
This node is connected to the Success slot of the previous Check Quest Conditions node.
- Object (Combatant)
Select: Player
Change the already added Item 0.
- Item
Select: Slime
Copy Item 0.
- Item
Select: Bone
Copy Item 1.
- Item
Select: Venom
Show Dialogue #
In case the items are not in the player’s inventory, we’ll only show a dialogue.
Copy one of the Show Dialogue nodes and connect it to the Failed slot of the previous Has In Inventory node.
Change the following settings.
- Text (Message Content)
Set to: You’ve got the materials?
Where are they?
Show Dialogue #
And in case the items are in the player’s inventory, we’ll show a dialogue and finish the quest.
Copy one of the Show Dialogue nodes and connect it to the Success slot of the previous Has In Inventory node.
Change the following settings.
- Text (Message Content)
Set to: You’ve got the materials?
Great!
<#>Here’s how you can make other kinds of potions … mumble mumble mumble …
<#>And that’s all that is to it.
Oh, and you can keep the materials!
Change Task Status #
Add Node > Game > Quest > Change Task Status
We’ll use this node to finish the Deliver Potion Materials task.
- Quest Task
Select: Deliver Potion Materials - Status
Select: Finished - Check Quest Finished
Enable
Node Group (Optional) #
To keep things organized, we can put all nodes we just added into a node group.
Select all new nodes, context click on one of them and select: Node Groups > Add Node Group
You can set the color and name of the node group in it’s settings, e.g. I’ll name mine Collect Potion Materials Quest.
Save Changes #
And that’s it for the schematic.
Click on Save Schematic to save the changes we’ve made to the CraftingNPC schematic.
Testing #
Hit play and talk to the crafting NPC, the first interaction will add the potion recipe and materials, the second interaction will start the quest.

Collect the needed items, e.g. by purchasing them in the shop or fighting enemies. You can also use the player combatant’s inspector to add items to the inventory, select the Fighter object in the scene hierarchy and expand the Inventory foldout to add items.

Seems like everything is working as it should.
The next part of the quest mini-series will add the second crafting quest.