

In this tutorial we’ll spawn enemy combatants in the scene.
The enemies will hunt the player using a move AI and automatically start a battle when coming close to the player.
We’ll set up:
- schematic for idle behaviour at waypoints
- move AI
- combatant spawners at defined positions
- area combatant spawners
This tutorial is based on the ORK 4 Unity Quickstart 3D tutorials, but can be used in any project.
Idle Schematic #
Move AIs can use schematics to define an idle behaviour when a combatant reaches a waypoint. Once the schematic is finished, the combatant will continue to the next waypoint.
We’ll set up a simple schematic that randomly waits for a time betwee two waypoints.
Open the schematic editor.

Wait #
Add Node > Base > Wait
We’ll wait for a random time between 1 and 5 seconds.
- Random
Enable - Time
Select: Value > Value
Set the value to: 1 - Time 2
Select: Value > Value
Set the value to: 5
And that’s it for the schematic. Click on Save Schematic to save it, e.g. as RandomPatrolWait.
Hunting Move AI #
Move AIs are used to let combatants determine targets for movement, while the actual movement is handled by the combatant’s movement component setup.
Open the ORK editor, navigate to Combatants > Move AIs and either add a new move AI or change the Default move AI if you haven’t used it yet.
Base Settings #
- Name
Set to: Hunt
Move Range #
We’ll limit the range a combatant will move in – this is measured from the combatant’s spawn position.
- Use Move Range
Enable - Range
Select: Value > Value
Set the value to: 10
Auto Stop #
- Use Auto Stop
Disable
We’ll not use this, but it can be useful, depending on the movement component you’re using for your combatants.
Speed Settings #
These settings define at which speed a combatant moves for different modes. The default settings are enough, we’ll just change the Waypoint Speed.
- Speed Type (Waypoint Speed)
Select: Walk
This’ll use the combatant’s walk speed.
The Speed setting is only used as a fallback if no walk speed could be determined.
Waypoint Settings #
These settings handle waypoint movement, either for randomly selected positions or fixed waypoints defined by a Combatant Spawner or Add Combatant component used to add the combatant to the scene.
- No Combatant Radius
Enable - Enable Random Patrol
Enable
We’ll randomly patrol within a defined area. - Patrol Radius
Set to: 10
Idle Settings #
- Enable Idle
Enable
Click on Add Idle Schematic.
- Schematic Asset
Select: RandomPatrolWait
Enemy Detection #
These settings handle how the combatant will detect enemies. We’ll detect enemies on sight within 10 world units and within an angle of 90 degrees of the forward direction of the combatant
- Use Enemy Detection
Enable - Timeout
Set to: 0.5 - Range
Select: Value > Value
Set the value to: 10
Click on Add Detection.
- Type
Select: Sight - Use Raycast
Enable
We’ll do a line of sight check. - Layer Mask
Select the Default layer (only).
To first unselect all other layers, select the Nothing layer, followed by the Default layer. - Use Child (User)
Select: Path
We’ll define the path to a child object. - Find Child (User)
Set to: Head - Use Child (Target)
Select: Path - Find Child (Target)
Set to: Head - Angle
Set to: 90
Target Position Check #
- Lost Position Check
Enable
When the detected target leaves the detection range, the combatant will keep following it until the lost interval runs out.
Otherwise the combatant will move to the last known position.
The target checks define how often the target’s new position is forwarded to the movement component – depending on the used component (we’ll use NavMesh) this can be more or less performance heavy. We’ll add different checks do increase the update interval when the target gets closer.
- Interval
Set to: 0 - Minimum Distance
Set to: 0
Click on Add Target Check.
- Interval
Set to: 0.2 - Minimum Distance
Set to: 2
Click on Add Target Check.
- Interval
Set to: 0.5 - Minimum Distance
Set to: 5
Click on Add Target Check.
- Interval
Set to: 1 - Minimum Distance
Set to: 10
Hunting Settings #
We don’t have to do more than just enable hunting.
- Use Hunting
Enable
Combatants General Settings #
Now we’ll set up the default movement component (which will handle the actual movement) and default move AI used by our combatants.
The combatant directly controlled by the player will never use a move AI – in case you spawn other members of the player group, they can use a move AI, e.g. to follow the player around.
Navigate to Combatants > Combatants and select the General Settings.
Battle Settings > Auto Start Battles > Start on Range #
We’ll change how close an enemy has to come to the player to start a battle.
- Auto Start Battles
Enable - Range
Select: Value > Value
Set the value to: 1.5
AI Settings > Move AI #
- Use Move AI
Enable - Move AI
Select: Hunt
Animations & Movement > Movement Component #
The scenes are set up for NavMesh, and that’s what we’re using to move the combatants.
- Component Type
Select: Nav Mesh Agent - Add Component
Enable
Save Changes #
And that’s it for the editor setup – don’t forget to save your changes by clicking on Save Settings at the bottom of the editor.
Radius for Combatants #
The move AI’s range checks (and other range checks) can also take the radius of a combatant into account. You can set up a radius by adding a Radius component to the combatant prefabs – and that’s what we’ll do.
The setup is pretty simple, just add a Radius component to all combatant prefabs found in Assets/Tutorial Assets/Prefabs/Combatants/Enemies/ and Assets/Tutorial Assets/Prefabs/Combatants/Player/.
The Radius component will automatically set the radius based on the prefab’s collider (Character Controller in case of our combatant prefabs) when added.
You can select multipe prefabs and add the combatant to all of them at once.
Spawning at Positions #
We’ll change the World scene from using Random Battle Area components to spawned combatants.
Combatants are spawned using Combatant Spawner components, you can learn more about them in this documentation.
Disabling Random Battles #
Open the World scene and disable the 2 Random Battle Area objects – you can easily identify them by either their name (and having the component attached) or their gizmo icon:

We’ll place a few combatant spawners in the area near the town entrance to spawn at the position of the spawners..
1st Spawner #
The first combatant spawner will be placed directly at the entrance to the town – and it’ll be a one-time-only battle, i.e. using the spawner’s Scene ID. Like item collectors, Battle and Combatant Spawner components use a Scene ID to mark if a battle was finished and shouldn’t occur again.
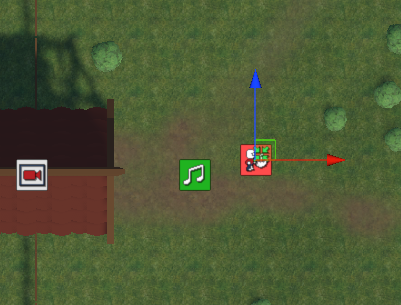
Add a combatant spawner either using the scene hierarchy context menu (ORK Framework > Combatant > Combatant Spawner) or the ORK toolbar (search for: Combatant Spawner). The variant withouth 2D or 3D added will be set up as an auto spawner, i.e. it’ll spawn when the level was loaded.
- Use Scene ID
Enable
The scene ID will automatically get the next known valid number (should be 0 right now).
Start Settings #
Our spawner should be set up to use the start type Ready.
We’ll keep it that way. If you spawner isn’t set up like this, use the Autostart button to set it to the Ready start type.
Combatant Settings #
A combatant is already added for us, let’s set it up.
- Faction
Select: Enemies - Use Group
Disable - Combatant
Select: Wasp - Quantity
Set to: 1
Spawn Settings #
Since we’re using NavMesh, it’s best to enable this setting:
- Use NavMesh Positions
Enable
This’ll prevent any warnings NavMesh warnings from occuring when spawning combatants.
2nd Spawner #
Add a new combatant spawner at a different position. This time we’ll not use a scene ID, instead allow the combatant to respawn after time.
However, since we’re not fighting in the same scene as the combatant spawner, we need to keep track of the spawner’s combatants and respawn times, or a new combatant would spawn when we return from the battle.
- Use Scene ID
Disable - Remember Combatants
Enable
This’ll keep track of the combatants status and respawn times between scenes.
The Spawner ID is used to store the information and was randomly assigned upon creation of the spawner.
Combatant Settings #
- Spawn Random
Enable
We’ll add multiple combatants to the spawner and randomly spawn one of them. - Respawn Random
Enable
Respawning will use a different, random combatant.
Change the already added combatant.
- Faction
Select: Enemies - Use Group
Disable - Combatant
Select: Wasp - Quantity
Set to: 1 - Respawn
Enable - Respawn Time
Set to: 30
Enemies will respawn after 30 seconds.
Feel free to change the time to your liking.
Copy Combatant 0 and change the following settings.
- Combatant
Select: Snake
Spawn Settings #
- Use NavMesh Positions
Enable
3rd Spawner #
Copy the second spawner and place it somewhere else.
We can keep the setup as it is, but we need to get a new Spawner ID.
Click on Get New Spawner ID.
4th Spawner #
Copy the third spawner and place it somewhere else.
Click on Get New Spawner ID.
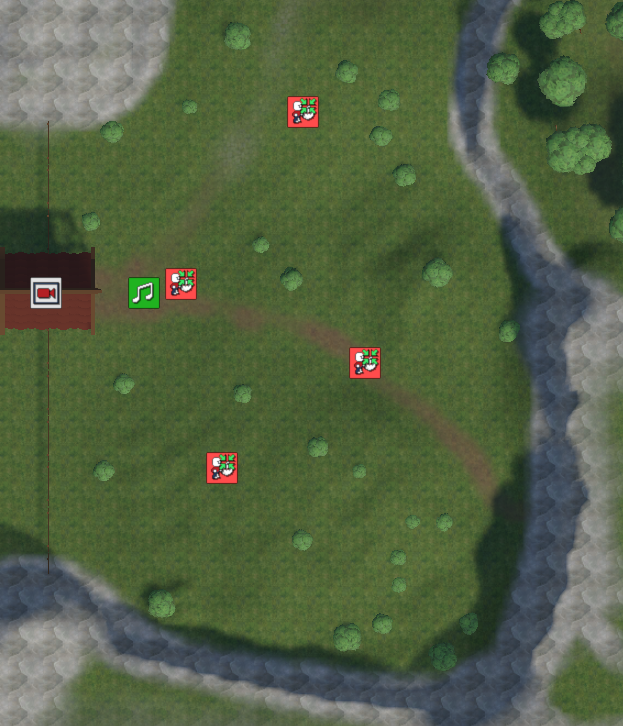
I’ve placed the 4 spawners like this:
Spawning in an Area #
When a combatant spawner has an area attached, spawning happens within the area instead of fixed spots.
Unity: A collider with Is Trigger enabled defines the area of the object.
1st Area Spawner #
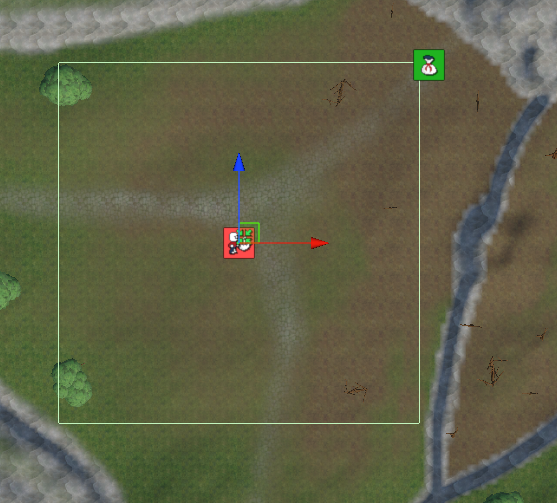
We’ll add an area spawner in the upper right part of the scene, use the scene hierarchy context menu (ORK Framework > Combatant > Combatant Spawner (3D)) or ORK toolbar (search for: Combatant Spawner (3D)).
Adjust the position of the object and size of the collider to look like this:
- Use Scene ID
Disable - Remember Combatants
Enable
Combatant Settings #
Change the already added combatant.
- Faction
Select: Enemies - Use Group
Enable - Combatant Group
Select: Forest x2 - Quantity
Set to: 10 - Respawn
Enable - Respawn Time
Set to: 30
Spawn Settings #
We want to spawn the combatants within the area defined by the object.
- Use NavMesh Positions
Enable - Spawn Type
Select: Collider - Layers
Select only the Default layer.
We’ll only use the default layer for raycasting positions to spawn the combatants.
2nd Area Spawner #
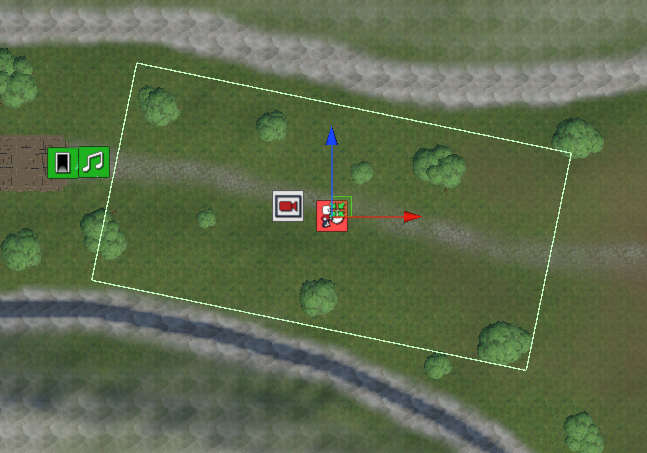
Copy the 1st area spawner and change it’s position, rotation and collider size to look like this:
We can keep the same setup – we just need to get a new Spawner ID.
Click on Get New Spawner ID.
Save Scene #
And that’s it for the scene’s setup.
Don’t forget to save the changes.
Testing #
Hit play and run out of town.
The enemies spawn and start hunting the player of sight – all’s working as it should.
Custom Move Range (Optional) #
You can enhance the move AI’s use with different components added to your scenes. Learn more about available components in this documentation.
We’ll use a Move AI Range component to define a custom move range using an area in the scene. Combatant Spawner and Add Combatant components can use them to set the move range for their combatants.
Unity: Uses colliders with Is Trigger enabled as area.
Move AI Range #
Let’s add one to the scene to allow the enemies in the upper part of the scene to freely move around in a large area.
Add a move range using the scene hierarchy context menu (ORK Framework > Move AI > Move AI Range (3D)) or the ORK toolbar (search for: Move AI Range 3D).
Place it and increase the collider size to roughly cover the entire upper area, I’ve placed mine like this:
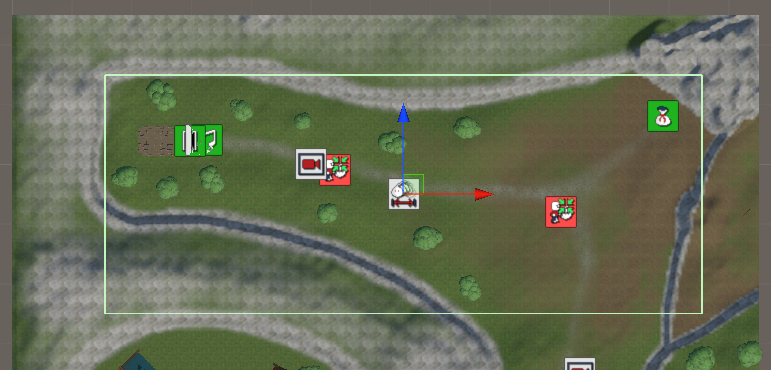
Transform #
- Position
Set to: X=131, Y=8, Z=190
Box Collider #
- Size
Set to: X=200, Y=20, Z=80
Move AI Range #
The Move AI Range component has options to define which functionality of the move AI it’ll limit, we’ll use both:
- Limit Random Patrol
Enable
This’ll set the range for random patrol, allowing the enemies to freely run around in the entire area instead of the 10 world units set in the move AI’s settings. - Limit Move Range
Enable
This’ll set the range for all movement, i.e. the enemy can hunt, flee, etc. within the entire area instead of the 10 world units set in the move AI’s settings.
Updating Combatant Spawners #
Select the 1st area spawner, we need to set the move AI range for the added combatants.
Combatant Settings > Combatant 0 #
- Move AI Range
Select the Move AI Range component we’ve added.
Repeat this for the 2nd area spawner.