

Set up languages you want to use in your game. All texts that are displayed to the player can be set up in the defined languages.
Languages are found in System > Languages.
Localization is a crucial and often complex part of game development – that’s why ORK tries to make it as easy as possible for you!
Languages can be added whenever you need them, i.e. you can start development with just a single language and add further languages once you start translating your content.
Language Setup #
A language’s setup is pretty simple – you define it’s name, description and icons. Optionally add language content for other languages.
Enable Initial Language if you want a language to be the language that’s selected automatically when the game is first initialized. If none is set, the first language is used. Depending on how the used language is saved (e.g. as part of options or save games) the initial language can be ignored when starting the game.
Language Content Definitions #
Wherever content is defined that might need to be available in multiple languages, it’ll be handled like this:
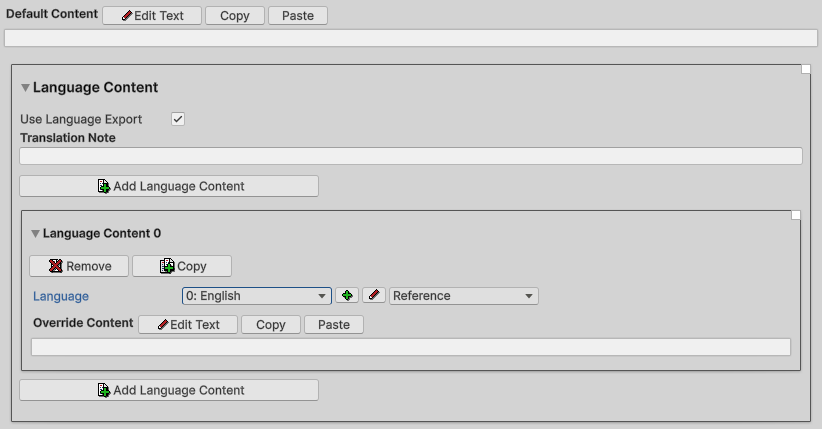
You can define a default content and additional content for a defined language. The default content is used for all languages as long as there’s no additional content added for a language. A running game will use the language content if the current language is matching it, otherwise it’ll fall back to the default content.
Images can also be defined for different languages. This is usually separate from text content, i.e. even if your text is defined in multiple languages, they can all use the same images if you want.
When creating your game’s content, it’s best to only define the default content and handle the language specific content via the language export/import functionality. When importing language data, it’ll create new language content for the imported languages. In case you already defined a language content, the import will replace the text of the language content.
Translation Export #
Each content definition has options to include it in language export/import. Content will be exported by default, in case something doesn’t need to be translated, disable Use Language Export in the content’s settings.
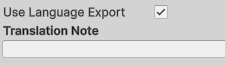
You can also include a note for the translator, e.g. if you need to provide some context or clarifications.
Export/Import #
You can export and import all your language content texts in Game > Languages. The export/import system is modular and can support multiple formats.
Formats #
You can create custom export formats by deriving your class from the BaseLanguageExportFormat (namespace GamingIsLove.ORKFramework.Editor).
The format options will be used for both exports and imports, i.e. when importing, make sure that the options match the importing file.
The exported data can optionally include information about where the text is coming from (Include Information setting) and the translation notes defined in the language contents (Include Translation Note setting). Both settings are enabled by default. If your import file no longer contains the information or translation notes, make sure to disable those settings before loading the file.
CSV (UTF-8) #
The default implementation exports/imports in CSV format (UTF-8 encoded) and lets you define the separator (defaults to ;) and optional text enclosers (defaults to “).
You can further process the file with any table calculation program like Excel from Microsoft. When using Excel, make sure to import the CSV-data instead of opening the file directly, as it’ll otherwise not use the UTF-8 enconding and can lead to reading certain special characters wrong.
After processing and converting the file back to a CSV file (UTF-8 encoded), make sure to still include the Export ID and Index columns.
Exporting #
Exporting language content is separated into four different parts. Each part will create a separate file in the selected format.

Each language content that’s exported will receive an export ID, i.e. it’ll also cause changes and requires saving the changes. Depending on the exported part, some things will be saved automatically, but you’ll need to save your data in the ORK editor in any case to keep track of the last export ID.
To create a fresh export and assign new export IDs, enable Reset Export IDs in the export settings. Please note that this’ll make any previous export invalid, as export IDs might no longer match. Without export IDs, the content might be assigned to the wrong settings (or not at all) when importing again.
Export Settings #
The settings export contains all language content that’s defined in the settings you made in the ORK editor (excluding schematics).
You need to save the settings in the ORK editor to keep the export IDs.
Export Scenes #
The scenes export contains all language content that’s defined on objects (via components) in your scenes.
Unity: This only includes scenes that are added to Unity’s build settings.
Exporting scene data will close the current scene and open all scenes one by one, before returning to the current scene. Make sure to save any changes you made in the current scene, as they’ll otherwise be lost.
The export IDs will be saved automatically with each scene, but you still need to save in the ORK editor to keep track of the last export ID.
Export Prefabs #
The prefabs export contains all language content that’s defined on prefabs (via components) in your project.
The prefabs will be saved in case they contain language content that’ll be exported, as they need to keep their export IDs, but you still need to save in the ORK editor to keep track of the last export ID.
Export Schematics #
The schematics export contains all language content that’s defined in schematics in your project. You can optionally limit the schematics to only include a defined folder (and sub-folders).
The schematics will be saved in case they contain language content that’ll be exported, as they need to keep their export IDs, but you still need to save in the ORK editor to keep track of the last export ID.
Importing #
To import a file, you first need to select a file and load the file’s content via the Load Exported File button.

Once the file is loaded successfully, you’ll see more information about the file’s content, including the number of separate language contents it includes. You can also select which language will be imported.
Like exporting, importing is also separated into the four different parts as explained before. After loading the file, you’ll have the 4 import buttons available – make sure to use the correct button for the file you’re importing, as they’ll most likely share export IDs (each of the four export files will start with export IDs at 0).
Editor Language #
You can also change the language of the editor’s help texts by exporting the default texts (as a CSV), translating it and setting it as the editor’s help text file.
To do this, navigate to Editor > Editor Settings and click on the Export Default Help button. This will export all help texts (default english texts) as a CSV file (UTF-8 formatted).
The translated CSV has to keep the same structure, i.e.:
- first line contains headers
- first column contains the identification of the texts
- 2nd column contains the names of the settings
- 3rd column contains the help texts of the settings
Please note that the help texts are found based on the identification, which relies on the class/field the setting is in. When something changes in an update (e.g. a class or field being renamed), the translated help texts can no longer be found and you’ll have to retranslate the default texts.
You can use Google docs to quickly translate CSV files.