
Want an ability to just throw a fireball straight ahead? Learn how to do it in this gameplay tutorial.
We’ll create an ability that throws a fireball into the direction the player is currently looking. The fireball will damage enemies when it hits them – this is done using Damage Dealers and Damage Zones. You can find more information on them in this how-to and this game tutorial.
For this kind of ability we need to consider three parts:
- the fireball prefab that will be shot
- the battle event that will through the fireball
- the ability that will use the battle event
Let’s get to it!
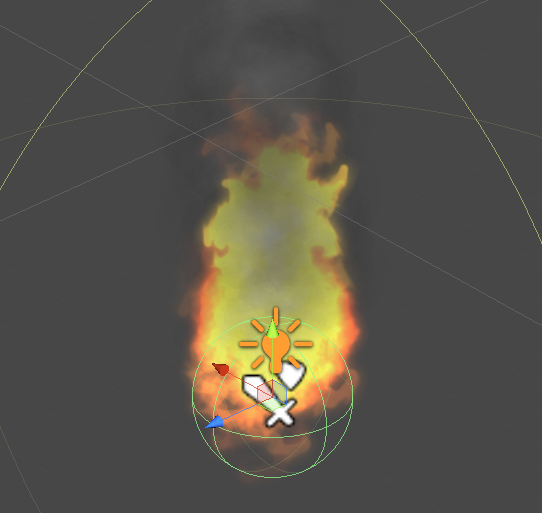
Setting up the fireball prefab
This is only an example, if you have your own assets you want to use, go ahead and use them. Keep in mind that some settings might differ depending on what kind of prefab you want to create.
I’ll use the Fireball prefab already added to the tutorial assets and add the needed components. Since we’re using Damage Dealers and Damage Zones to do damage, we’ll need a collider, a rigidbody and a damage dealer component on the fireball prefab.
Sphere Collider
Add a Sphere Collider component and change the following settings.
- Is Trigger
Enable this setting.
If you want to do damage on collision, disable it – I’ll go with Trigger Enter damage. - Radius
Set to 1.
Rigidbody
Add a Rigidbody component and change the following settings.
- Use Gravity
Disable this setting. - Is Kinematic
Enable this setting. - Freeze Position (Constraints)
Enable all axes. - Freeze Rotation (Constraints)
Enable all axes.
Damage Dealer
Add a Damage Dealer component and change the following settings.
- Type
Select Trigger Enter. - One Time Damage
Enable this setting. - One Target
Disable this setting.
This way, the fireball will do damage to every target it hits.
If you want to only do damage to one target, enable this setting.
Click on Add Tag to add an activation tag (which we’ll use in the battle event to activate the damage dealer).
- Tag
Set to fireball.
And that’s it for the prefab – either save it as a new prefab by dragging it from the scene hierarchy into the project view, or apply the changes to the prefab (if an already existing prefab is used).
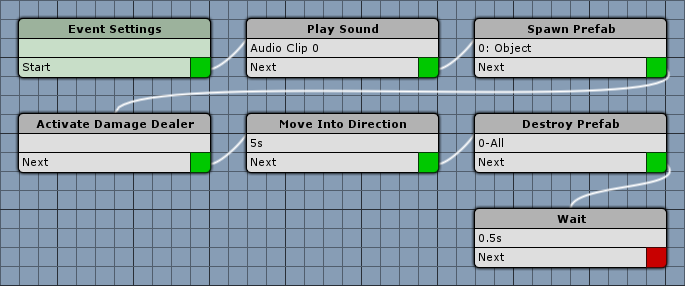
The battle event
Open the ORK Framework editor and navigate to Events. Click on New Battle Event to create a new battle event.
This event will spawn our prefab, activate it’s damage dealer and send it flying.
Event Settings
First, we’ll need to set up the prefabs and audio clips we’ll use.
Prefabs
- Destroy Prefabs
Disable this setting.
Click on Add Prefab to add the prefab.
- Prefab
Select Fireball, the prefab we just created.
Audio Clips
Click on Add Audio Clip.
- Audio Clip
Select fire.
This audio clip will be played when we shoot the fireball.
Click on Add Audio Clip again to add another clip.
- Audio Clip
Select NearExplosionB.
This audio clip will be played by the damage dealer when it hit a target.
Play Sound
Add > Animation + Audio > Audio > Play Sound
We’ll use this step to play the fire audio clip on the user – we could also play an audio clip in the Spawn Prefab step, but that would play the clip on the spawned prefab instead.
- Object (Play On)
Select Actor. - Actor
Select User. - Use Sound Type
Disable this setting. - Audio Clip
Select Audio Clip 0. - Wait
Disable this setting. - Play One Shot
Enable this setting. - Volume
Set to 1.
Spawn Prefab
Add > Game Object > Prefab > Spawn Prefab
- Prefab
Select Prefab 0. - Use Position
Disable this setting. - Object (Target Object)
Select Actor. - Actor
Select User. - Offset
Set to X=0, Y=1, Z=0. - Use Rotation
Enable this setting.
Activate Damage Dealer
Add > Battle > Action > Activate Damage Dealer
For the damge dealer to actually do damage to anything, we need to activate it first. Since the auto activation only works for damage dealers parented to the user of an action, we’ll need to manually activate the damage dealer of the spawned prefab.
- Object
Select Prefab. - Prefab
Select Prefab 0. - Spawned Prefab ID
Set to -1.
This will use all spawned instances of the prefab. - Activate
Enable this setting. - Use Action Tags
Enable this setting.
Click on Add Tag to add a tag.
- Tag
Set to fireball.
This will activate the damage dealers with the matching tag.
- Add Audio
Enable this setting. - Audio Clip
Select Audio Clip 1. - Play One Shot
Enable this setting. - Volume
Set to 1.
This will play the 2nd audio clip when a target was hit.
Move Into Direction
Add > Movement > Movement > Move Into Direction
Now it’s time to move the fireball forward.
- Object
Select Prefab. - Prefab
Select Prefab 0. - Spawned Prefab ID
Set to -1.
This will use all spawned instances of the prefab. - Time (s)
Set to 5. - Wait
Disable this setting. - Speed
Set to 5. - Value Type (Direction)
Select Value. - Value (Direction)
Set to X=0, Y=0, Z=1.
This will send the fireball forward. - Local Space
Enable this setting. - Controller Move
Disable this setting, since we don’t have a character controller attached.
Destroy Prefab
Add > Game Object > Prefab > Destroy Prefab
We don’t want the fireball to stay in the scene forever, so we’ll destroy it after some time. This can also be set up in the damage dealer’s settings, but it’s better to handle this in the event, otherwise you’d have to change things in two places when you want to change the time the fireball flies around.
- Prefab
Select Prefab 0. - Spawned Prefab ID
Set to -1. - Destroy After Time
Enable this setting. - Time (s)
Set to 5. - Wait
Disable this setting.
Wait
Add > Base > Wait
To prevent the player from spamming the ability, we’ll add a little wait time.
- Time (s)
Set to 0.5.
And that’s it for the battle event – click on Save Event and save it as fireball.asset in Assets/Events/Battle/.
Fireball ability
Navigate to Status > Abilities and create a new ability. Change the following settings.
- Name
Set to Fireball.
Base Settings
- Ability Type
Select Magic. - Useable In
Select Battle.
Target Settings
Since we just throw the fireball straight ahead, we don’t need to select a target – this is done by setting the Target Range to None.
- Target Type
Select Enemy. - Target Range
Select None. - Use Target Raycast
Disable this setting. - Is Dead
Select No.
Battle Animation
- Animate
Enable this setting
Change the already added Battle Event settings.
- Battle Event
Select the fireball event we just created. - Chance
Set to 100. - Perform In
Enable the battle system types you want it to be used in.
Use Costs
Click on Add Value Change to add a new status value change – this is a magic spell, so we want to consume MP.
- Status Value
Select MP. - Operator
Select Sub. - Value Origin
Select Value. - Value
Set to 5.
The fireball ability will now consume 5 MP when used.
Target Changes
Click on Add Value Change to add the status value change for the damage to the target.
- Status Value
Select HP. - Operator
Select Sub. - Value Origin
Select Formula. - Formula
Select Magical Damage 5. - Set Attack Attribute
Enable Element and select Fire.
Enable Attack Type and select Explosion.
And that’s it for the ability.
Don’t forget adding the ability
If you want to use the fireball ability, you’ll need to add it to your player’s combatant. Navigate to Combatants > Combatants and select your player combatant – in my case, that’s Brown Pants. Alternatively, you can also add the abiltiy to the combatant’s class or an equipment, or learn it through the event system or items.
Ability Development
Click on Add Ability to add a new ability to the combatant.
- Learn at Level
Set it to 1.
If you like to learn the abiltiy at a different level, set it to something else – for testing purposes, level 1 will do. - Ability
Select Fireball.
And that’s it – click on Save Settings to save the changes.
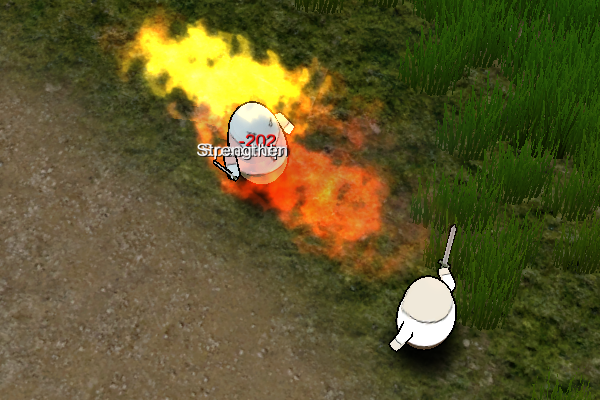
When testing your game, you’ll now be able to throw fireballs around.
Tip: Using control maps
Using the fireball ability through the battle menu is boring, so why don’t you set up a Control Map to instantly cast it using an Input Key?
Add a new Input Key in Base/Control > Input Keys and set it up how you need it.
Add a new Control Map, or add a Control Key to an already existing control map in Base/Control > Control Maps.
To use the fireball ability with a control map, use the following Action Settings.
- Type
Select Action. - Action
Select Ability. - Selection
Select Fireball. - Use Auto Target
Enable this setting.
A more detailed descriptions of using control maps can be found in this game tutorial.
Tip: Animating damage dealers
You can use Battle Events to do more complex animations when a damage dealer hits a target.
To use this functionality, you need to enable the Animate setting in the ability’s Damage Dealer Settings. Now you can add battle events like we already did to animate the ability – the battle events will be used when the damage dealer hits a target. Keep in mind that an animated damage dealer wont automatically calculate the damage, so you’ll need to use a Calculate step in the battle events of the damage dealer.