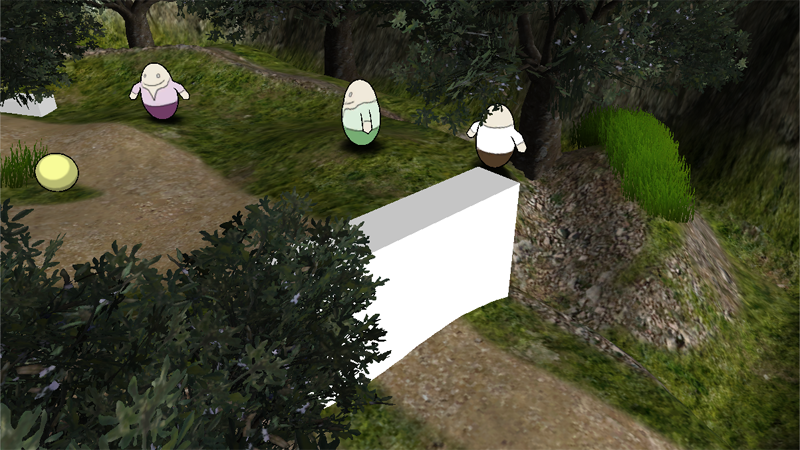
A wall is hiding a secret passage in a dungeon? Remove it when flipping a switch using the Event System.
This is a common game mechanic in all kinds of games – you flip a switch or press a button, and somewhere a wall gets removed or a door is opened. In this tutorial, we’ll create a simple setup where we remove a wall and make sure it doesn’t come back when we reload the scene later.
Let’s get to it!
The wall opening event
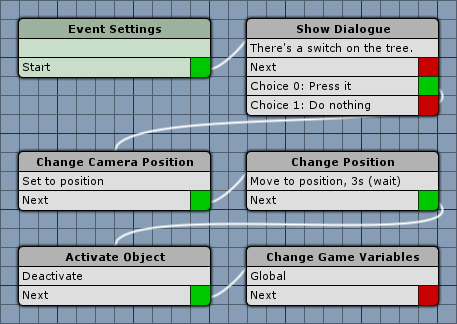
First, we’ll create the game event that’ll remove the wall – open the ORK Framework editor, navigate to Events and click on New Game Event to create a new event.
Event Settings
- Blocking Event
Enable this setting. - Block Player Control
Enable this setting. - Block Camera Control
Enable this setting.
Click on Add Actor to add the wall as an actor.
- Type
Select Object.
We’ll select the wall’s game object in the inspector of the Event Interaction used for this event.
Show Dialogue
Add > UI > Dialogue > Show Dialogue
First, we’ll ask the player if he wants to press the switch.
- Dialogue Type
Select Choice. - GUI Box
Select Bottom Dialogue. - Text
Set to There’s a switch on the tree..
Click on Add Choice to add the first choice.
- Text
Set to Press it.
Click on Add Choice again.
- Text
Set to Do nothing.
Change Camera Position
Add > Game Object > Camera > Change Camera Position
Now we’ll show the wall.
- Camera Position
Select Side View. - Object (Target Object)
Select Actor. - Actor
Select 0: Scene Object. - Fade Position
Disable this setting.
Change Position
Add > Movement > Movement > Change Position
It’s time to move the wall out of the way.
- Object (Moving Object)
Select Actor. - Actor
Select 0: Scene Object. - To Object
Enable this setting. - Object (Target Object)
Select Actor. - Actor
Select 0: Scene Object. - Local Space
Enable this setting. - Offset
Set to X=0, Y=-6, Z=0. - Move
Enable this setting. - Wait
Enable this setting. - Ignore Y
Disable this setting. - Controller Move
Disable this setting. - Face Direction
Disable this setting. - Time (s)
Set to 3. - Interpolation
Select Ease In Quad.
Activate Object
Add > Game Object > Game Object > Activate Object
After moving the wall ended, we’ll deactivate the wall’s game object.
- Set Active
Disable this setting.
The game object will be set inactive. - Object
Select Actor. - Actor
Select 0: Scene Object.
Change Game Variable
Add > Value > Variable > Change Game Variable
Finally, we’ll set a game variable to remember that the wall has been removed.
- Variable Origin
Select Global.
Click on Add Game Variable to add a variable that will be changed.
- Value Type (Variable Key)
Select Value. - Value (Variable Key)
Set to townWallRemoved. - Type
Select Bool. - Value
Enable this setting.
And that’s it for the event – click on Save Event and save it as removeWall in Assets/Events/Town/.
Scene setup
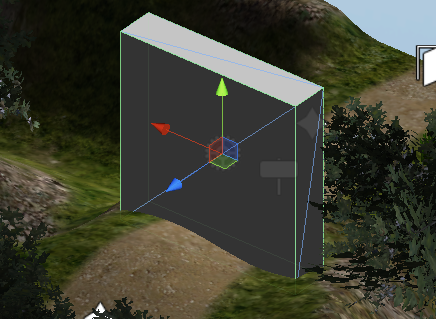
We’ll add a wall and the event to the town scene (1 Town, can be found in Assets/Tutorial Resources/Scenes/). First, we’ll add the wall using a simple cube – add one using the Unity® menu: Game Object > 3D Object > Cube
Rename the cube to Wall and change the following settings.
Transform
- Position
Set to X=30.5, Y=6, Z=9.5. - Scale
Set to X=5, Y=5, Z=1.
Variable Event
A Variable Event component is a simple component that can remove game objects based on Variable Conditions. Add the component either using the Unity® menu or the ORK Scene Wizard.
- Start Type
Select Autostart. - Auto Destroy (Variable Settings)
Enable this setting.
Click on Add Game Variable to add a variable condition.
- Condition Type
Select Variable. - Value Type (Variable Key)
Select Value. - Value (Variable Key)
Set to townWallRemoved. - Is Valid
Disable this setting. - Type
Select Bool.
This will remove the wall when we return to the scene after it has been removed.
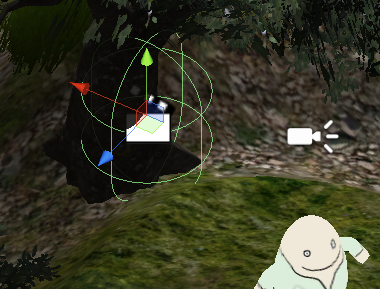
Now we’ll add an empty game object (Game Object > Empty) for the switch – place it on the tree behind the green NPC.
Rename the game object to Switch and change the following settings.
Transform
- Position
Set to X=40, Y=4, Z=14.
Capsule Collider
- Is Trigger
Disable this setting. - Radius
Set to 1. - Height
Set to 3.
Event Interaction
It’s time to add the event – add the component either using the Unity® menu or the ORK Scene Changer.
- Event Asset
Select removeWall.
Click on Ok to use the event.
- Start Type
Select Interaction. - Auto Destroy (Variable Settings)
Enable this setting.
Click on Add Game Variable to add a variable condition.
- Condition Type
Select Variable. - Value Type (Variable Key)
Select Value. - Value (Variable Key)
Set to townWallRemoved. - Is Valid
Disable this setting. - Type
Select Bool.
And that’s it – don’t forget to save the scene.
Now, if you press the switch, the wall will be removed and stays gone when coming back to the scene.
Tip: Removing objects in other scenes
When you want to remove game objects in other scenes, it’s enough to change a game variable and use a Variable Event component as explained in this tutorial. No need to move a game object around.


