
Want to have a HP bar above the heads of your combatants? You can place Combatant HUDs at the game object of a combatant.
Combatant HUDs are used to display combatant information. By setting the Combatant Type of the HUD to Individual, the HUD will be displayed at the position of a combatant’s game object. Let’s set up a simple HP bar to be displayed above the heads of all combatants.
Create a new GUI box
First, we’ll need a new GUI box to display the HUD – open the ORK Framework editor, navigate to Menus > GUI Boxes, create a new GUI box and change the following settings.
- Name
Set to Individual HUD. - Height Adjustment
Select Auto.
Content Box Settings
- Bounds
Set to X=0, Y=0, W=100, H=100.
When placing a HUD at the position of a game object, the position X=0, Y=0 will be placed at the position of the object. - Anchor
Select Middle Center. - Padding
Set to X=0, Y=0, Z=0, W=0. - Show Box
Disable this setting.
That’s it for the new GUI box.
The individual HUD
Time to set up the HUD – navigate to Menus > HUDs, create a new HUD and change the following settings.
- Name
Set to HP Bar. - GUI Box
Select Indvidual HUD. - HUD Type
Select Comatant. - Combatant Type
Select Individual. - Path to Child
Set to HUD.
We’ll add an empty game object to the prefabs later – this child object will be used for placement. - Displayed Groups
Enable Player, Ally and Enemy.
Display Conditions
- In Control, In Battle
Select Ignore. - Shop, In Event, Changing Scene, Game Paused, Blocking Menu Screen
Select No.
Click on Add Status Element to add a HUD element.
- Type
Select Status Value. - List
Disable this setting. - Status Value
Select HP. - Use Bar
Enable this setting. - Position
Set to X=0, Y=0. - Anchor
Select Upper Left. - Relative To
Select Upper Left. - Use Last Element
Disable this setting. - Width
Set to 100. - Is Percent (Width)
Enable this setting. - Adjust Width
Enable this setting. - Height
Set to 5. - Is Percent (Height)
Disable this setting. - Adjust Height
Enable this setting.
And that’s it – click on Save Settings to save the changes.
Updating the prefabs
Finally, we’ll need to add a new child object to all prefabs of our combatants for the HUD to be placed at. If the game object isn’t found, the HUD will be placed at the game object’s position itself (i.e. usually at the feet).
The procedure is the same for all prefabs.
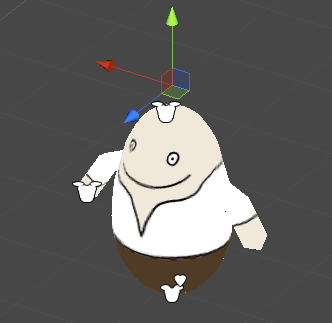
- Drag the prefab in the scene (the prefabs can be found at Assets/Tutorial Resources/Prefabs/Combatants/).
- Create a new empty game object using the Unity® menu: Game Object > Create Empty
- Rename the new game object to HUD and parent it on the prefab by dragging it on the prefab in the scene hierarchy.
- Change the position to X=0, Y=2.2, Z=0.
- Apply the changes to the prefab.
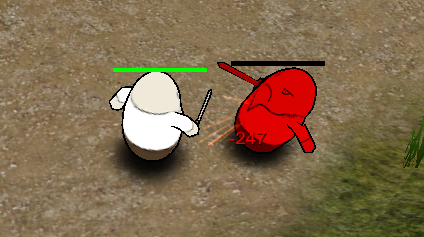
Now, all combatants have a HUD bar above their heads.
Tip: Advanced display conditions
The HUD should only be displayed when the combatant’s HP aren’t full? Use a Status Requirement in the HUD’s Display Conditions to check for the HP being less than 100 %.
To only display the HUD for a short amount of time when the combatant received damage, you can use Status Effects. E.g. create a Damaged status effect that ends after a few seconds and is added by all abilities that deal damage. Check for that status effect in the Status Requirements of the HUD.