
Now that we’ve got our player, we need to be able to interact with the game world … or it would become quite a boring game.
The player can interact with is every event-like component that uses the start type Interact. This can be picking up an item, talking to a NPC, using a save point and other things – whatever it is, you need an Interaction Controller on your player.
The Interaction Controller
An interaction controller is a game object with 3 components: Collider (used as trigger), Rigidbody and Interaction Controller.
Adding an interaction controller to the player is easy if you let ORK do the work. Use the ORK Scene Wizard to create an interaction controller (Create Object > Interaction Controller) and turn it into a prefab (drag it from scene hierarchy on the project tab). Then use the prefab in the game control settings (ORK Framework editor: Base/Control > Game Controls).
You can find a detailed explanation about this in this how-to. Follow the instructions and use the shown settings and the interaction controller will perfectly fit our hero Brown Pants.
Now we need something to interact with – let’s create a simple dialogue. For this we’ll reuse some of the things we already learned, we’ll create a new GUI box and a game event.
A new GUI Box
Open the ORK Framework editor and navigate to Menus > GUI Boxes. Copy the GUI box we created for the main menu (this will save us some time). Change the following settings.
Base Settings
- Name
Change to Bottom Dialogue. - Height Adjustment
Select Scroll.
We want this GUI box to display a scrollbar if the content exceeds it’s height.
Content Box Settings
- Bounds
Set to X=0, Y=800, W=1280 and H=300. - Anchor
Select Lower Left.
The lower left corner of the box will be placed at X, Y.
Name Box Settings
- Bounds
Set to X=0, Y=0, W=200 and H=50. - Anchor
Select Lower Left. - Relative Bounds
Enable this setting.
The name box will be placed relative to the content box. - Relative To
Select Upper Left.
The name box will be relative to the upper left corner of the content box.
Save the changes using Save Settings.
The dialogue event
Now we’ll create the dialogue event. Open the Events section and click on New Game Event to create a new game event. You can learn more about the node editor used to create events in this how-to.

Event Settings
Edit the following settings in the Event Settings.
- Blocking Event
Enable this setting.
Blocking events can only be executed while no other blocking event is running. - Block Player Control
Enable this setting.
We don’t want our player to run around while talking to someone … - Block Camera Control
Enable this setting.
Now click on Add Actor to add a new actor to this event. Actors are used in events to move game objects around or display the name of a speaker (and other things) – we’ll be using it to display the name of the player in the dialogue. Change the following setting in the new actor.
- Type
Select Player.
This actor will use the player’s game object and name.
Show Dialogue
Now add a Show Dialogue step to the Start slot of the Event Settings by right-clicking on it: Add > UI > Dialogue > Show Dialogue.
Change the following settings.
- GUI Box
Select Bottom Dialogue (the GUI box we just created). - Use Speaker
Enable this setting.
We want to display the name of our player. - Actor
Select Player (automatically selected since it’s the first in the list). - Show Name
Enable this setting. - Message
Type the message you want to display in the dialogue, e.g.: Hi, this is a simple dialogue!
And we’re done with the event – save the event (e.g. name it simpleDialogue and save it in Assets/Events/Town/). Close the ORK Framework editor.
Add the dialogue to the town scene
Finally we’ll add the dialogue event in the town scene. Open it the scene 1 Town (Assets/Tutorial Resources/Scenes/).
Drag the NPC_Green prefab (Assets/Tutorial Resources/NPCs) into the scene and place it where you want the dialogue to take place. Use the scene wizard to add an Event Interaction: Add Component > Event Interaction. In the inspector of the Event Interaction, select the simpleDialogue asset we just created and click on Ok. Change the following settings.
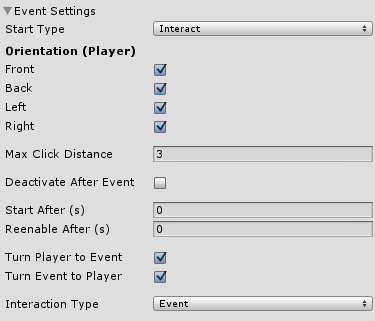
- Start Type
Set to Interact (should already be selected). - Turn Player to Event
Enable this setting. - Turn Event to Player
Enable this setting.
And we’re done. Save the scene, open the main menu scene (0 Main Menu) and hit play.
When you walk to the NPC, you will be able to talk to him by pressing enter when you’re near enough and facing him. The dialogue will be displayed at the bottom of the screen with the name of the player in the dialogue’s name box.

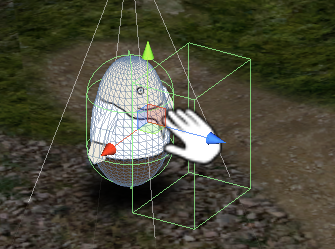
Remember, the NPC needs to be in the trigger of the Interaction Controller to be recognized. If you’re unsure if it’s within the trigger (or where your trigger is), simply hit pause and select your player game object, you’ll see the bounds of the trigger in the scene view.
And that’s it for now – the next lesson will cover connecting scenes.