
Every game needs a player, so let’s create one!
Open the ORK Framework editor using the Unity® menu: Window > ORK Framework.
Setting up a player combatant
A combatant simply is an entity, that can participate in battles – every combatant could be used as the player during the game.
Navigate to Combatants > Combatants. We will edit the default combatant and use it as our player. Change the following settings.
Content Information
- Name
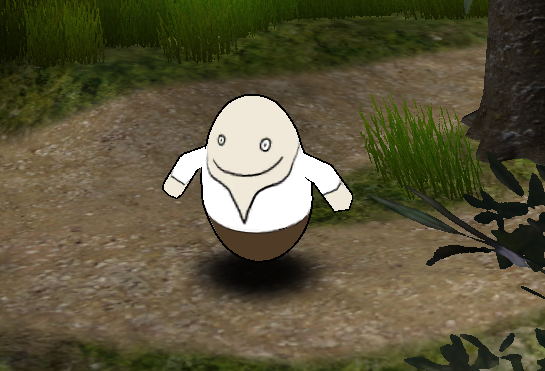
Change to Brown Pants (or whatever name you want your player to have).
Base Settings > Prefab Settings
- Prefab
Select the Brown Pants prefab (located at Assets/Tutorial Resources/Prefabs/Combatants/).
This is the prefab used represent a combatant in a scene.
We can ignore the rest of the settings for now. Save the changes using Save Settings. Confirm saving.
Creating a game event to spawn the player
Now that we have a combatant with a prefab, we want to spawn it in the first scene of our game. This is done using a Game Event.
Select the Events section in the ORK Framework editor and click on New Game Event. Events are created using a node editor – basically you add different steps and connect them with each other, the steps will be executed in the order according to their connections.
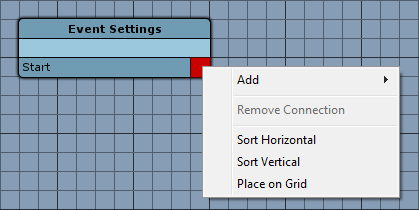
Each step is represented by a box displayed in the editor. The start of the event is at the Event Settings box, the step connected to the Start slot. Slot’s are the fields that connect the steps with each other. Steps are added using the context menu (right-click) – if you right-click on a step’s slots, the new step will be connected automatically.
You can learn more about the node editor used to create events in this how-to.
A simple event spawning the player needs two steps – one to join the combatant we just created to the player group, one to spawn the player in the scene. The final event will look like this:
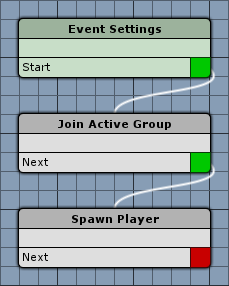
Join Active Group
Add the first step to the event by doing a right-click on the Start slot of the Event Settings (the box displayed in the editor).The context menu will be displayed, select Add > Game > Active Group > Join Active Group. A Join Active Group step is now added to the event, connected to the event’s start (the Start slot of the Event Settings) and selected in the editor. To edit a step, you need to select it (click on it). Change the following setting.
- Combatant
Select Brown Pants (the combatant we just created).
The step will add the combatant to the player group (the active group).
Spawn Player
Right-click on the Next slot of the Join Active Group step. Select Add > Game > Player > Spawn Player. Edit the following setting.
- Spawn Point ID
Set to 0.
Spawn points are used to define the location when spawning the player, the spawn point ID is used to identify a spawn point in the scene.
That’s it for the event – click on Save Event. Since the event hasn’t been saved before, you need to choose it’s location and name. It’s good to keep things in order, so let’s name it startEvent and place it in a sub-folder in your project: Assets/Events/
Adding a spawn point
Open the scene 1 Town (found in Assets/Tutorial Resources/Scenes/ in the project tab). We’ll add the spawn point used by the start event.
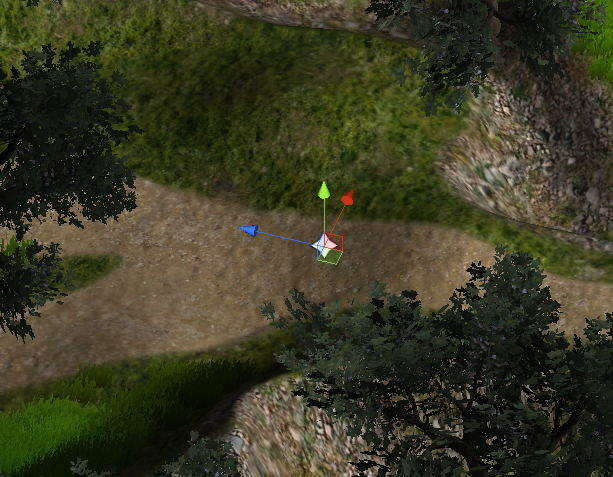
Use the ORK Scene Wizard to do this: Create Object > Spawn Point. Now, place the spawn point where you want the player to be spawned.
Since this is the first spawn point in the scene, it’ll automatically receive the Spawn ID 0 – check this in the inspector of the spawn point (and set it to 0 if it has a different number).
You now have two options to start the event when beginning a new game – only use one of the options, or you’ll end up with running the start event twice, having 2 player combatants in your group.
Option 1: The easy way
Usually, a game event would be added to a scene to be executed – but the start event can also be added to the main menu settings. This way it will automatically execute whenever a new game is started, even if you change the new game scene. Open the ORK Framework editor, navigate to Menus > Main Menu and change the following setting.
New Game Settings
- Start Event
Select startEvent (the event we just created).
That’s it, click on Save Settings. The start event will now automatically execute when a new game is started (either via the main menu, or using the game starter).
Option 2: Adding the event to the town scene
This is the way a game event is added to the game usually. Create a new game object using the Unity® menu: GameObject > Create Empty.
The object should now be selected, use the scene wizard to add an Event Interaction component: Add Component > Event Interaction.
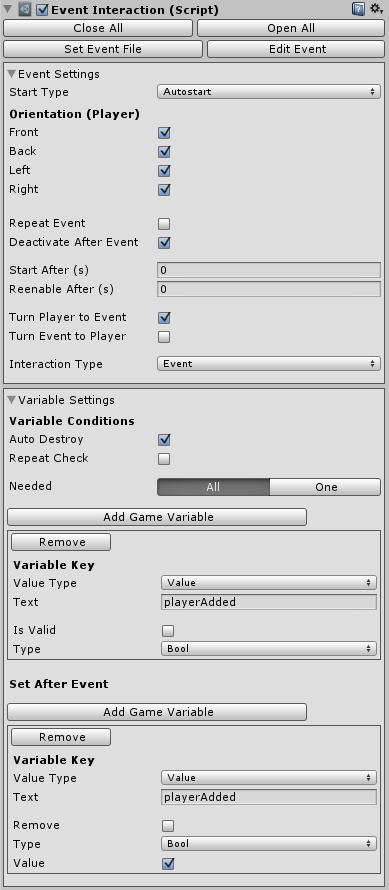
In the inspector of the game object, select the startEvent asset we just created in the Event Asset field and click on Ok. Change the following settings.
Event Settings
- Start Type
Select Autostart.
The event will automatically start when the scene is loaded. - Deactivate After Event
Enable this setting.
Variable Settings
We only want this event to be performed once in the game, so we set a Game Variable to remember that the event has already performed. Learn more about game variables and how to change or check them in this how-to.
In Variable Conditions, click on Add Game Variable. Change the following settings.
- Value Type
Select Value.
We want to type in the key (name) of a game variable. - Text
Change to playerAdded.
That’s the key (name) of the variable. - Is Valid
Disable this setting. - Type
Select Bool.
We want to use a bool variable to simply trigger if the event has been performed or not.
The event will be performed as long as the game variable (bool) playerAdded is false.
In Set After Event, click on Add Game Variable.
- Value Type
Select Value. - Text
Change to playerAdded. - Remove
Disable this setting. - Type
Select Bool. - Value
Enable this setting.
We want to set the variable to true.
This will set the game variable (bool) playerAdded to true after the event has been performed.
The complete settings will look like this:
Save the scene, open the main menu scene (0 Main Menu) and hit play.
Select New Game in the main menu, now the town scene should load and your player spawn. You’ll be able to move your player using the arrow keys (this is the default setup), but we have no animations yet … so, let’s fix this! Stop the game.
Adding animations
We’ll come back to the animations later, for now we only need to do some basics. If you want to learn more about animations in ORK Framework, take a look at this how-to.
Open the ORK Framework editor and navigate to Base/Controls > Animations. Edit the default animation (we’re using Unity®’s legacy animation system) and add 3 animations by clicking on Add Legacy Animation 3 times.
Legacy Animation 0
- Animation Type
Select Idle. - Animation Name
Set to idle. - Set Layer
Enable this setting. - Animation Layer
Set to -1.
Legacy Animation 1
- Animation Type
Select Walk. - Animation Name
Set to walk. - Set Layer
Enable this setting. - Animation Layer
Set to 0.
Legacy Animation 2
- Animation Type
Select Run. - Animation Name
Set to run. - Set Layer
Enable this setting. - Animation Layer
Set to 0.
Revisiting the player combatant
Now we have set up some basic animations for the player’s movement – go back to Combatants > Combatants and edit the player combatant once more.
Change the following settings.
Animations & Movement > Animation Settings
- System Type
Select Legacy.
We’re using Unity’s legacy animation system – if you want to use a different system (e.g. Mecanim), don’t forget to change your combatant’s system type. - Animations
Select Default (the animation we just edited). - Use Auto Animation (Automatic Move Animation)
Enable this setting.
This will let the player combatant automatically use the animations we created when moving.
Save the changes we made, close the editor and hit play again. The player will now be animated when you move him around.
And that’s it for now – the next lesson will cover interacting with the game world.
Error Message: GetLocalizedString
Don’t worry if you’re getting the following error message in the Unity console when the game loads the town scene:
GetLocalizedString can only be called from the main thread.
This error isn’t related to ORK Framework – it’s an issue with the tree assets used in the tutorial resources. Unity is discontinuing the support for their tree editor, but the trees still work as expected.