
Adding the actual quest to the game is done using Game Events and Game Variables.
The Game Events will take care of the dialogues and progressing the quest, while the Game Variables are used to keep track of the quest’s progress. You can learn more about game variables in this how-to.
Our epic quest will include two objects in our game – Blue Pants and his lost item. So we’ll need at least two game events as well. We can split down the events according to the different stages of the quest (e.g. the different dialogues when having accepted the quest, having found the item, etc.), but it’s simpler to have less events and keep the quest’s logic (i.e. reacting on the different stages) in the event. Else we’d have to add multiple Event Interactions to our NPC with different variable conditions – which can get confusing.
So, let’s start with adding our NPC to the game.
Adding Blue Pants to the scene
We’ll add Blue Pants to the town scene, so open 1 Town (can be found in Assets/Tutorial Resources/Scenes/). The prefab for the NPC is named NPC_blue and can be found in Assets/Tutorial Resources/NPCs/.
You can place him wherever you want, I’ve placed him in the grass beside the spawn point.

Place On Ground
To place the game object directly on the ground when the scene loads, you can add a Place On Ground component using the ORK Scene Wizard (while having the game object selected): Add Component > Place On Ground
Place On Ground uses a raycast to find the ground, so be sure to select a suiting layer mask (e.g. the Default layer).
Event Interaction
We’ve already used event interactions before, so let’s add one to our new game object using the scene wizard: Add Component > Event Interaction
Now click on Create New Event in the event interaction’s inspector – this will open the ORK Framework editor, automatically navigate to the Events section and create a new game event.
Game Event: Talking to Blue Pants
This game event will cover all of our dialogues with Blue Pants, so it’ll get a little bit more complex than the events we created until now.
We’ll create a series of game variable checks to check for the quest’s current state and react on it accordingly. The variable checks will be in inverted order, so we’ll first check if the quest is finished, after that if the item has been found and finally if the player has already started the quest (i.e. searches for the item). To check the state, we use a string game variable named BP_Quest – the state is either search, found, finished or not set yet.

Event Settings
This event will be a blocking event – only one blocking event can be executed at a time, and it’ll change the Game State for In Event to Yes.
- Blocking Event
Enable this setting. - Block Player Control
Enable this setting. - Block Camera Control
Enable this setting.
We’ll need two actors – Blue Pants and the player. Click on Add Actor to add the first one.
- Type
Select Object. - Event Object
Enable this setting. - Set Name
Enable this setting. - Name (English)
Set to Blue Pants.
Click on Add Actor to add our player.
- Type
Select Player.
That’s it for the event settings.
Check Game Variables (finished)
Add > Value > Variable > Check Game Variable
The 1st variable check step will check if the quest is finished, i.e. if BP_Quest is set to finished.
- Variable Origin
Select Global.
Click on Add Game Variable.
- Value Type (Variable Key)
Select Value. - Value (Variable Key)
Set to BP_Quest. - Is Valid
Enable this setting. - Type
Select String. - Value Type (String Value)
Select Value. - Value (String Value)
Set to finished.
Show Dialogue
Add > UI > Dialogue > Show Dialogue
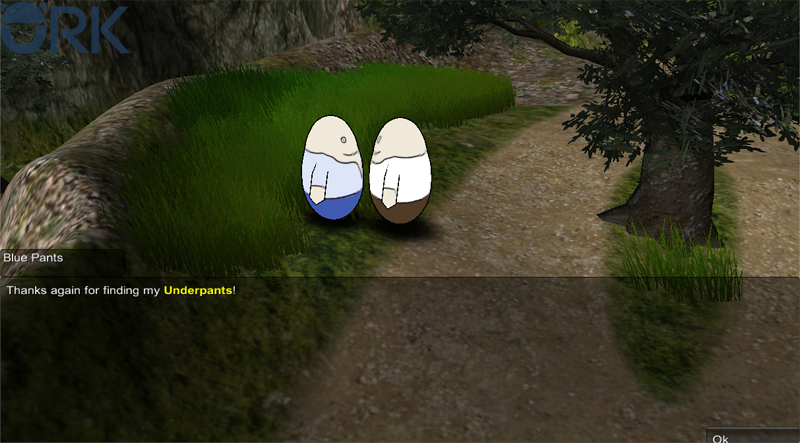
Blue Pants thanks us again for finding the item.
It’s connected to the finished check step’s Success slot.
- Dialogue Type
Select Message. - GUI Box
Select Bottom Dialogue. - Use Speaker
Enable this setting. - Actor
Select Blue Pants. - Show Name
Enable this setting. - Message
Set to: Thanks again for finding my #text.color2##text.boldUnderpants#<style#<color!
Check Game Variables (found)
Add > Value > Variable > Check Game Variable
The 2nd variable check step will check if the item has been found, i.e. if BP_Quest is set to found.
It’s connected to the finished check step’s Failed slot.
- Variable Origin
Select Global.
Click on Add Game Variable.
- Value Type (Variable Key)
Select Value. - Value (Variable Key)
Set to BP_Quest. - Is Valid
Enable this setting. - Type
Select String. - Value Type (String Value)
Select Value. - Value (String Value)
Set to found.
Show Dialogue
Add > UI > Dialogue > Show Dialogue
Blue Pants asks us if we’ve found the item.
It’s connected to the found check step’s Success slot.
- Dialogue Type
Select Choice. - GUI Box
Select Bottom Dialogue. - Use Speaker
Enable this setting. - Actor
Select Blue Pants. - Show Name
Enable this setting. - Message
Set to: Have you found my #text.color2##text.boldUnderpants#<style#<color yet?
Click on Add Choice to add the 1st choice.
- Text
Set to: Yes
Click on Add Choice again.
- Text
Set to: No
Has In Inventory
Add > Combatant > Inventory > Has In Inventory
Now, let’s check if the player really has the item …
It’s connected to the previous dialogue’s Choice 0 slot, i.e. when we said yes.
- Object
Select Actor. - Actor
Select Player.
Click on Add Item to add the item we’ll check for.
- Type
Select Item. - Selection
Select Underpants. - Quantity
Set to 1. - Chance (%)
Set to 100.
Show Dialogue
Add > UI > Dialogue > Show Dialogue
Blue Pants thanks us for finding the item.
It’s connected to the inventory check step’s Success slot.
- Dialogue Type
Select Message. - GUI Box
Select Bottom Dialogue. - Use Speaker
Enable this setting. - Actor
Select Blue Pants. - Show Name
Enable this setting. - Message
Set to:
Wow, thanks so much!
Here, take this … for your trouble.
Remove From Inventory
Add > Combatant > Inventory > Remove From Inventory
Let’s get rid of the underpants …
- Object
Select Actor. - Actor
Select Player.
Click on Add Item.
- Type
Select Item. - Selection
Select Underpants. - Quantity
Set to 1. - Chance (%)
Set to 100.
Add To Inventory
Add > Combatant > Inventory > Add ToInventory
Now, adding our reward.
- Object
Select Actor. - Actor
Select Player.
Click on Add Item.
- Type
Select Item. - Selection
Select Potion. - Quantity
Set to 5. - Chance (%)
Set to 100.
Learn Log Text
Add > Game > Log > Learn Log Text
Update the quest log.
- Complete Log
Disable this setting. - Log Text
Select BP 4.
Change Game Variable
Add > Value > Variable > Change Game Variable
Update the quest’s state to finished.
- Variable Origin
Select Global.
Click on Add Game Variable.
- Value Type (Variable Key)
Select Value. - Value (Variable Key)
Set to BP_Quest. - Type
Select String. - Value Type (String Value)
Select Value. - Value
Set to finished.
Show Dialogue
Add > UI > Dialogue > Show Dialogue
We don’t have the item …
Connected to the inventory check step’s Failed slot.
- Dialogue Type
Select Message. - GUI Box
Select Bottom Dialogue. - Use Speaker
Enable this setting. - Actor
Select Blue Pants. - Show Name
Enable this setting. - Message
Set to: Hey, you don’t have them!
Check Game Variables (search)
Add > Value > Variable > Check Game Variable
The 3rd variable check step will check if the quest is started, i.e. if BP_Quest is set to search.
It’s connected to the found check step’s Failed slot.
- Variable Origin
Select Global.
Click on Add Game Variable.
- Value Type (Variable Key)
Select Value. - Value (Variable Key)
Set to BP_Quest. - Is Valid
Enable this setting. - Type
Select String. - Value Type (String Value)
Select Value. - Value (String Value)
Set to search.
Show Dialogue
Add > UI > Dialogue > Show Dialogue
Blue Pants tells us again where to find his item.
Connected to the search check step’s Success slot.
- Dialogue Type
Select Message. - GUI Box
Select Bottom Dialogue. - Use Speaker
Enable this setting. - Actor
Select Blue Pants. - Show Name
Enable this setting. - Message
Set to:
Already found my #text.color2##text.boldUnderpants#<style#<color?
They should be somewhere on the road to town.
Show Dialogue
Add > UI > Dialogue > Show Dialogue
Blue Pants asks us if we can search for his lost item. This is the start of the quest.
It’s connected to the search check step’s Failed slot.
- Dialogue Type
Select Choice. - GUI Box
Select Bottom Dialogue. - Use Speaker
Enable this setting. - Actor
Select Blue Pants. - Show Name
Enable this setting. - Message
Set to:
Hi there, fellow!
I’ve lost something, could you help me find it?
Click on Add Choice to add the 1st choice.
- Text
Set to: Sure
Click on Add Choice again.
- Text
Set to: Some other time …
Show Dialogue
Add > UI > Dialogue > Show Dialogue
Blue Pants tells us where to find his item.
Connected to the previous dialogue’s Choice 0 slot (when we accept the quest).
- Dialogue Type
Select Message. - GUI Box
Select Bottom Dialogue. - Use Speaker
Enable this setting. - Actor
Select Blue Pants. - Show Name
Enable this setting. - Message
Set to:
Great!
I’ve lost my #text.color2##text.boldUnderpants#<style#<color … they should be somewhere on the road to town.
Please, bring them to me, it’s getting a little bit chilly without them.
Learn Log Text
Add > Game > Log > Learn Log Text
Update the quest log.
- Complete Log
Disable this setting. - Log Text
Select BP 2.
Change Game Variable
Add > Value > Variable > Change Game Variable
Update the quest’s state to search.
- Variable Origin
Select Global.
Click on Add Game Variable.
- Value Type (Variable Key)
Select Value. - Value (Variable Key)
Set to BP_Quest. - Type
Select String. - Value Type (String Value)
Select Value. - Value
Set to search.
And that’s it for the event – click on Save Event and save it as bluePantsDialogue in Assets/Events/Quests/Blue Pants/.
Add the event to the NPC
Close the ORK Framework editor – now it’s time to add the event to our NPC in the scene. Change the following settings in the inspector of the Event Interaction.
- Event Asset
Select bluePantsDialogue.
Now, click on Ok to accept the new event. The inspector settings will now change to set up the event.
- Start Type
Select Interact. - Turn Player to Event
Enable this setting. - Turn Event to Player
Enable this setting.
And that’s it. Since we handle the variable checks in the event, we don’t need to do anything else.
Save the scene.
Adding the item to the scene
Open the field scene (2 Field, can be found in Assets/Tutorial Resources/Scenes/). We wont use an Item Collector to collect the item, because we want to do some additional things when collecting it.
Add an ItemPrefab prefab (can be found in Assets/Tutorial Resources/Prefabs/Items/) between the first two battles.
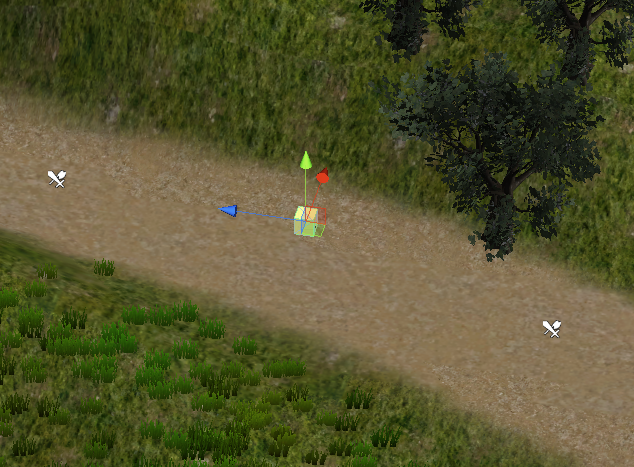
Again, add a Place On Ground component and an Event Interaction component.
Click on Create New Event to bring up the ORK Framework editor.
Game Event: The Underpants!
This game event will add the lost item to the player’s inventory, update the quest log and state and display a small dialogue.
It’s a one time event and will only be available after we accepted the quest, so we’ll add a variable condition to the Event Interaction.

Event Settings
This event will be also be a blocking event.
- Blocking Event
Enable this setting. - Block Player Control
Enable this setting. - Block Camera Control
Enable this setting.
We’ll need only one actor this time, the player. Click on Add Actor.
- Type
Select Player.
That’s it for the event settings.
Show Dialogue
Add > UI > Dialogue > Show Dialogue
The player talks!
- Dialogue Type
Select Message. - GUI Box
Select Bottom Dialogue. - Use Speaker
Enable this setting. - Actor
Select Player. - Show Name
Enable this setting. - Message
Set to: Oh … some #text.color2##text.boldUnderpants#<style#<color.
Add To Inventory
Add > Combatant > Inventory > Add To Inventory
Collect the underpants.
- Object
Select Actor. - Actor
Select Player.
Click on Add Item.
- Type
Select Item. - Selection
Select Underpants. - Quantity
Set to 1. - Chance (%)
Set to 100.
Learn Log Text
Add > Game > Log > Learn Log Text
Update the quest log.
- Complete Log
Disable this setting. - Log Text
Select BP 3.
Change Game Variable
Add > Value > Variable > Change Game Variable
Update the quest’s state to found.
- Variable Origin
Select Global.
Click on Add Game Variable.
- Value Type (Variable Key)
Select Value. - Value (Variable Key)
Set to BP_Quest. - Type
Select String. - Value Type (String Value)
Select Value. - Value
Set to found.
And that’s it for the event – click on Save Event and save it as bluePantsItem in Assets/Events/Quests/Blue Pants/.
Add the event to the item
Close the ORK Framework editor and change the following settings in the inspector of the Event Interaction.
- Event Asset
Select bluePantsItem.
Click on Ok to accept the new event. The inspector settings will now change to set up the event.
- Start Type
Select Interact. - Deactivate After Event
Enable this setting.
This will remove the game object after the event. - Turn Player to Event
Enable this setting. - Turn Event to Player
Disable this setting.
Now comes the crucial part – setting up the variable condition to display this item only when we’re searching for it.
- Auto Destroy
Enable this setting.
The event’s game object will automatically be destroyed when the variable conditions aren’t valid.
Click on Add Game Variable to add a variable condition.
- Value Type (Variable Key)
Select Value. - Value (Variable Key)
Set to BP_Quest. - Is Valid
Enable this setting. - Type
Select String. - Value Type (String Value)
Select Value. - Value (String Value)
Set to search.
And that’s it. Since we set the variable in the event, we don’t need to do anything else.
Save the scene.
Testing the quest
Open the main menu scene (0 Main Menu) and hit play. Talk to Blue Pants and accept the quest … as you progress through the quest, you’ll see that the quest log get’s updated, and the Underpants will be visible in your inventory after collecting it.
This concludes our first little quest.
And that’s it for now – the next lesson will cover saving the game.