
In Real Time Battles, the actions of a combatant aren’t bound to turns or a timebar. Instead, actions can be performed at any time.
There is a wide variety in how you can set up your real time battles – simply put, you can style them to be anything between button-smashing and menu-driven. In our little game, we will set up the base attacks to be used via button, the other actions will be selected through the battle menu.
Like the other battle system types, real time battles can also be fought in using the Battle component, having a single battle at a time. Additionally, you can set up areas (or a whole scene) to be a Real Time Battle Area, where every spawned combatant will participate in the battle. We’re going to use the areas.
Real Time Battles
Let’s go through the real time settings – open the ORK Framework editor and navigate to Battle System > Real Time Battles. Change the following settings.
Real Time Settings
In real time battles, the player’s battle menu wont show automatically – we have to call it using an input key.
- Battle Menu Key
Select Battle Menu.
We’ve created the key earlier. - 2nd Press Closes
Enable this setting.
Pressing the battle menu key again will close the opened battle menu.
Like in the other battle types, we have some options for the real time battles.
- Can Counter
Enable this setting. - Death Immediately
Enable this setting. - End Immediately
Disable this setting. - Pause On Menu
Enable this setting. - Block Menu
Disable this setting.
Control Block Settings
Since we want to run around while fighting real time battles, we wont block the player and camera control for the whole battle – only in action and while the battle menu is opened.
- Block Player Control
Select Player Actions. - Block in Battle Menu (Player)
Enable this setting. - Block Camera Control
Select None. - Block in Battle Menu (Camera)
Enable this setting.
Move AI Settings
To make the enemies move around, we need to enable the move AIs in real time battles.
- Allow Move AI
Enable this setting. - Range
Set to 50.
Default Start/End Events
We don’t need them for our set up.
Battle Gains Collection
Since we will use the real time battle areas, the battle will only end when we leave the area – so it’s best to collect our loot and experience right away when an enemy is killed.
- Collect Immediately
Enable this setting. - Show Gains
Enable this setting.
That’s it for the real time settings.
When bringing up the battle menu, we want the whole game to freeze, i.e. the battle, actions and animations will not progress. For this, we’ll copy our current battle menu, set it to freeze time and use it in real time battles. Navigate to Battle System > Battle Menus and copy the Default Battle Menu. Change the following settings in the new copy.
- Name
Set to Real Time Battle Menu. - Change Time Scale
Enable this setting. - Time Scale
Set to 0.
That’s it for the new battle menu.
Updating the battle settings
Now, navigate to Battle System > Battle Settings and change the following setting.
AI Range
We’ll limit the range for AI use – otherwise all combatants in a big area will spam their actions when the player isn’t even near them.
- Range
Set to 20.
Default Use Range
Since we’re using a big area with possibly a lot of enemies to fight, we need to limit the Use Range of the battle actions. The use range determines the distance between user and target of an action to allow performing the action. The default use ranges for all abilities and items is made here – each ability and item can individually override this setting.
In previous tutorials, we already set the Default Range to None, i.e. not using range limitations. Now, we’ll set a default use range for real time battles only.
- Own Real Time
Enable this setting.
Real Time Range
We’ll use one of the default Battle Range Templates to limit the use range to 5 world units. The battle range templates allow setting up reusable templates for use ranges and affect ranges of abilities and items. They can be created in Battle System > Battle Range Templates.
- Range Type
Select Template. - Template
Select Range 5.
We’ll use the new battle menu we created earlier in real time battles.
- Own Real Time Menu
Enable this setting. - Real Time Menu
Select Real Time Battle Menu.
That’s it for the battle settings.
Combatant AI
We’ve already set up different Battle AIs for our enemies, but there are some other settings we need to take care of. Navigate to Combatants > Combatants and change the following settings for all enemies (Evil Pants, Evil Caster, Evil Supporter).
Battle Settings > AI Settings
The Aggression Settings determine how a combatant will become aggressive. A combatant will hunt enemies (move AI) only if he is aggressive. When a combatant becomes aggressive (e.g. through being attacked), he can notify his group and faction – like a call for help. By default, every combatant is automatically aggressive, so we don’t need to change this for now.
We’re here for the AI Timeout setting – this setting is used in real time battles to stop combatants from spamming actions without pause.
- AI Timeout (s)
Set to 1.
Now, the enemies will wait for a second before using the next action.
That’s it for the combatants.
Attack use range
We’ve set the default use range to 5, but we want the attacks to only be useable at a closer distance – otherwise the enemies would simply use their base attack without even having a chance of hitting something. Navigate to Status >Abilities and change the following settings for Attack and Mug Attack.
Target Settings
- Own Use Range
Enable this setting.
Default Range
- Range Type
Select None.
This ensures that the use range in other battle systems is still not limited.
- Own Real Time
Enable this setting.
Real Time Range
- Range Type
Select Template. - Template
Select Range 1.
That’s it – click on Save Settings and close the ORK Framework editor
Setting up the battle area
Open the field scene (2 Field, can be found in Assets/Tutorial Resources/Scenes/). We’ll make the Woody Valley into a big real time battle using Real Time Battle Area components. The real time battle is running while the player is within the area’s trigger – and every spawned combatant with the battle system type Real Time will automatically participate in the battle.
This means, we first need to add Combatant Spawners to get us some enemies into the scene. We’ve already used them earlier, so I’m not going into much detail here (you can also simply copy the already existing one and change it’s battle type). There is just one setting that is different than last time – we need to spawn all the members of the added combatant groups.
- Spawn All Members
Enable this setting in all added combatant groups.
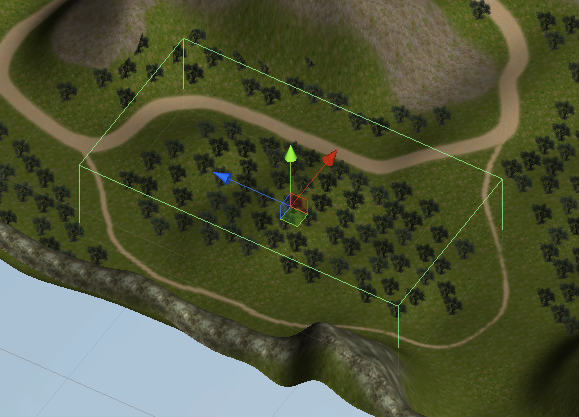
Now, we’ll add a Real Time Battle Area – since the battle will run while the player is within the area’s trigger, we’ll add a larger area around the combatant spawner. Use the ORK Scene Wizard to add a real time battle area: Create Object > Real Time Battle Area > Limited Area
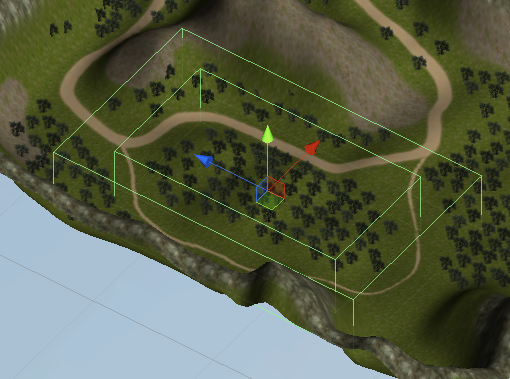
And that’s it – save the scene.
Testing
Open the main menu scene (0 Main Menu) and hit Play. Walk outside of town and into the area where you placed the real time battle area.
Once you enter the area, the battle starts and Brown Pants will have his sword in hand, the enemies will run to you and attack you.

If you haven’t added Equipment Viewers and a Start Equipment to the enemies yet, their base attack wont do you any harm, because they don’t have any Damage Dealer on them.
This concludes our Battle Tutorials.
And that’s it for now – the next lesson will cover game controls.