
When building a game, you might want to let your player know in which area of the game he currently is.
This is done using Areas and Area Types – they are created in the ORK Framework editor and added to a scene using the Area component.
A notification about the area can automatically be displayed when the player walks into an area. Information about the current area can be displayed in HUDs, menus and dialogue texts using the area text codes (learn more about text codes in this how-to).
Adding new colors
To make things a bit more interesting, we want to use different colors in the area notifications, so we need to add new colors first. Open the ORK Framework editor and navigate to Game > Colors.
Add a four new colors and change the following settings.
Color 2
- Name
Change to Yellow. - Color
Select a yellow color in the color editor (R=1, G=1, B=0, A=1).
Color 3
- Name
Change to Red. - Color
Select a red color in the color editor (R=1, G=0, B=0, A=1).
Color 4
- Name
Change to Green. - Color
Select a red color in the color editor (R=0, G=1, B=0, A=1).
Color 5
- Name
Change to Blue. - Color
Select a red color in the color editor (R=0, G=0, B=1, A=1).
That’s it for the colors.
A new GUI box …
We need to create a new GUI box that will be used to display the area notification when the player walks into a new area. Navigate to Menus > GUI Boxes.
To make things easier, we’ll copy our main menu GUI box (the first in the list) and change the following settings in the newly created GUI box.
Base Settings
- Name
Change to Area Notification. - Height Adjustment
Select Auto.
Content Box Settings
- Bounds
Set to X=640, Y=800, W=400 and H=200. - Anchor
Select Lower Center.
Name Box Settings
- Bounds
Set to X=0, Y=0, W=200 and H=50. - Anchor
Select Lower Left. - Relative Bounds
Enable this setting. - Relative To
Select Upper Left. - Adjust Width
Enable this setting. - Adjust Height
Enable this setting. - Color (Text Format)
Select Yellow (the color we just created).
The text in the name box will be displayed using this color. - Font Size (Text Format)
Change to 15. - Font Style (Text Format)
Select Bold.
We’re done with the GUI box.
The notification layout
Now we need to set up the default area notification layout – the layout decides which things the notification will display, each area can override the default layout with a custom layout. Navigate to Game > Game Settings and change the following settings.
Area Settings > Area Notification Layout
- Show Notification
Enable this setting. - GUI Box
Select Area Notification (the GUI box we just created). - Visible Time (s)
Set to 3.
The notification will be visible for 3 seconds. - Show Title
Enable this setting.
We want to display the name of the area’s type in the name box of the GUI box.
Change the title text field to %tn. - Text
To edit the text of the notification, click on Edit.
We will be using some text codes to change the alignment and color of the text (learn more about text codes in this how-to). - Change the first line of the text to %n and select the whole line.
Now we use the text editor buttons to align the text at the center and change the text color.
With the text selected, click on Center, now click on More and Colors. Select the color Red and click on Add.
The text line should now look like this: #text.center#text.color3#%n#<color - Move the text cursor to the end of the line (nothing selected) and hit enter to start a new line.
Change the new text line to %d and select the whole line again.
Use the text editor buttons again to align the text to the left – click on Left. - The whole text should look like this:
#text.center#text.color3#%n#<color
#text.left%d - Click on Ok to confirm the changes to the text.
That’s it for the notification layout.
Adding area types
Area types are used to organize areas. Navigate to World > Area Types, we need two area types, so add a new area type to the already existing one. Change the following settings.
Area type 0
- Name
Change to Town. - Description
Change to A peaceful town..
Area type 1
- Name
Change to Field. - Description
Change to An adventurous field..
That’s it for the area types.
Adding areas
Navigate to World > Areas. We need 7 areas (3 in the town, 4 in the field), so add 6 new areas to the already existing one. Change the following settings.
Area 0
- Name
Change to Town entrance. - Description
Change to Take care when leaving the town!. - Area Type
Select Town.
Area 1
- Name
Change to Tree square. - Description
Change to Rest below the shady tree.. - Area Type
Select Town.
Area 2
- Name
Change to Backyard. - Description
Change to Looking for backyard sales?. - Area Type
Select Town.
Area 3
- Name
Change to Road to town. - Description
Change to Follow this road to get to a town.. - Area Type
Select Field.
Area 4
- Name
Change to Woody road. - Description
Change to A road through the woods.. - Area Type
Select Field.
Area 5
- Name
Change to Woody valley. - Description
Change to A vally … with woods!. - Area Type
Select Field.
Area 6
- Name
Change to Plain fields. - Description
Change to Finally, no wood!. - Area Type
Select Field.
That’s it for the areas – and our work in the ORK Framework editor.
Save the changes by clicking on Save Settings and close the ORK Framework editor. We will now add our new areas to the town and field scenes.
Town scene
Open the town scene (1 Town) and use the ORK Scene Wizard to add three areas to the scene: Create Object > Area.
Place the areas like this and select the equivalent area in the inspector of each area component.
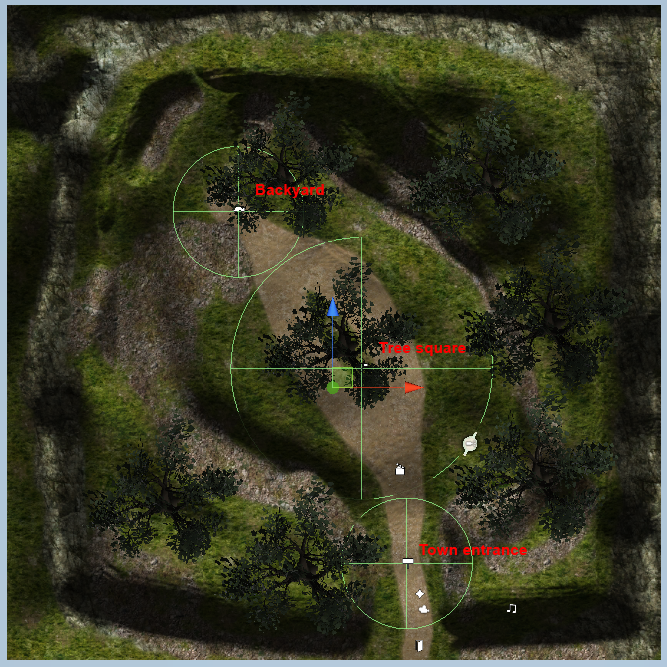
Make sure to place the ares at the ground of the terrain, the player should be able to walk into them.
Save the scene.
Field scene
Open the field scene (2 Field) and use the scene wizard to add 9 areas to the scene (we will use the some areas more than once): Create Object > Area.
Using an area multiple times in a scene can be used to simply cover the entrances to an area, rather than placing a huge area over the whole thing. This also allows more detailed placement. The area notification will only displayed when the player enters a new area, so walking into an area component with the same area wont display the notification again.
Place the areas like this and select the equivalent area in the inspector of each area component.
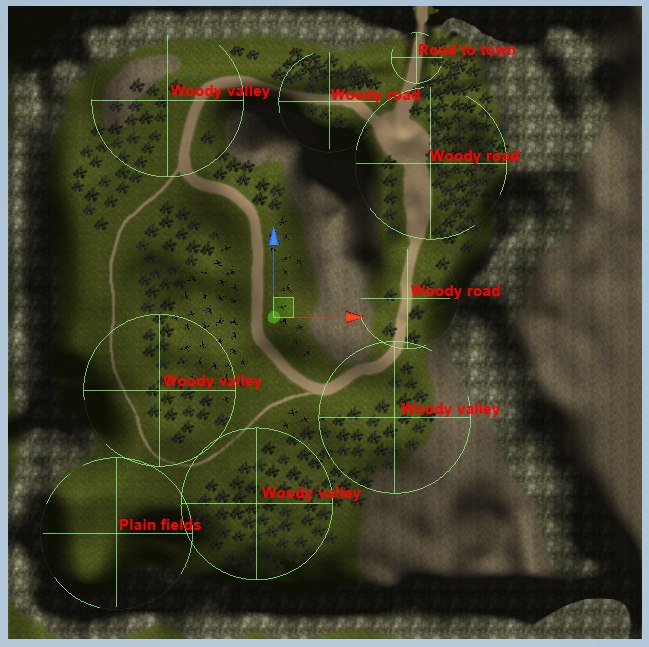
Make sure to place the ares at the ground of the terrain, the player should be able to walk into them. You can also use a different collider (like a Box Collider) for your areas – just make sure to enable Is Trigger.
Save the scene.
That’s all we need to do, so change to the main menu scene (0 Main Menu) and hit play. You’ll now see the area notification when you walk into a new area.
Tip: Keeping things in order
When creating complex scenes, it’s always a good idea to keep things in order. For areas, make sure to name your game objects accordingly.
You can also use an empty game object as a parent for all areas, to group them together in the scene hierarchy.
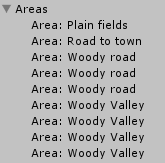
This way you have a structured scene and have no problem finding things again.
And that’s it for now – the next lesson will cover status values – this means we’ll get to serious business from now on!