
Let’s create a little cinematic introduction to the field scene.
In our Game Event, we’ll do some camera changes and display Auto Close dialogues.
Camera Objects
Open the field scene (2 Field, found in Assets/Tutorial Resources/Scenes/). We’ll use game objects in the scene to position the camera – while we could also do this using Camera Positions, it’s easier to use exactly placed objects in the scene for this one-time event. Camera positions are more useful when they’re needed multiple times, e.g. in battle events or for reused cinematic shots.
We’ll add 7 empty game objects (using the Untiy® menu GameObject > Create Empty) to the scene and name/place them like this.
CamPoint0
- Position
Set to X=325, Y=43, Z=483. - Rotation
Set to X=30, Y=180, Z=0.
CamPoint1
- Position
Set to X=308, Y=36, Z=413. - Rotation
Set to X=0, Y=200, Z=0.
CamPoint2
- Position
Set to X=272, Y=24, Z=428. - Rotation
Set to X=15, Y=270, Z=0.
CamPoint3
- Position
Set to X=246, Y=13, Z=418. - Rotation
Set to X=340, Y=210, Z=0.
CamPoint4
- Position
Set to X=235, Y=42, Z=392. - Rotation
Set to X=0, Y=210, Z=0.
CamPoint5
- Position
Set to X=207, Y=60, Z=365. - Rotation
Set to X=20, Y=210, Z=0.
CamPoint6
- Position
Set to X=48, Y=73, Z=218. - Rotation
Set to X=10, Y=70, Z=0.
That’s it for the camera position objects – save the scene.
The event
Add another empty game object to the scene and name it Introduction Event. Use the ORK Scene Wizard to add an Event Interaction: Add Comonent > Event Interaction
Click on Create New Event in the object’s inspector to open the ORK Framework editor and create a new event.

Event Settings
- Blocking Event
Enable this setting. - Block Player Control
Enable this setting. - Block Camera Control
Enable this setting.
We’ll need two actors – the camera and the player. Click on Add Actor to add the first one.
- Type
Select Camera.
Click on Add Actor again.
- Type
Select Player.
Now, we’ll add the camera position objects we created as Waypoints – add 7 waypoints to the event and change the following settings for all of them.
- Find Object
Enable this setting. - Object Name
Set to CamPointX.
Where X is the number of the current waypoint – so, CamPoint0, CamPoint1, CamPoint2, …, CamPoint6.
Change Camera Position
Add > Game Object > Camera > Change Camera Position
First, we’ll set the camera to the position and rotation of the our first waypoint.
- Use Target Position
Enable this setting. - Set Position
Enable this setting. - Set Rotation
Enable this setting. - Object (Target Object)
Select Waypoint. - Waypoint
Select Waypoint 0. - Fade Position
Disable this setting.
Change Camera Position
Add > Game Object > Camera > Change Camera Position
Now, we’ll fade to the position and rotation of the next waypoint.
- Use Target Position
Enable this setting. - Set Position
Enable this setting. - Set Rotation
Enable this setting. - Set Field of View
Enable this setting. - Field of View
Set to 60. - Object (Target Object)
Select Waypoint. - Waypoint
Select Waypoint 1. - Fade Position
Enable this setting. - Time (s)
Set to 10. - Wait
Disable this setting.
- Interpolation
Select Ease In Out Quad.
Wait
Add > Base > Wait
- Time (s)
Set to 4.
Show Dialogue
Add > UI > Dialogue > Show Dialogue
While the camera is fading, we’ll display the first dialogue.
- Dialogue Type
Select Auto Close. - GUI Box
Select Area Notification. - Message
Set to:
#text.boldWelcome to the field!#<styleYou’ll fight different kinds of battles here … on this road, #text.bold#text.color3#Turn Based#<color#<style battles await you.
You won’t see your enemies coming! - Block Accept Button
Enable this setting.
The player can’t close the dialogue. - Close After (s)
Set to 10. - Wait
Enable this setting.
Rotate To
Add > Movement > Rotation > Rotate To
Now, we rotate the camera to the next waypoint.
- Object
Select Actor. - Actor
Select Camera. - Ignore X/Y/Z
Disable these settings. - To Object
Enable this setting. - Object
Select Waypoint. - Waypoint
Select Waypoint 2. - Fade Rotation
Enable this setting. - Time (s)
Set to 2. - Wait
Enable this setting. - Interpolation
Select Ease In Out Quad.
Change Camera Position
Add > Game Object > Camera > Change Camera Position
And move it to the next waypoint.
- Use Target Position
Enable this setting. - Set Position
Enable this setting. - Set Rotation
Enable this setting. - Set Field of View
Enable this setting. - Field of View
Set to 40. - Object (Target Object)
Select Waypoint. - Waypoint
Select Waypoint 2. - Fade Position
Enable this setting. - Time (s)
Set to 5. - Wait
Disable this setting.
- Interpolation
Select Ease In Out Quad.
Show Dialogue
Add > UI > Dialogue > Show Dialogue
- Dialogue Type
Select Auto Close. - GUI Box
Select Area Notification. - Message
Set to:
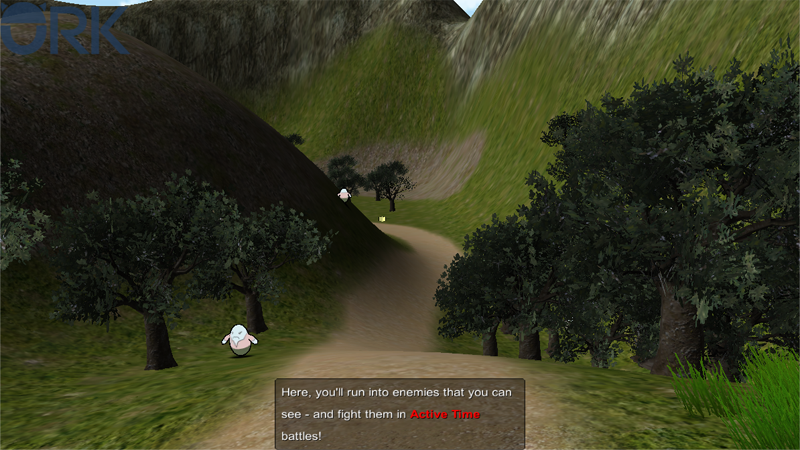
Here, you’ll run into enemies that you can see – and fight them in #text.bold#text.color3#Active Time#<color#<style battles! - Block Accept Button
Enable this setting. - Close After (s)
Set to 8. - Wait
Enable this setting.
Change Camera Position
Add > Game Object > Camera > Change Camera Position
- Use Target Position
Enable this setting. - Set Position
Enable this setting. - Set Rotation
Enable this setting. - Object (Target Object)
Select Waypoint. - Waypoint
Select Waypoint 3. - Fade Position
Enable this setting. - Time (s)
Set to 4. - Wait
Enable this setting.
- Interpolation
Select Ease In Quad.
Change Camera Position
Add > Game Object > Camera > Change Camera Position
- Use Target Position
Enable this setting. - Set Position
Enable this setting. - Set Rotation
Enable this setting. - Set Field of View
Enable this setting. - Field of View
Set to 60. - Object (Target Object)
Select Waypoint. - Waypoint
Select Waypoint 4. - Fade Position
Enable this setting. - Time (s)
Set to 5. - Wait
Enable this setting.
- Interpolation
Select Linear.
Change Camera Position
Add > Game Object > Camera > Change Camera Position
- Use Target Position
Enable this setting. - Set Position
Enable this setting. - Set Rotation
Enable this setting. - Set Field of View
Enable this setting. - Field of View
Set to 40. - Object (Target Object)
Select Waypoint. - Waypoint
Select Waypoint 5. - Fade Position
Enable this setting. - Time (s)
Set to 5. - Wait
Enable this setting.
- Interpolation
Select Ease Out Quad.
Change Camera Position
Add > Game Object > Camera > Change Camera Position
- Use Target Position
Enable this setting. - Set Position
Enable this setting. - Set Rotation
Enable this setting. - Object (Target Object)
Select Waypoint. - Waypoint
Select Waypoint 6. - Fade Position
Enable this setting. - Time (s)
Set to 20. - Wait
Disable this setting.
- Interpolation
Select Ease In Out Quad.
Show Dialogue
Add > UI > Dialogue > Show Dialogue
- Dialogue Type
Select Auto Close. - GUI Box
Select Area Notification. - Message
Set to:
Finally, this area is swarming with enemies you’ll have to fight in #text.bold#text.color3#Real Time#<color#<style battles! - Block Accept Button
Enable this setting. - Close After (s)
Set to 10. - Wait
Enable this setting.
Show Dialogue
Add > UI > Dialogue > Show Dialogue
- Dialogue Type
Select Auto Close. - GUI Box
Select Area Notification. - Message
Set to:
In real time battles, you can use #text.bold#text.color2#Space#<color#<style to attack, and #text.bold#text.color2#Left-CTRL#<color#<style to open the battle menu. - Block Accept Button
Enable this setting. - Close After (s)
Set to 10. - Wait
Enable this setting.
Wait
Add > Base > Wait
- Time (s)
Set to 1.
Fade Screen
Add > UI > Fade Screen
- Wait
Enable this setting. - Time (s)
Set to 2. - Interpolation
Select Linear. - Fade Alpha/Red/Green/Blue
Enable these settings. - Start Color
Select a black color without alpha (R=0, G=0, B=0, A=0). - End Color
Select a black color with full alpha (R=0, G=0, B=0, A=1).
Change Camera Position
Add > Game Object > Camera > Change Camera Position
And we’ll return to the player.
- Use Target Position
Disable this setting. - Camera Position
Select Front View.
- Object
Select Actor. - Actor
Select Player.
Fade Screen
Add > UI > Fade Screen
- Wait
Enable this setting. - Time (s)
Set to 1. - Interpolation
Select Linear. - Fade Alpha/Red/Green/Blue
Enable these settings. - Start Color
Select a black color with full alpha (R=0, G=0, B=0, A=1). - End Color
Select a black color without alpha (R=0, G=0, B=0, A=0).
Show Dialogue
Add > UI > Dialogue > Show Dialogue
A final warning for the player.
- Dialogue Type
Select Auto Close. - GUI Box
Select Area Notification. - Message
Set to:
Watch out, the first battle is right ahead! - Block Accept Button
Enable this setting. - Close After (s)
Set to 4. - Wait
Enable this setting.
And that’s it for the event – click on Save Event and save it as fieldIntroduction.asset in Assets/Events/Field/. Close the ORK Framework editor.
Autostart event
Back in the field scene, we’ll set up our event to automatically start when the scene is loaded the first time. We’ll let the Event Interaction handle setting and checking the game variables.
With the event object selected, change the following settings in the Event Interaction inspector.
- Event Asset
Select fieldIntroduction.
Click on Ok.
- Start Type
Select Autostart. - Deactivate After Event
Enable this setting. - Turn Player to Event
Disable this setting.
Variable Condition
Now, we’ll set up variable conditions so that our event will only start the first time we’re entering the scene.
- Auto Destroy
Enable this setting.
Click on Add Game Variable to add a variable condition.
- Value Type (Variable Key)
Select Value. - Value
Set to FieldIntroduction. - Is Valid
Disable this setting. - Type
Select Bool.
Now, the event will only start if FieldIntroduction is not true.
Set After Event
Finally, we’ll let the event interaction set a variable after the event has finished. Click on Add Game Variable.
- Value Type (Variable Key)
Select Value. - Value
Set to FieldIntroduction. - Type
Select Bool. - Value
Enable this setting.
And that’s it – save the scene.
Testing
Open the main menu scene (0 Main Menu) and hit play.
After entering the scene, the new event will automatically start and take us on a tour around the field.
And that’s it for now – the next lesson will cover creating the crafting system.