
This time we’ll spawn some enemies and let them hunt the player to start a battle.
To make this happen, we need to do two things:
- create a Move AI to let the enemies hunt the player
- use Combatant Spawner components to spawn them in the scene (without starting a battle)
We’ll start with the move AI. You can learn more about move AIs in this how-to.
Creating a Move AI
Move AIs are used to move combatants around in the field and (optionally) in battles. To use move AIs in battles, you need to enable them for the battle system type. The move AI handles if and when enemy combatants are hunted, if a combatant follows it’s leader around and other movements, like following waypoints.
For our little game, we’ll create a simple move AI that will hunt the player on sight and move around randomly while not running after the player. Open the ORK Framework editor and navigate to Combatants > Move AIs. There’s already a default AI, so let’s change it’s settings.
Base Settings
- Name
Change to Hunt. - Use Auto Stop
Enable this setting.
This will automatically stop the combatant if he’s close to the target position for some time. - Stop Distance
Set to 0.5. - Stop Time (s)
Set to 0.5.
To move the combatant’s game object around, we need a component on the game object that will actually do that for us. ORK Framework already comes with a (very) simple component that will move the combatant toward its target. You can also use Unity’s Navmesh system, or a custom solution.
- Component Type
Select Default.
This uses ORK Framework’s simple movement component. - Add Component
Enable this setting.
The component is added automatically to combatant’s (if it’s not already there).
Speed Settings
The speed settings determine how fast a combatant will move in certain situations. Unless you use the Value speed type, the speed settings defined for the combatant is used.
- Follow Speed
Select Run.
The speed used when following the group’s leader. - Give Way Speed
Select Walk.
The speed used when moving out of the leader’s way. - Hunting Speed
Select Run.
The speed used when hunting an enemy. - Flee Speed
Select Run.
The speed used when fleeing from an enemy. - Waypoint Speed
Select Walk.
The speed used when moving to a waypoint.
Waypoint Settings
While not hunting or fleeing from an enemy, or following the leader, combatants can move around between waypoints. To follow fix waypoints in a scene, you need to add those waypoints to the Combatant Spawner component (or Add Combatant component) that adds the combatant to the scene – but you can also let ORK generate random waypoints.
- Stop Distance
Set to 0.1. - No Combatant Radius
Enable this setting. - Reset Time (s)
Set to 1.
The combatant will move to the next waypoint if he couldn’t reach the current one after this time. - Enable Random Patrol
Enable this setting. - Patrol Radius
Set to 5. - From Current Position
Enable this setting.
The patrol radius will always be used from the current position of the combatant.
If disabled, the patrol radius is used from the spawn position of the combatant, forcing him to stay within a certain area.
Idle Settings
The combatant can use Move Events while being idle (e.g. between waypoints). You can use the move events to e.g. wait for some time, rotate the combatant or play some animation on him.
- Enable Idle
Disable this setting.
We’re not using this for now.
Group Settings
Combatants can follow their group leader – we’ll use that.
- Follow Leader
Enable this setting. - Stop Hunting
Disable this setting. - No Waypoints
Enable this setting.
The Follow Range determines when the combatant will run after his leader.
- Range
Set to 3. - Threshold
Set to 0.5.
The threshold is used for a smoother transfer between following and stopping.
The combatant will follow the leader when the distance is 3.5 and stop following when it’s 2.5.
The Give Way Range determines if and when a combatant will move out of the leader’s way (e.g. to not block him).
- Give Way
Enable this setting. - Range
Set to 1. - Threshold
Set to 0.5.
Auto Respawn can automatically respawn a combatant near his leader when getting too far away.
- Auto Respawn
Disable this setting.
Enemy Detection
Now things are getting interesting – the enemy detection controls when a combatant notices an enemy. You can add multiple detection settings, like seeing an enemy in front of the combatant, but noticing a moving enemy all around.
- Use Detection
Enable this setting. - Timeout (s)
Set to 0.5.
The base detection range determines the area around the combatant that he will recognize enemies. Each detection setting has it’s own range, but they can’t exceed the base detection range.
- Range
Set to 5.
Let’s keep it easy for now. - Threshold
Set to 0.5.
Now, click on Add Detection to add a detection setting. Since we will only use this one detection, you can leave it’s range settings as they are.
- Type
Select Sight. - Use Raycast
Disable this setting.
We could use a raycast from the combatant to the target to ensure that there really is a line of sight – but this is only a simple game. - Angle
Set to 120.
The combatant can see everything in front of him, 60 degree to either side. - Angle Offset
Set to 0.
Target Position Check
These settings are used to check the target’s position and update the position the combatant moves to, as well as how to handle losing the target (i.e. target no longer being detected).
- Target Lost Interval
Set to 1. - Lost Position Check
Enable this setting.
Since some movement components (e.g. Navmesh) can use a lot of calculations when updating the position, you can set the update timeout based on the distance to the target. We’ll use four different checks – click on Add Target Check to add new checks.
Check 0
- Interval
Set to 0.
The target’s position is checked every frame. - Minimum Distance
Set to 0.
We’ll use this when we’re close.
Check 1
- Interval
Set to 0.2. - Minimum Distance
Set to 2.
Check 2
- Interval
Set to 0.5. - Minimum Distance
Set to 5.
Check 3
- Interval
Set to 1. - Minimum Distance
Set to 10.
Hunting Settings
These settings determine if and when to hunt enemy combatants.
- Use Hunting
Enable this setting.
You can use Hunting Conditions to only hunt enemies that match certain status requirements (e.g. at least level 5). We don’t need them for now.
That’s it for the move AI.
Battle Start Range
Next, we’ll define the range at which a battle will start if an enemy comes near the player. Navigate to Battle System > Battle Settings and change the following settings.
Auto Start Battles > Start on Range
Here we can define the Battle Start Range – the range the combatant must reach to start a battle with the player.
- Auto Start Battles
Enable this setting. - Range
Set to 1.
Combatants can individually override these settings, e.g. if you want a combatant to start battles from farther away. That’s it for the battle start range.
Adding the move AI to the combatants
Now that we have our move AI, we need to add it to the combatants who are going to use it – in our case, that’s the enemy combatants. When hunting the player, a battle will automatically start once the enemy gets within a defined range.
Navigate to Combatants > Combatants and change the following settings for Evil Pants, Evil Caster and Evil Support.
Animations & Movement > Movement Settings
- Use Move AI
Enable this setting. - Move AI
Select Hunt.
That’s it – click on Save Settings and close the ORK Framework editor.
Spawning combatants
Open the field scene (2 Field, can be found in Assets/Tutorial Resources/Scenes/) and move the scene view to the path to the right of the town entrance. We’re using a Combatant Spawner to add our combatants to the scene.
Combatant spawners can be used to either spawn combatants on a single spot, or randomly within an area (trigger) – and killed combatants can be automatically respawned. The combatant spawner also determines the battle system type of the combatants. We’ll use the ORK Scene Wizard to add a spawn area to the scene: Create Object > Combatant Spawner (Area) > Active Time Battle
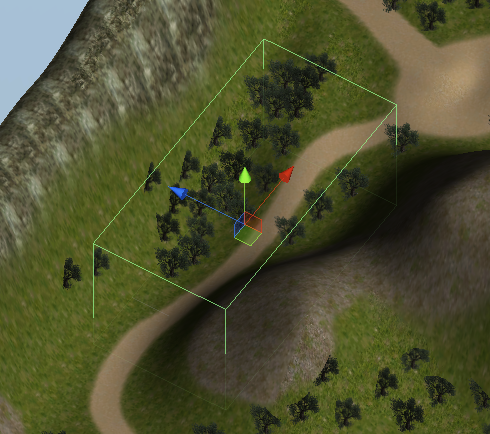
Increase the size of the Box Collider, e.g. to X=100, Y=50, Z=50.
Now it’s time to set up the combatant spawner – change the following settings in the game object’s inspector.
Start Settings
- Use Scene ID
Disable this setting. - Start Type
Select Autostart.
Battle Settings
Since we used the scene wizard to create the combatant spawner, the Battle Type should already be set to Active Time.
Like in Random Battle Areas, you can use a different game object with a Battle Component attached for battles started by spawned combatants. If you don’t select a game object (that’s what we’ll do), a new game object will be created for each battle.
Combatant Settings
The comatants are spawned using raycasts at random positions within the spawner’s collider. The raycasts start at the top and end at the bottom of the collider, so make sure the box starts above the ground and ends below it.
- Layer Mask
Select the Default layer.
That’s the layer where the terrain (where we want to spawn at) is located.
Now it’s time to add some combatant groups – remember to select Enemies as the Faction for all combatant groups. Let’s set up the first group.
- Combatant Group
Select Fighter, Caster. - Quantity
Set to 3.
That’s the quantity the combatant spawner will spawn of this group. - Random Rotation
Enable this setting.
Spawned combatants will have a random start rotation – otherwise they will all look into the same direction. - Spawn All Members
Disable this setting.
We only want to spawn the group leaders for now. - Respawn
Enable this setting.
The combatant will respawn after being defeated in battle. - Respawn Time (s)
Set to 30.
The combatant will respawn after 30 seconds.
Feel free to add some more combatant groups, my suggestion:
- Fighter, Supporter (quantity 3, respawning every 40 seconds)
- Fighter, Caster, Supporter (quantity 1, respawning every 60 seconds)
- 2xFighter, Caster (quantity 1, respawning every 60 seconds)
That’s it – save the scene.
Testing time
Open the main menu scene (0 Main Menu) and hit Play. Walk outside of town and into the area where you placed the combatant spawner.
You’ll now see them walking around – and hunting you if they spot you.

You can prevent combatants from spawning in certain areas by adding Block Combatant Spawn components to the scene. The block combatant spawn will prevent combatants spawning within it’s trigger.
You can add them using the scene wizard: Create Object > Block Combatant Spawn
And that’s it for now – the next lesson will cover damage dealers and damage zones.