
With all the battles and a quest in the game, it’s time to allow saving the player’s progress.
ORK Framework comes with a save game system that allows saving all in-game data – the data can be encrypted and either be saved to PlayerPrefs or to a File.
You can save the game at Save Points (a component added to game objects in your scenes), through the menu system or using the event system. Beside saving the game to save slots, you can also use an autosave slot and a retry slot. While the autosave slot is also saved permanently, the retry slot is only available during a running game.
The save game settings
Open the ORK Framework editor and navigate to Menus > Save Game Menu. All save game related settings can be found here, so let’s change the following settings.
Save Game Settings
The settings for the actual save game files/data.
- Save Slots
Set to 3.
This determines how many save games a player can have. - Save To
Select File.
The save game will be saved to files in your game’s persistent data path.
The actual path depends on the OS your game is running on, see the Unity® documentation for details. - Encrypt Data
Enable this setting.
The save game data will be encrypted.
Else, the data would be available in plain text and could be altered by the player.
During development, it can be a good idea to keep it in plain text to do changes if needed.
Screen Fade Out/In
These settings handle the screen fading when loading a saved game.
We can just stick with the default settings.
Save Settings
You can define what a save game will save of the running game. Also, you select if some of the scene data (like dropped items) will be kept during the running game – else they’ll be gone when you leave the scene.
By default, the save game will save everything beside dropped items (they’ll be gone when leaving the scene or loading a saved game). Let’s take a look at them.
- Statistics
Enable this setting.
The statistics of the game will be saved (i.e. number of killed enemies, etc.). - Game Time
Enable this setting.
The time since starting a new game will be saved.
If disabled, the game time will be reset when you load the game. - Groups
Enable this setting.
The player groups will be saved – i.e. all your group members, their levels, status values, equipment, etc.
If disabled, the player group will be gone and you’ll have to define a scene to load when loading the game. - Factions
Enable this setting.
The faction sympathies will be saved. - Logs
Enable this setting.
The learned logs will be saved. - Positions
Enable this setting.
The position of your group members in the scene will be saved.
The Scene Data will also determine what data is kept when changing the scene in the running game.
- Save Boxes
Select Save.
The content of item boxes (i.e. Item Collectors with Box type selected) will be saved. - Save Items
Select Save.
Collected items will be saved (using their Scene ID) – i.e. collected items wont reappear. - Save Drops
Select None.
Items dropped into the game world will be gone once we leave the scene. - Save Battles
Select Save.
Already fought battles will be saved (using their Scene ID). - Save Shops
Select None.
The content of shops wont be saved.
You can set up shops to keep the items you sell to them and allow you to buy them back. - Object Variables
Select Save.
Object game variables will be saved.
They are like game variables, but they’re bound to game objects using an Object ID. - Scene Positions
Enable this setting.
Scene positions will be saved.
They allow storing a position in a scene for later use, like remembering the position before teleporting away and return to it later.
The Inventory Data determines what will be saved of the player’s inventory.
- Items
Enable this setting.
Items in the inventory will be saved. - Weapons
Enable this setting.
Weapons in the inventory will be saved. - Armors
Enable this setting.
Armors in the inventory will be saved. - Money
Enable this setting.
All types of money/currencies in the inventory will be saved.
The Game Variable Data determines what game variables will be saved. You can save none, all or only selected variables (or exclude selected variables).
- Game Variables
Select All.
All game variables will be saved.
File Settings
These settings are used to set up the content of file buttons displayed in the save menus.
File Info
The File Info is used to display a saved game. You can use special text codes to display information about the saved game.
- Text
Set to:
#text.color2##text.boldFile %#<style#<color
%n, Lvl %l
Time: %t
Area: %a
Empty File Info
The Empty File Info is used to display empty save slots.
- Text
Set to Empty.
Auto Save Settings
Beside the save slots, ORK Framework also allows automatic saving of the game, e.g. when passing a checkpoint, or regularly saving using global events.
We’re not going to use this in our small game.
These settings define the look of the menu to save the game (i.e. selecting a save slot).
- GUI Box
Select Bottom Dialogue. - One Box
Enable this setting. - Show Title
Enable this setting. - English (Text)
Set to Save. - Save Text
Set to Select the save slot:. - Show Question
Enable this setting.
A question dialogue will be displayed before actually saving the game. - GUI Box
Select Main Menu. - Question Text
Set to Save to slot %?. - Use Choice
Enable this setting. - Yes Button Text
Set to Save. - No Button Text
Set to Cancel. - Show Saved Info
Disable this setting.
We don’t want to display an info after the game has been saved.
These settings define the look of the menu to load a saved game.
- GUI Box
Select Bottom Dialogue. - One Box
Enable this setting. - Show Title
Enable this setting. - English (Text)
Set to Load. - Load Text
Set to Select the load slot:. - Show Question
Enable this setting.
A question dialogue will be displayed before actually loading the game. - GUI Box
Select Main Menu. - Question Text
Set to Load from slot %?. - Use Choice
Enable this setting. - Yes Button Text
Set to Load. - No Button Text
Set to Cancel. - Show Loaded Info
Disable this setting.
We don’t want to display an info after the game has been loaded.
Save Point Settings
These settings determine the options and the look of the save point menu. The save point menu is displayed by Save Point components.
- Show Choice
Enable this setting.
The save point menu will be displayed.
Else, the save game menu is displayed directly. - GUI Box
Select Main Menu. - Save Button Text
Set to Save. - Load Button Text
Set to Load. - Add Cancel Button
Select Last.
And that’s it, click on Save Settings and close the ORK Framework editor.
Adding a save point
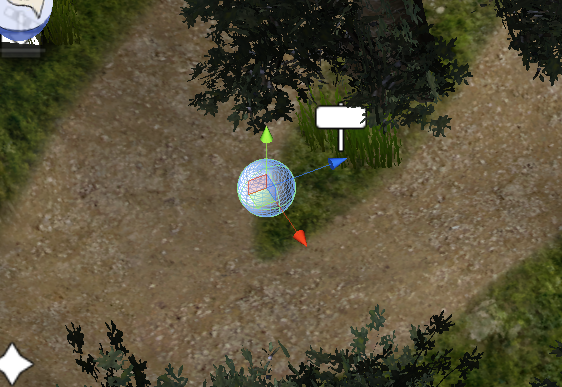
Open the town scene (1 Town) and add a new game object to your scene. I’ve added a simple sphere (using the Unity® menu: Game Object > Create Other > Sphere).
Place the sphere somewhere around the town in the center of the scene. Use the ORK Scene Wizard to add a Save Point component to the object: Add Component > Save Point
The save point’s settings are already set up for us, but let’s take a look.
- Start Type
Select Interact. - Save Point Type
Select Save Point.
You can use this setting to use the save point as an Autosave or Retry point – e.g. in combination with the Trigger Enter start type.
Additionally, you can use variable conditions to make a save point (or autosave/retry point) available only at a certain time in your game – and set a variable when saving the game.
Save the scene.
Testing
Open the main menu scene (0 Main Menu) and hit play. The new save point will let you save and load the game.

Try doing something – like fighting the first battle or accepting Blue Pants quest – and save the game.
When you load the game again, you’ll see that your progress in the game has been saved.
And that’s it for now – the next lesson will cover shops.