
In Active Time Battles a combatant can perform an action once his timebar has been filled.
This kind of battle system is best known from old RPGs like Final Fantasy VII, but is also used in modern RPGs (e.g. Final Fantaxy XIII used also a version of it).
Active Time Battles
Open the ORK Framework editor and navigate to Battle System > Active Time Battles and change the following settings.
Active Time Settings
The timebar is filled over time – to do this we use formulas.
- Time Calculation
Select Turn Calculation.
This formula will be used to fill the timebar over time. - Start Calculation
Select Turn Calculation.
This formula will calculate the filling of the timebar at the start of the battle.
The different border settings for the timebar determine when an action can be selected and performed. We’ll use a classic approach and allow choosing and performing actions when the timebar is filled completely.
- Menu Border
Set to 1000.
The combatant can select actions when his timebar reaches this value. - Action Border
Set to 1000.
The combatant can perform actions when his timebar reaches this value. - Maximum Timebar
Set to 1000.
The maximum value the timebar can reach. - Tick Interval (s)
Set to 0.05.
The tick interval determines the rate in which the timebar is filled. - Pause On Menu
Enable this setting.
The filling of the timebar will be paused while displaying a battle menu. - Pause On Action
Disable this setting.
We don’t want the timebar to stop while actions are performed.
You can define how much of the timebar will be consumed when an action is performed. For abilities, this is done individually in their settings – other actions (item, defend, escape, none) are defined here. We’ll let every action set the timebar to 0 (i.e. end the turn).
- Item/Defend/Escape/None End Turn
Enable this settings.
The active time battle optionally allows selecting multiple actions and performing them in sequence. We’re not using this feature.
- Use Multi Choice
Disable this setting.
Control Block Settings
Like in Turn Based Battles, you can define if the player and camera controls are blocked during an active time battle.
- Block Player Control
Select Battle. - Block In Battle Menu (Player)
Enable this setting. - Block Camera Control
Select Battle. - Block In Battle Menu (Camera)
Enable this setting.
Default Start/End Events
We can reuse the events from turn based battles.
- Start Event
Select simpleStart. - Victory Event
Select simpleVictory. - Escape Event
Select simpleEscape. - Defeat Event
Select simpleDefeat.
That’s it for this settings.
Altering the HUD
To give our player a visual feedback for when he will be ready to select actions, we’ll alter the Player HUD we created earlier. Navigate to Menus > HUDs and change the following settings.
Click on Add Status Element to add a new element to the HUD.
Status Element 4
- Type
Select Timebar. - Use Bar
Enable this setting.
The timebar doesn’t have a default bar setting as the status values had, so we have to define the bar here.
- Color
Select Yellow. - Use Empty Bar
Enable this setting. - Color (Empty Bar)
Select Default Shadow.
This element is anchored to the previous element.
- Position
Set to X=0, Y=15. - Anchor
Select Upper Left. - Relative To
Select Lower Left. - Use Last Element
Enable this setting. - Width
Set to 100. - Is Percent (Width)
Enable this setting. - Adjust Width
Enable this setting. - Height
Set to 5. - Is Percent (Height)
Disable this setting. - Adjust Height
Enable this setting.
Now, copy this status element and change the following settings.
Status Element 5
- Use Bar
Disable this setting. - Text
Set to Time. - Font Size
Set to 18. - Position
Set to X=0, Y=-20. - Relative To
Select Upper Left. - Height
Set to 30.
Since the two new elements are of type Timebar, they’ll only appear while fighting in an active time battle.
That’s it for the HUD changes. Click on Save Settings and close the ORK Framework editor.
Adding random battles
We’ve already used Battle Components to add turn based battles to our scenes – using battle components for active time battles works the same way, simply select Active Time as Battle Type and you’re good to go.
This time, we’re using something different to start battles – Random Battle Areas. Simply put, it’s an area (a trigger) where battles randomly occur while the player walks within.
Open the field scene (2 Field, can be found in Assets/Tutorial Resources/Scenes/) and move the scene view to the big opening after the town entrance. Now, use the ORK Scene Wizard to add a random battle area: Create Object > Random Battle Area > Active Time Battle
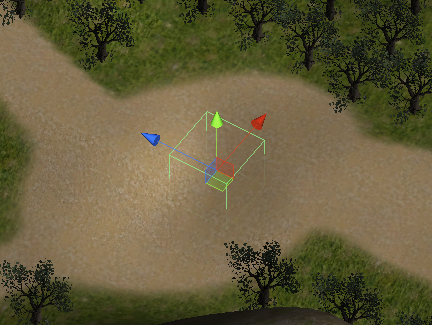
The scene wizard automatically created a new game object with a Box Collider (used as trigger) and a Random Battle Area component attached. The size is a bit too small, so let’s increase the trigger’s size – change the following setting in the inspector of the new game object.
Box Collider
- Size
Set to X=50, Y=20, Z=50.
Now it’s time to set up the random battle area.
Battle Settings
- Battle Type
Select Active Time.
The random settings determine how often a random battle occurs – the default settings are good enough for now, but feel free to play around with them.
- Battle Chance (%)
Set to 10.
This is the chance of a random battle happening. - Check Interval (s)
Set to 0.5.
The time in seconds between two checks. - Minimum Check Distance
Set to 0.1.
The minimum distance the player must have walked since the last check to allow another check. - Minimum Distance
Set to 5.
The minimum distance the player must have walked since the last battle to allow a new battle. - Maximum Distance
Set to 15.
If the player walked more than this distance since the last battle, a battle will be forced.
This makes sure a battle occurs on a regular basis. - Ignore Y Distance
Enable this setting.
The distance on the Y-axis (height differences) are ignored for the distance checks.
The Battle Object lets us use a game object with an attached Battle Component for our battles. If no object is provided (that’s what we’re doing), a new game object with a battle component will be created for each battle (and placed at the position of the player), using the default start/end events.
Combatant Settings
You’ll notice the Total Chance information – this will tell you if the sum of the chances for the different combatants/groups you add to this random battle area is above or below the maximum chance (e.g. 100 % – you can chance the chance settings in the Game Settings).
In a random battle area, every combatant or group occurs with a defined chance. So, beside the chance that a battle actually happens, there is also a chance setting for which enemies the player will fight. If the sum of all chances isn’t the maximum chance, this can lead to either not starting a battle, or some combatants/groups never appearing in battle.
Now, let’s add some of our combatant groups – again, keep in mind to set the Faction of all added groups to Enemies. Feel free to add whatever groups you like, but make sure that the sum of their chances is 100. My suggestions are:
Group 0
- Combatant Group
Select Fighter, Caster. - Chance
Set to 20.
Group 1
- Combatant Group
Select Fighter, Supporter. - Chance
Set to 20.
Group 2
- Combatant Group
Select 2xFighter. - Chance
Set to 20.
Group 3
- Combatant Group
Select Caster, Supporter. - Chance
Set to 20.
Group 4
- Combatant Group
Select Fighter, Caster, Supporter. - Chance
Set to 5.
Group 5
- Combatant Group
Select 2xFighter, Caster. - Chance
Set to 5.
Group 6
- Combatant Group
Select 2xFighter, Supporter. - Chance
Set to 5.
Group 7
- Combatant Group
Select 2xCaster, Supporter. - Chance
Set to 5.
That’s in total 100 %. And we’re done – save the scene.
Let’s test again!
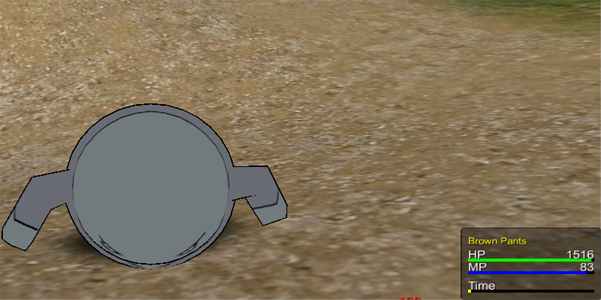
Open the main menu scene (0 Main Menu) and hit Play. Walk outside of town and run around where you placed the random battle area. You’ll now randomly encounter enemy combatant groups right on the spot.
Remember, you can simply deactivate the previous battles if you don’t want to fight your way through them for a simple test.
Up until now we’ve only seen enemies after a battle started – but we can also spawn an enemy in the scene and have them hunt the player.
And that’s it for now – the next lesson will cover combatant spawners.