
A small RPG demo project using tactical grid battles and advanced gameplay mechanics.

A small RPG demo project using tactical grid battles and advanced gameplay mechanics.
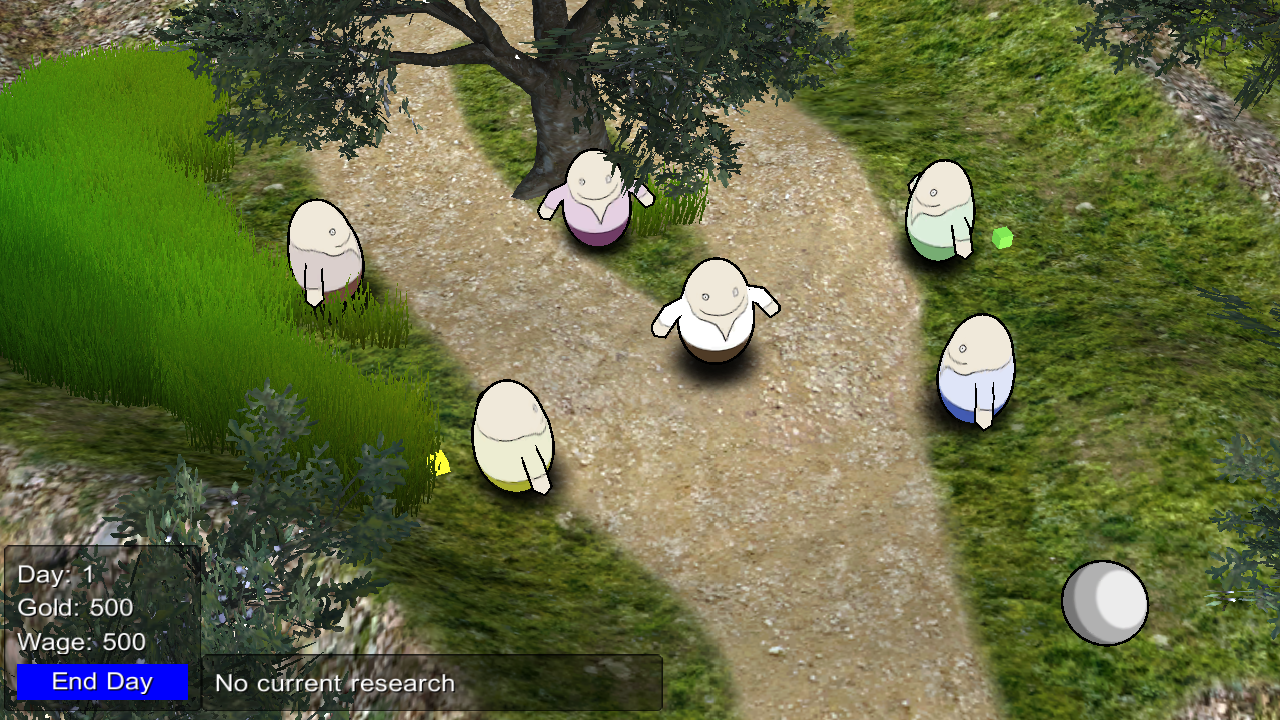
In this game the player commands an army of survivors through multiple missions, recruit new survivors and upgrade facilities in the base of operations (our good old town scene). Missions are selected on a mission map when leaving the base and are unlocked on the mission path as you advance.
There’ll be no detailed tutorials for this project, as it’s meant to be tested and explored on your own. You can find some explanations on different features (and where to find them in the project) further down below.
This project is based on the Demo Project (the result of the game tutorials) and uses both ORK Framework and Makinom, as well as the connection plugin.
Download the Mission Grid Battles project for Unity 5.6, 2017, 2018 or 2019/2020. After downloading, extract it and open the project in the Unity editor – this isn’t a .unitypackage file to be imported into a project, it’s a complete Unity project.
The Mission Grid Battles project was created in colaboration with Kevin Zhang from Dead Monarchy Studios to showcase how ORK can be utilized in tactical grid battles.
The following isn’t an in-depth tutorial, just a short explanation and where you can find the setup in the project. In case you’re looking for detailed tutorials, I’d recommend checking out the game tutorials (especially when just starting with ORK Framework) and the grid battle tutorials. If you’ve got questions about this project, join the discussion in the community forum.
Some of the general gameplay mechanics:
Some of the battle gameplay mechanics:
Here are details on some of the general gameplay mechanics used in this project.
The game is mostly controlled by mouse input, both player/camera controls as well as the UI are set up to utilize mouse input/movement. In battles, you can pan the camera by moving the cursor to the edge of the screen.
Battles don’t use a battle menu and require input via the shortcut slot system – actions can be activated by either clicking on a displayed slot in the HUD or pressing the according input key (1-9 and 0). You can end the turn of a combatant by pressing space and switch between targets (during target selection) by pressing Tab.
The rest of the controls are the same as in the demo project (game tutorials), i.e. you can also use the arrow keys to navigate menus, use accept (enter) and cancel keys (right control). A menu screen for inspecting the group’s status, read mission logs and bestiary entries can be called using the menu key (escape).
The base of operations offers different NPCs to access the facilities – some facilities can be upgraded via the research system.
Facility upgrades are done using passive abilities on the general combatant (i.e. the actual player that isn’t participating in battle). Each upgrade gives the corresponding ability a level up. The level of facilities that can be upgraded is visible by the number of cubes behind the NPC, each upgrade adds another cube.
Here’s a list of available facilities/NPCs:
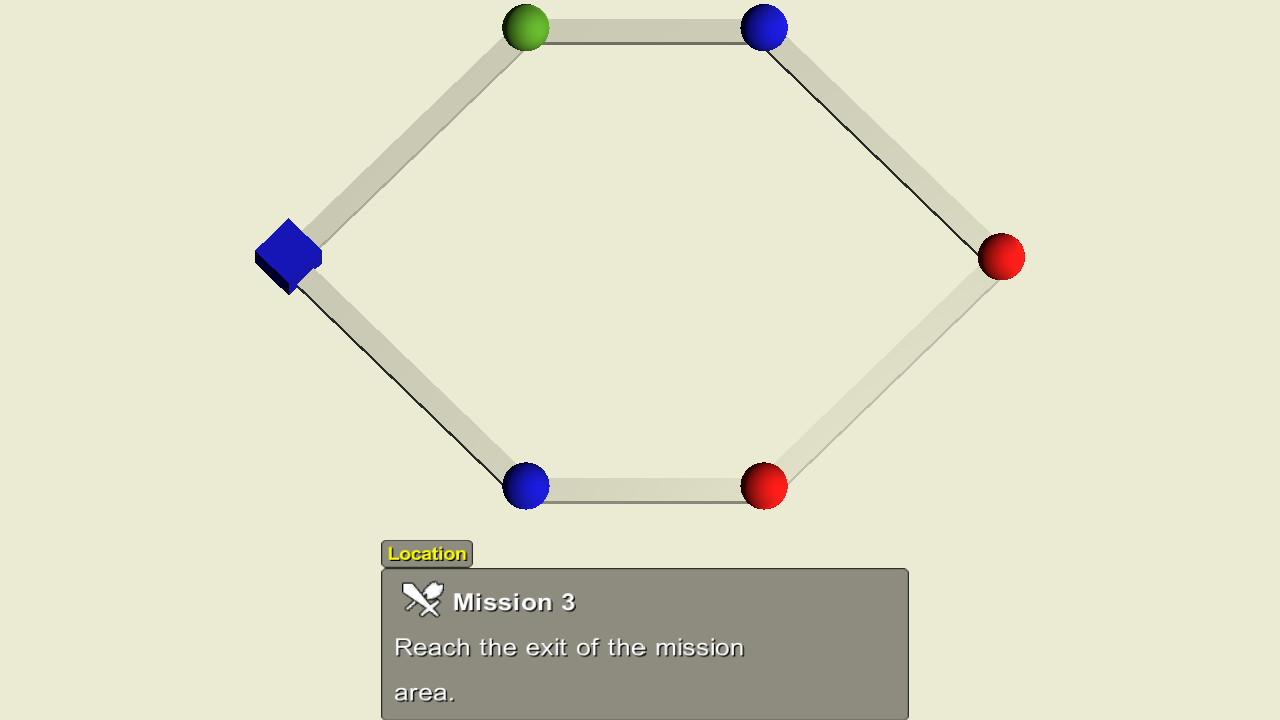
You can embark on missions by leaving the base of operations, which opens a mission select scene (where you can also return to the base of operations). Clicking on one of the missions (the spheres in the mission map) will prompt the player to start the mission and, if accepted, opens a group menu to select which survivors should take part.
Going on a mission will reduce the stamina of all participating survivors at the end of the mission. The game doesn’t feature any items to restore health or stamina, the player needs to manage who to take on a mission to ensure they survive the encounters. Health and stamina is restored by 10 each new day.
The goal of each mission is to reach the end of the mission scene, which usually requires to fight against enemies. You can go on the same mission multiple times, but enemies only respawn after 5 in-game days.
You can only go on one mission per day – after returning from a mission (either by reaching the end or aborting it by leaving through the mission entrance), the exit of the base is blocked by a gate (cube). You don’t have to go on missions, though, i.e. you can start a new day whenever you want (in the base).
You can still use all facilities of the base, but you need to end the current day by clicking on End Day in the HUD (lower left corner) to start a new day.
The newDay game event handles what happens when a new day starts, it’s used via a global event (World > Global Events in the ORK editor). The event itself also uses other global events to perform sub-tasks that happen each day. The global event is called through a click action in the Days HUD (Menus > HUDs).
The following things happen on a new day:
The combatants use the Init Game Event setting to perform the setRandomName game event whenever a combatant is initialized. This event starts a Makinom machine and set’s the combatant’s name (the combatant is available via the action selected data key).
The Makinom machine performs the generateRandomName schematic, which loads first names and last names from text files into string variable lists and generates a random name by combining a randomly selected value from those lists. Finally, it sets an ORK variable (which is used in the ORK game event to set the combatant’s name).
The general battle mechanics using phase battles and battle grids has already been discussed elsewhere, so in this section we’ll focus on some unique mechanics.
The player doesn’t select actions via the battle menu an uses the shortcut slot system and control maps instead. The battle menu is stopped from opening by disabling Auto Call Menu in Battle System > Phase Battles (or whatever other battle system type you’re using) and not use an input key to call the menu (i.e. using the None input key, if you don’t have one in your project, I’d highly recommend adding one to disable inputs where they’re not needed). The available shortcuts are displayd by a Latest Turn HUD, which shows the currently selecting combatant (only for the player group), see the Turn Combatant Shortcuts HUD setup for details (in Menus > HUDs).
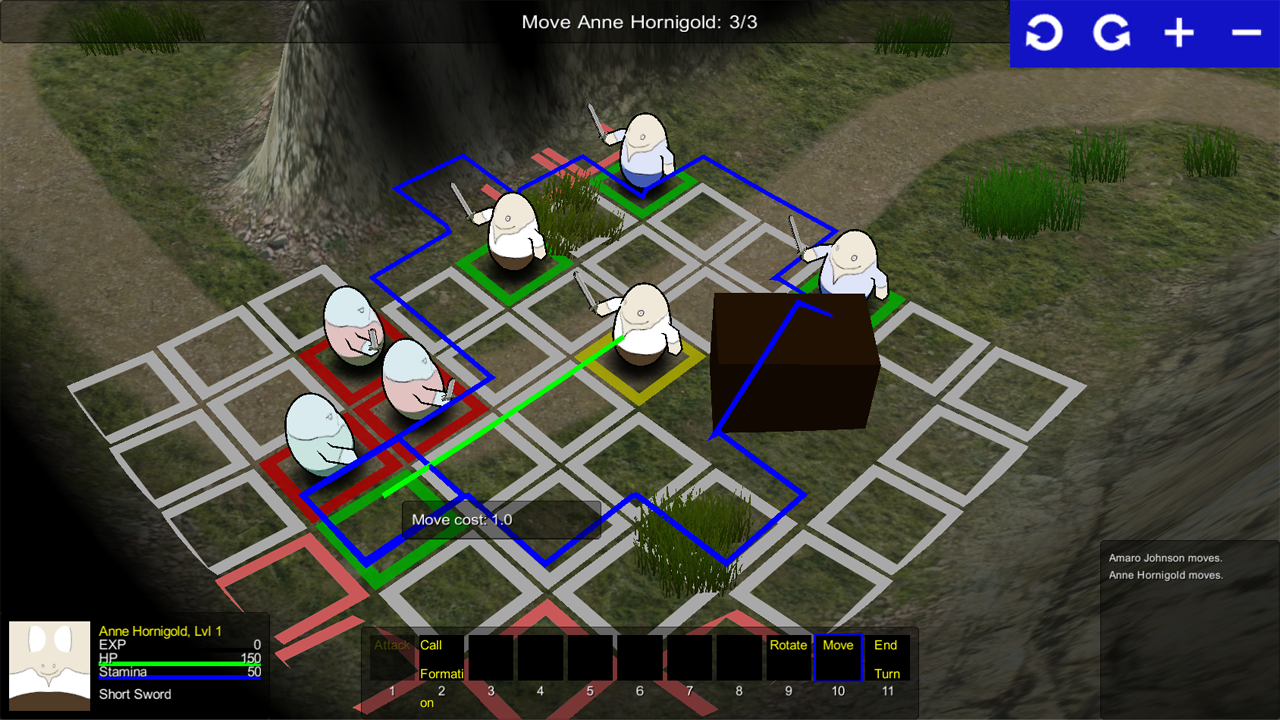
The grid move selection is always active during action selection, i.e. you can just one-click move somewhere. This is enabled by selecting Always in phase battle’s Player Auto Grid Move setting (Grid Settings in Battle System > Phase Battles). Clicking on one of the shortcuts (or pressing the corresponding input key) will activate the target selection (or directly use the ability if it doesn’t require target selectin, e.g. calling a formation), a 2nd click/press will cancel the target selection.
The HUD also shows the currently equipped weapon of the combatant – clicking on it opens a weapon list and allows changing the weapon on the fly. Since abilities are gained through weapons (i.e. Equipment Abilities set up in Inventory > Weapons), this is an easy way to change the actions that are available to the combatant. See the Turn Combatant Info HUD setup for details.
The shortcut slots are automatically filled with newly added abilities (and remove abilities that are lost), this is set up in Menus > Shortcut Settings in the Default Auto Add Slots and Default Auto Arrange Slots settings (the Default Shortcut Assignments settings handle adding shortcuts for base actions like the attack, rotate, move and end turn commands).
There are also virtual controls (using a Control HUD) on the top right corner to rotate and zoom the camera. A battle log is displayed in the lower right corner, using a Console HUD (see Battle Log HUD setup) and the settings defined in Game > Console Settings.
As stated above, an attack of opportunity (AOO for short) can occur when a combatant moves past a combatant of an enemy faction, i.e. moving over a cell in attack range of an enemy. If the enemy’s attack hits the combatant, the move is interrupted and the combatant stays on that cell. This mechanic is added in the gridMoveCommand battle event, which is used by the Move Command set up in Battle System > Battle Grid Settings.
The AOO itself is set up in the AOOPerformMoveBy battle event, which is called by the gridMoveCommand battle event via a Call Battle Event node. The grid move battle event will search for all enemies of the user and store them into a found objects list (using a Search Combatants node). The AOO battle event is called twice in the grid move battle event, before the first move to a new cell (for cases where a combatant moves away from an enemy) and as part of the grid path loop (i.e. moving from cell to cell).
The AOO battle event uses a Grid Move Out Of Range node to find all enemies (from the previously found enemies), the user will move away from on the next cell. The attack itself is started as a Sub Action of the grid move action by using an Use Battle Action node. A sub action will be performed as part of the current action of the battle event and not be part of ORK’s action queue, i.e. it’s not part of any turn/action order and doesn’t disrupt the battle.
There’s also a 2nd AOO mechanic implemented, which is available to the player by equipping an AOO Sword or AOO Sword 2. Instead of attacking enemies that are passing by, this AOO targets enemies that stop in attack range (e.g. when moving directly to the enemy). This is done by additional battle events used before and after the gridMoveCommand battle event and are set up in the Move Command settings as well.
The AOOCheckMoveInRange battle event is used before the grid move battle event and searches for all enemies with AOO status effects applied (which are auto effects when one of the AOO swords is equipped). The found enemies are again filtered by a Grid Move Out Of Range node, but this time it checks for moving into range with the last cell of the path.
The AOOPerformMoveInRange battle event is used after the grid move battle event and lets all previously found enemies that are in attack range attack the user via a Use Battle Action node (again, as a Sub Action).
I’d recommend to check out the battle events to see the setup in detail, as there are also other things involved (e.g. a chance check to limit the times of attacks).
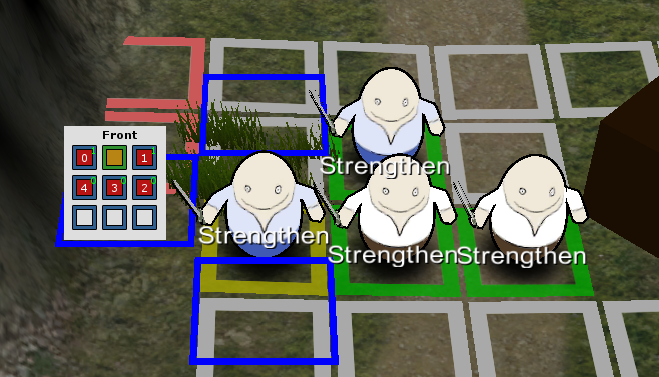
Grid formations are set up in Battle System > Grid Formations and can used by both the enemy and the player. The enemy’s battle AI will use a formation and move into their formation positions – the leader will only move after the formation was finished and waits for the others to move into formation again.
The player can use a formation via an ability, the combatant that used the ability will be the leader of the formation. Moving all combatants on cells that are part of the formation (i.e. finishing the formation) will grant boosting status effects to all members. The player can move the combatants on any cell that are part of the formation and they’ll use that cell as their position, i.e. the player doesn’t need to mind moving on specific positions in the formation.
Updating the formation is done at the end of the gridMoveCommand battle event, which is used to perform grid movement.
The battle loot isn’t immediately added to the player’s inventory and put into an item box instead. This is done in the gridVictoryBattleEnd battle end event in the Collect Battle Gains node, where it shows the battle gains and adds the loot into the missionGains item box (ID).
The item box doesn’t need to be in the scene, as it’s identified via it’s item box ID and can be accessed via the event system at any time. However, to actually open an item collector and let the player take things out of the item box, it needs to be added to a scene – which is done in the base of operations after returning from a mission.
The item box is opened automatically when returning from a mission, if there’s something in the item box. The item box is placed in the base scene (1 Town, see the Mission Gains Item Box game object) as an Item Collector with the start type None (to only start it via an event)
The item box is opened in the backToMainBase game event with a Start Item Collector node, after checking if there are items in the box and finding the game object with the item box. Afterwards the event checks if researchable artefacts are in the player’s inventory and adds the corresponding research tree (and removes the artefact from the inventory).